What did you do to your NBS GMT800 Tahoe/Yukon Today?

Disclaimer: Links on this page pointing to Amazon, eBay and other sites may include affiliate code. If you click them and make a purchase, we may earn a small commission.

Alex_M

Full Access Member
Joined
Sep 27, 2021
Posts
376
Reaction score
678
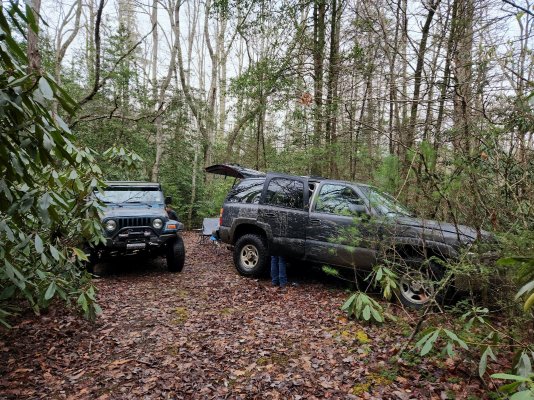
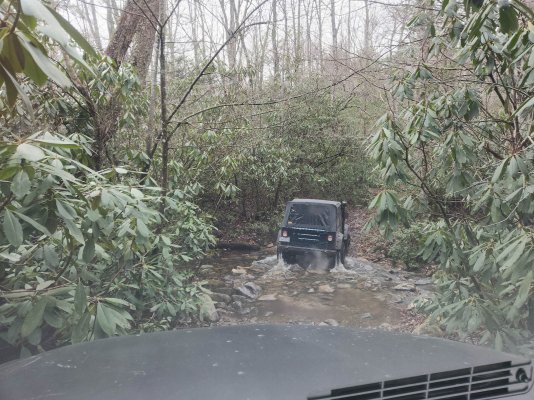
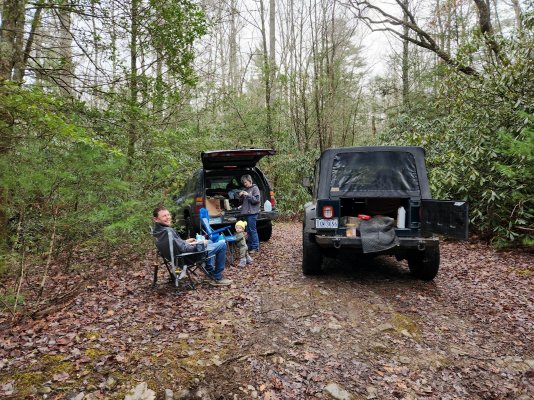
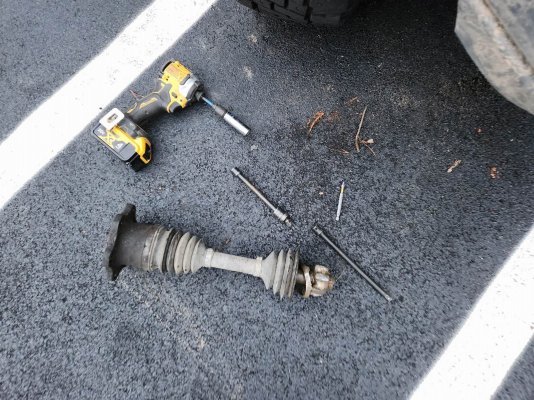
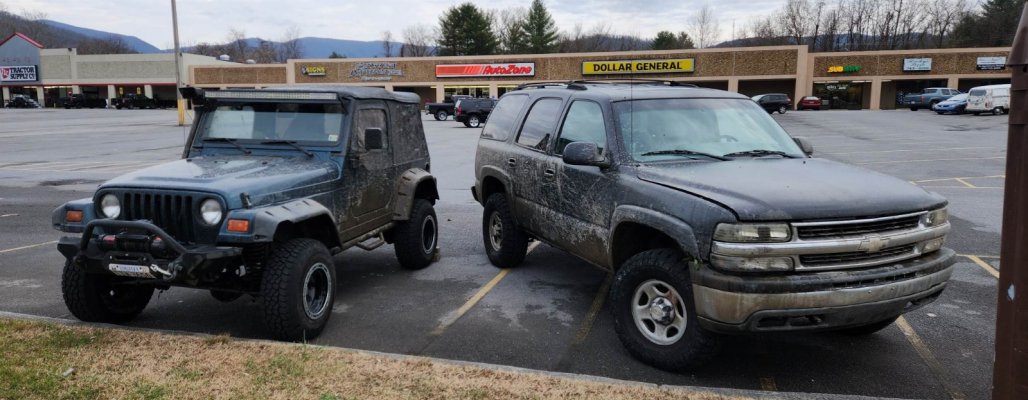
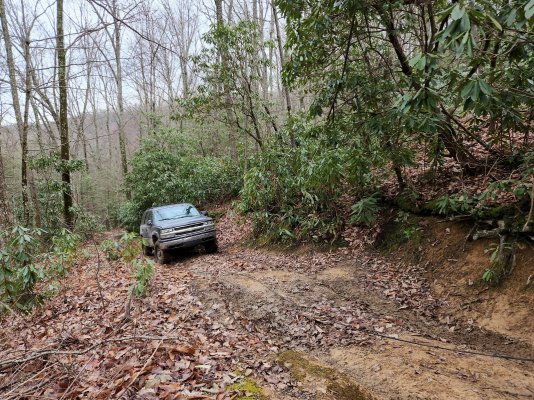
Went out wheeling with the wife, little, and old man today. The family took the Tahoe and the old man took his jeep. Wet conditions, had a really good time. Did end up popping a CV and my dad had to pull me up the last hill, but that CV has been making noise for 30k miles so it doesn't owe me anything. Was able to finish the trail and drive home 2wd, and pulled out the broken shaft leaving the stub installed in the hub so my wife can continue driving the Tahoe until I can get the rear end swapped in her Cherokee.

The Tahoe is back on 33s right now until I can go thru with the SAS (gathering parts). Looking forward to getting it back on 35s with the alloy wheels. The Jeep is on 31s and will be getting the 33s currently on the Tahoe soon as some wheels are found, and going back to factory style fender flares.

Hopefully I'll have some more pictures/videos of Tahoe action from my dad in the next day or two, but here's what I have now. What a blast.

One video of the Jeep
R1CMUtL.jpg

Sr5mWml.jpg

91fS41D.jpg

The hill where my CV gave up the ghost.
FTI48uU.jpg

KZWR0U9.jpg

xmQ2gNs.jpg
 

Pilot

Full Access Member
Joined
Dec 26, 2017
Posts
329
Reaction score
731
Location
Bloomfield, NJ * Lewes Beach, DE * Buenos Aires
Ok I finally got the QA1 panhard bar installed, and the TA Performance girdled diff cover. I swear, every time I work on the truck it seems like “easy” stuff ends up with one challenge after another. Lol. Anyway, the passenger side bracket for the new panhard was unbelievably tight. I tried ratchet straps (2), many iterations of prybar action, scraped all the gunk off the inside of the brackets to make sure there was nothing preventing the bushing from sliding in..you name it.. I tried it! finally, I pulled it back out, and ended up machining off about 1/16” from the bolt sleeves, because no matter what I did, they kept getting hung up on the brackets, and are just about a 16th longer than the loop ends. After doing that, I greased the bushings, and was able to get the driver side in with the expected amount of prybar action. Back to the passenger side.. I ended up finally using my floor jack to push up on that one, with a 2x4, to avoid buggering up the paint. That got it within about 1/8”… next, I got my biggest prybar back out and was pushing the truck rear up so much (30x or
So) that it triggered my dash camera to turn on. Ha! but it would only move a tiny bit.. I’m now within 1/16” or less and it was soooo close.. I found a pair of needle nose pliers that fit inside the sleeve and were just big enough I thought.. hey, it’s tool steel.. should be pretty solid.? Hammered on that a few times, to bring the sleeve up to the bracket hole, and then I could finally get the bolt in. I honestly believe this job would have taken me no time at all if I just had a lift! After I got everything back together, it was time to pull the passenger side plug, so I could drain the extra 75-90 in it, since I had added 3 quarts from the Amsoil squeeze packs, and the diff is supposed to be full after something like 2.2 quarts. What I read said the passenger side plug should be the reference point of the full diff. You pull that plug, and it should drain to the bottom of that port. So got her off the Jack stand nice and level, crawled back under there for hopefully the last time, pulled that plug.. and.. nothing came out. Wtf.. stuck my pinky in the hole, and still couldn’t touch the fluid level. So I’m confused as ****. I added 3 full quarts, and it still seems low. If this TA Performance cover adds a bit of capacity, I haven’t seen it mentioned in the instructions, and even if so, how much could it be? I’m planning to get more Amsoil tomorrow hopefully somewhere locally, so I can finally drive her again. Just floored that it could need that much in the diff. Apologies for the novel, I feel like this install was just about a 300 page book. :okay2:

Looks awesome! What are the benefits of the aftermarket panhard bar? I’ve had a ton of problems with mine due to my lift and have been considering going aftermarket.
 

Pilot

Full Access Member
Joined
Dec 26, 2017
Posts
329
Reaction score
731
Location
Bloomfield, NJ * Lewes Beach, DE * Buenos Aires
Ok I finally got the QA1 panhard bar installed, and the TA Performance girdled diff cover. I swear, every time I work on the truck it seems like “easy” stuff ends up with one challenge after another. Lol. Anyway, the passenger side bracket for the new panhard was unbelievably tight. I tried ratchet straps (2), many iterations of prybar action, scraped all the gunk off the inside of the brackets to make sure there was nothing preventing the bushing from sliding in..you name it.. I tried it! finally, I pulled it back out, and ended up machining off about 1/16” from the bolt sleeves, because no matter what I did, they kept getting hung up on the brackets, and are just about a 16th longer than the loop ends. After doing that, I greased the bushings, and was able to get the driver side in with the expected amount of prybar action. Back to the passenger side.. I ended up finally using my floor jack to push up on that one, with a 2x4, to avoid buggering up the paint. That got it within about 1/8”… next, I got my biggest prybar back out and was pushing the truck rear up so much (30x or
So) that it triggered my dash camera to turn on. Ha! but it would only move a tiny bit.. I’m now within 1/16” or less and it was soooo close.. I found a pair of needle nose pliers that fit inside the sleeve and were just big enough I thought.. hey, it’s tool steel.. should be pretty solid.? Hammered on that a few times, to bring the sleeve up to the bracket hole, and then I could finally get the bolt in. I honestly believe this job would have taken me no time at all if I just had a lift! After I got everything back together, it was time to pull the passenger side plug, so I could drain the extra 75-90 in it, since I had added 3 quarts from the Amsoil squeeze packs, and the diff is supposed to be full after something like 2.2 quarts. What I read said the passenger side plug should be the reference point of the full diff. You pull that plug, and it should drain to the bottom of that port. So got her off the Jack stand nice and level, crawled back under there for hopefully the last time, pulled that plug.. and.. nothing came out. Wtf.. stuck my pinky in the hole, and still couldn’t touch the fluid level. So I’m confused as ****. I added 3 full quarts, and it still seems low. If this TA Performance cover adds a bit of capacity, I haven’t seen it mentioned in the instructions, and even if so, how much could it be? I’m planning to get more Amsoil tomorrow hopefully somewhere locally, so I can finally drive her again. Just floored that it could need that much in the diff. Apologies for the novel, I feel like this install was just about a 300 page book. :okay2:

Also, do you have a build thread? I vaguely remember you talking about some engine mods and I’d love to catch up on what you ended up doing.
 

Sam Harris

Supporting Member
Joined
Sep 26, 2018
Posts
7,431
Reaction score
14,924
Location
Texas
Looks awesome! What are the benefits of the aftermarket panhard bar? I’ve had a ton of problems with mine due to my lift and have been considering going aftermarket.
This panhard bar is the only one I’m aware of (thank you @Rocket Man), that will clear the diff cover with a girdle. The factory bar won’t clear it.

And by the way, I acquired 2 more quarts (just in case) of severe duty 75-90 Amsoil, and topped it off this evening. She took an estimated 3.6-3.7 quarts!! Mark, do you remember what your diff takes..? I’m shocked I had to add that much.!

ETA: Next order of business is to fix that damn driver side lean. Couldn’t really see it from the pic, but while she was up on the jackstands it was making me crazy seeing that sag..! Have to measure, and get a lift block for the coil on the driver side ASAP..!
 

Attachments

  • 27E50D49-8894-464C-A8FC-4E73CF5722D0.jpeg
    27E50D49-8894-464C-A8FC-4E73CF5722D0.jpeg
    359.9 KB · Views: 7
Last edited:

Sam Harris

Supporting Member
Joined
Sep 26, 2018
Posts
7,431
Reaction score
14,924
Location
Texas
Looks awesome! What are the benefits of the aftermarket panhard bar? I’ve had a ton of problems with mine due to my lift and have been considering going aftermarket.
If you’re looking for one due to a lift, or lowered suspension, you’d probably want an adjustable panhard, so you can center the rear end where it needs to be. I know spohn makes an adjustable one for our rigs, but figured that’s typically for lowered rides.
 

Rocket Man

Mark
Supporting Member
Joined
Dec 25, 2014
Posts
26,006
Reaction score
50,869
Location
Oregon
This panhard bar is the only one I’m aware of (thank you @Rocket Man), that will clear the diff cover with a girdle. The factory bar won’t clear it.

And by the way, I acquired 2 more quarts (just in case) of severe duty 75-90 Amsoil, and topped it off this evening. She took an estimated 3.6-3.7 quarts!! Mark, do you remember what your diff takes..? I’m shocked I had to add that much.!

ETA: Next order of business is to fix that damn driver side lean. Couldn’t really see it from the pic, but while she was up on the jackstands it was making me crazy seeing that sag..! Have to measure, and get a lift block for the coil on the driver side ASAP..!
I do not remember but it wasn’t much more than stock whatever that is.
 

Rocket Man

Mark
Supporting Member
Joined
Dec 25, 2014
Posts
26,006
Reaction score
50,869
Location
Oregon
Put the hood back on the Tahoe. The new LEDs light up the engine bay like daytime! Still need to finish up the wiring but here's a test run. Also installed three TRX style amber LED lights from Etrailer in the hood.

View attachment 386646View attachment 386647
Be aware those strip lights will eventually fall off from shutting the hood if they aren’t mechanically fastened. I did everything possible to mine to stop it but i eventually removed them because of that. If I do it again it will be with some that are screwed on. I like that hood blanket but I bought a new OEM one a couple years ago.
 

Walchit

Full Access Member
Joined
Aug 29, 2021
Posts
447
Reaction score
911
Be aware those strip lights will eventually fall off from shutting the hood if they aren’t mechanically fastened. I did everything possible to mine to stop it but i eventually removed them because of that. If I do it again it will be with some that are screwed on. I like that hood blanket but I bought a new OEM one a couple years ago.
I built a growlight with LED strips, and I could tell they weren't gonna last, so I put dabs of superglue under them while I stuck them down. It's held for a few years now.
 

Attachments

  • 20221206_203027.jpg
    20221206_203027.jpg
    260.8 KB · Views: 9

Rocket Man

Mark
Supporting Member
Joined
Dec 25, 2014
Posts
26,006
Reaction score
50,869
Location
Oregon
I built a growlight with LED strips, and I could tell they weren't gonna last, so I put dabs of superglue under them while I stuck them down. It's held for a few years now.
That would probably work but I wouldn’t use that on paint, even under the hood because you’d never be able to replace the lights when they fail without pulling the paint off. And even led lights might eventually fail. I’d rather have a few small screws instead. That’s my thoughts anyway and if I put strip lights under my hood again that’s what I’ll do.
 

Forum statistics

Threads
132,713
Posts
1,873,069
Members
97,537
Latest member
CHENTE
Top