What did you do to your NBS GMT800 Tahoe/Yukon Today?

Disclaimer: Links on this page pointing to Amazon, eBay and other sites may include affiliate code. If you click them and make a purchase, we may earn a small commission.

Alex_M

Full Access Member
Joined
Sep 27, 2021
Posts
376
Reaction score
678
Did you have a hard time with the o2's? I had to take mine to a garage because I stripped one. I even used those special o2 sockets.
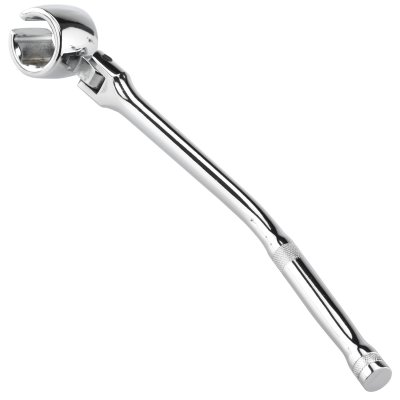
Best thing I've found for O2 sensors is this style O2 wrench. I've used every different type of wrench and socket I've seen and this is by far the best. Night and day difference.o2wrench.jpg
 

Alex_M

Full Access Member
Joined
Sep 27, 2021
Posts
376
Reaction score
678
Finally threw a new CV in and changed the oil. Had a very small amount of metal in the oil, unfortunately. At 305k I reckon it's time, but the darn thing still makes 65-70psi oil pressure driving down the road. Rattle's pretty good for about 50-60 seconds on cold start up, and then doesn't make any more noise the rest of the day. Like the anti-drain back valve lets it leak down overnight.

We'll let her ride out long as she's able I reckon.
 

YukonBrian

TYF Newbie
Joined
Jun 21, 2022
Posts
16
Reaction score
52
Installed new control arms, upper and lower for both sides. All four balljoints were toast, so it was a good time to get it done.

As a bonus this is the last piece of my Moog steering/suspension refresh in the front with new Bilstein 4600 shocks. Alignment service is scheduled for Wednesday to square everything away, then I can actually start looking at ordering some new KO2 tires.

This has been about 4 months in the making, so I’m happy to have everything done. The truck steers and absorbs the roads amazingly now.

Install pics below:

The passenger side lower ball joint was bound inside the knuckle and had to be cut out. This was a horrible start to the day and added some hours of cutting/hammering/torching:
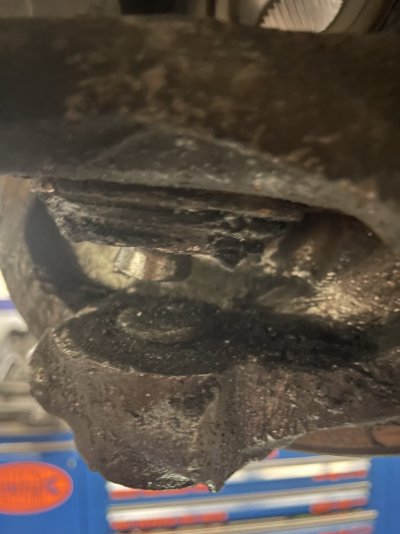
C9FA3713-24E5-442D-A07C-40A8DA8F93A1.jpeg


To get the rest of the balljoint out, I ended up needing to pull off the whole knuckle. You can still see the rest of the ball joint in this pic with the knuckle. After I got it laid on the bench, I used tension from a balljoint press and heat to finally coax it out. When it broke free, it shot out of the knuckle and flew across the shop.
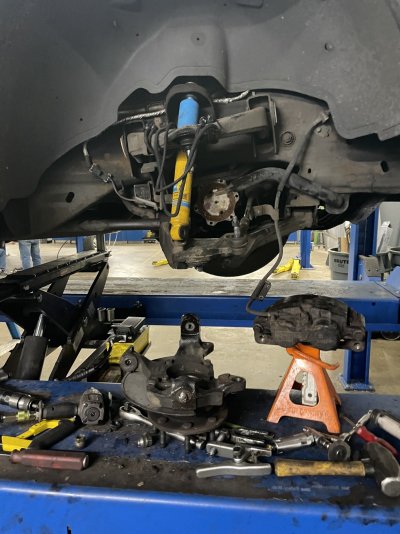
D66C4CED-37F9-4A02-B2B4-624D53239316.jpeg


The driver side was a breeze and I was able to remove the ball joints with a few taps on a pickle fork. I don’t have a final assembly pic, but I do have a pic of just the lower control arm as I was getting started on the upper.
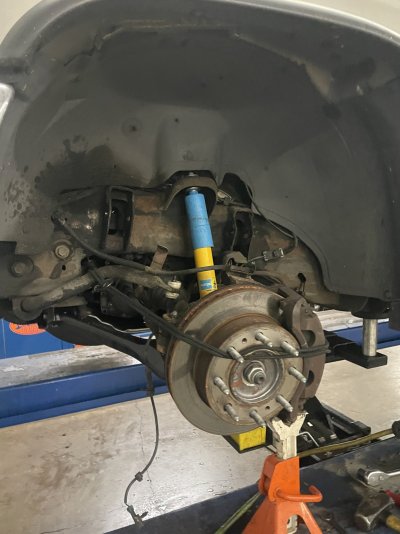
4F52CC06-16A9-4B47-9D9F-8802876646CE.jpeg


This all took me about 16 hours in total lift rental time. So, I didn’t save a ton on labor but it was a fun experience as someone who hasn’t done more than brake pads/tune ups before.

My next fix is going to be a new side battery terminal bolts and an alternator/tensioner/idler/serpentine belt combo as I’m noticing some weird voltage drops when I left off the throttle from higher revs (~3k). Those parts come Tuesday, so I’m crossing my fingers it solves the problem and I don’t have a larger electrical system issue.

The charging system attention is needed anyway as my sound system gets installed in February.
 

blueinkd

Full Access Member
Joined
Nov 21, 2017
Posts
633
Reaction score
1,511
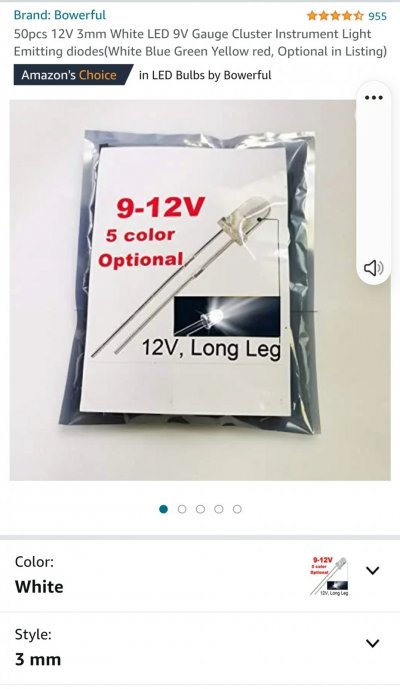
So my hvac and radio are completely dark at night. Long break next week so I grabbed some stuff to tinker with. I have seen plenty of videos on the digital hvac process. Some mention polarity of the LEDs and some don't but I will use the usspeedo video which clearly shows negative side.

Any tips and tricks are appreciated!! I do have an extra hvac digital control module I picked up for $20 I will be swapping bulbs out first. In getting that gun from Lowes because it's available locally as it's too late for anything from Amazon and it not make it in.

Is the headlight/dimmer switch not serviceable?? What about the fog light switch???
 

Attachments

  • Screenshot_20221230_150934_Chrome.jpg
    Screenshot_20221230_150934_Chrome.jpg
    106.8 KB · Views: 7
  • Screenshot_20221230_150739_Chrome.jpg
    Screenshot_20221230_150739_Chrome.jpg
    125.8 KB · Views: 7
  • Screenshot_20221230_160402_Chrome.jpg
    Screenshot_20221230_160402_Chrome.jpg
    216.5 KB · Views: 6
Last edited:

Fless

Staff member
Super Moderator
Joined
Apr 2, 2017
Posts
12,143
Reaction score
24,754
Location
Elev 5,280
So my hvac and radio are completely dark at night. Long break next week so I grabbed some stuff to tinker with. I have seen plenty of videos on the digital hvac process. Some mention polarity of the LEDs and some don't but I will use the usspeedo video which clearly shows negative side.

Any tips and tricks are appreciated!! I do have an extra hvac digital control module I picked up for $20 I will be swapping bulbs out first. In getting that gun from Lowes because it's available locally as it's too late for anything from Amazon and it not make it in.

Is the headlight/dimmer switch not serviceable?? What about the fog light switch???

I think I'd be using a small soldering iron on the circuit boards, maybe a 15-25 watt pencil iron. The gun shown is way too bulky and unwieldy, and could burn the board too easily. I use an Antex Precision that's about 30 years old but is great for small stuff like this, with a chisel tip.

The last pic -- the headlight bulb -- just pushes in and twists (after the other is out). No soldering required.
 

Forum statistics

Threads
132,714
Posts
1,873,086
Members
97,538
Latest member
Elio_vega

Latest posts

Top