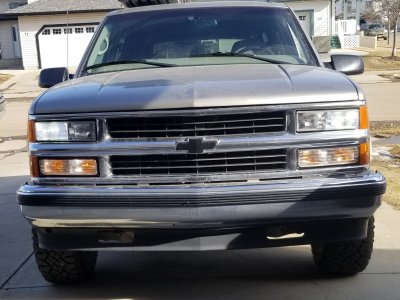
What did you do to your OBS GMT400 Tahoe/Yukon Today?

Disclaimer: Links on this page pointing to Amazon, eBay and other sites may include affiliate code. If you click them and make a purchase, we may earn a small commission.

Jason in DLH

Cheeseburger and Fries
Joined
Sep 4, 2020
Posts
1,400
Reaction score
1,562
Location
MN
Hi
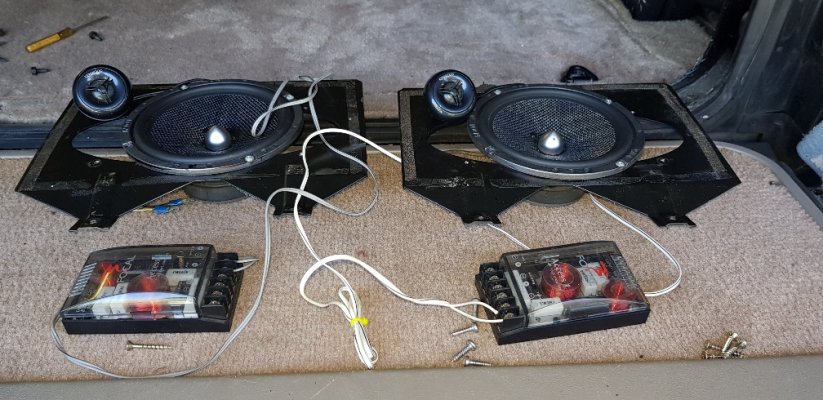
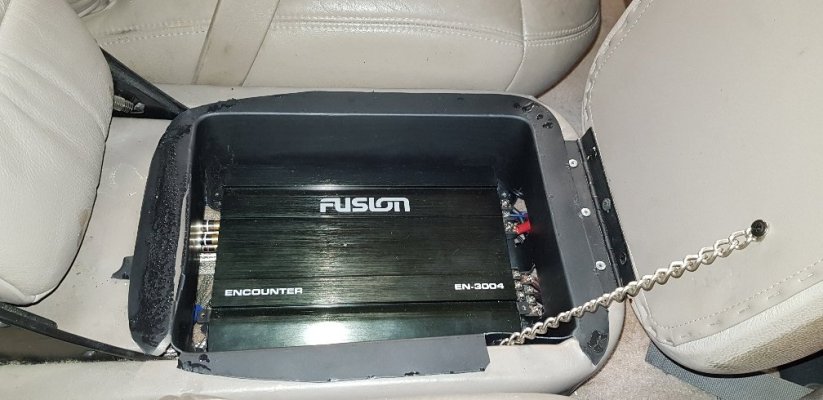
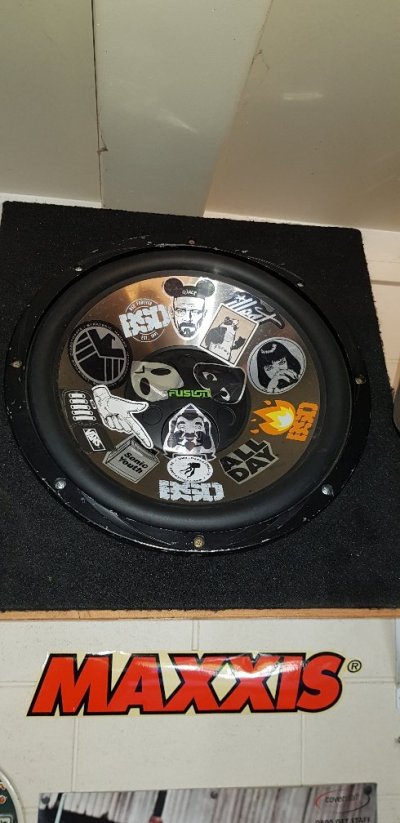
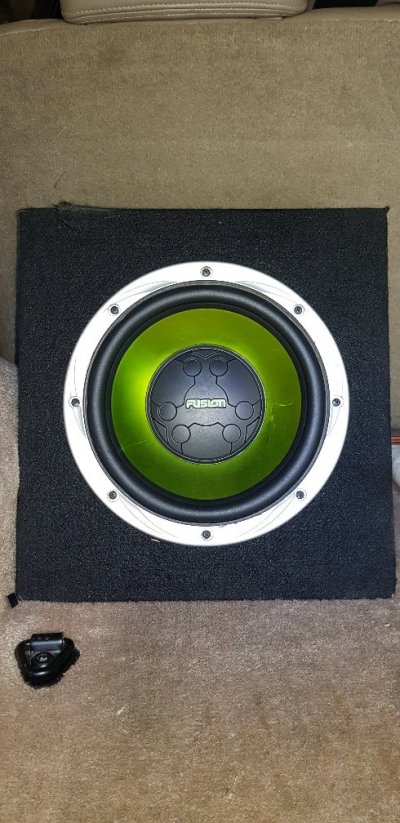
Today I decided to pull some of the rear interior put of the Yukon so I could pull the blown rear speakers out and are replacing them with a pair of FOCAL 6" Kevlar mid range speakers coupled with an old old pair of Kenwood tweeters and FOCAL crossovers.These I will hook up to a Fusion Encounter 1800watt 4 channel amp currently living under the centre front seat. The other 2 channels I've bridged to produce 900 watts into a 10" Fusion sub in the back. This should help fill the massive rear cavity. That will give the Beast the factory components in the front doors,factory door speakers 10 " sub and rear components. I usually run a 15" 750 watt Fusion but am enjoying the punch of the 10 at the moment. Rock'n [emoji869]


Yes I know[emoji85] Build thread!
I am amassing content [emoji13]View attachment 271201View attachment 27120291cf93691c3bf76c9554e4960f42a5e0.jpgae32186931cffac013465ac78caa9950.jpgff98c1592988fac0b8f259ca775a56c5.jpg4810c19024bc9fc74917fdd6e2392179.jpg

Sent from my SM-G950F using Tapatalk

Awesome! Any problems with your amp breathing in there?
 

97YukonNZ

Full Access Member
Joined
Feb 12, 2021
Posts
1,385
Reaction score
3,778
No problems so far is a fanned amp so it cools itself. Cut the front and rear of the plastic box holding the amp so it could push/pull air.

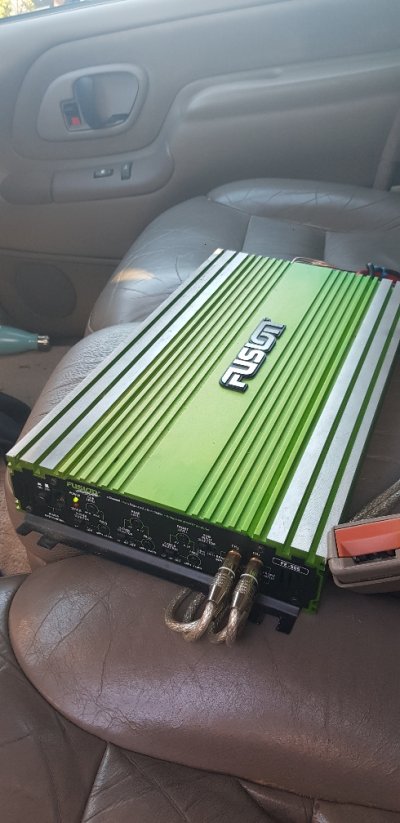
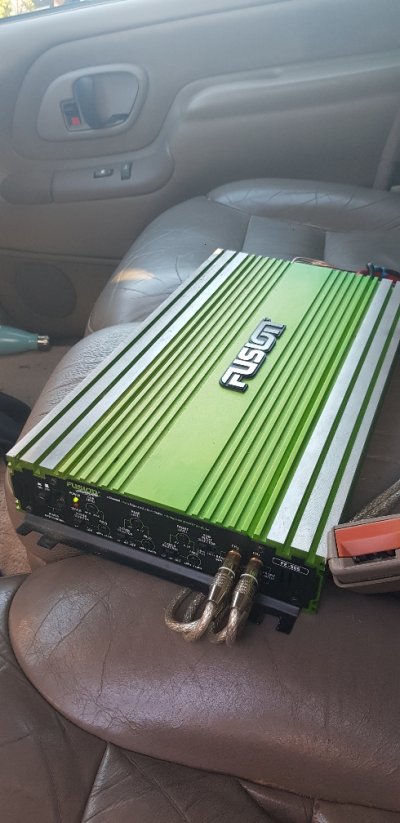
A friend dropped by work this morning with an older model 1400 watt 5 channel amp that he paid $15 for at an eco store. It looks so sexy!! That beautiful ano green with cast geometric thick alloy casing!

Am thinking about grabbing that,putting a battery on the left side of the truck and adding a smart charger so I can dedicate 1 battery for sounds and the other for Starting.

He'll want $50 at least for it. The capitalist Pig hahahaha [emoji28]

Sent from my SM-G950F using Tapatalk
 

Guitarded

TYF Newbie
Joined
Apr 24, 2020
Posts
26
Reaction score
46
Location
Edmonton, AB
The nice weather is here and it feels great to be outside working on the truck again.

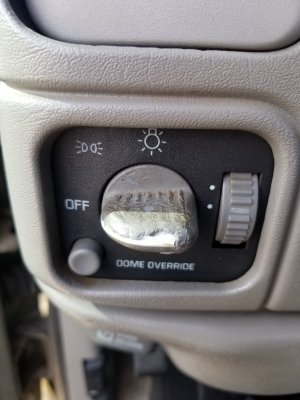
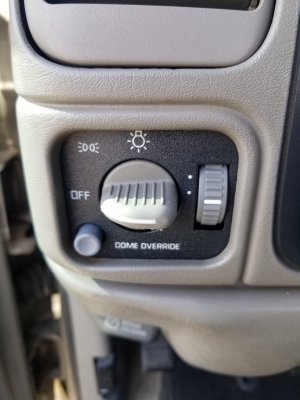
Finally got around to replacing the headlight switch. I don't know what it is with these trucks, but the headlight switches always seem to get old and gross. The rubber gets sticky and discoloured, and nothing you do seems to be able to clean it. I've had a few of these OBS trucks that have had this issue.

Anyway, easy fix. Throw old the old, install the new. Looks so much better.

20210313_125730.jpg

20210313_130238.jpg


Also took the opportunity to install LED headlight bulbs. I know, I know. The housings aren't designed for them, they're too bright, what about other drivers, etc, etc.

I prefer the "white" look, it's a much nicer light coming off the lights now. I went with a lower lumen rating, specifically with other drivers in mind. There is a noticeable difference in light output. I feel like I can actually see at night now. And with the amount of night driving I do, definitely worth it. Was out Saturday night, seeing how they look, and did not get flashed once, so I take that as a positive.

20210313_142202.jpg
 

McDermut

Member
Joined
Mar 22, 2020
Posts
49
Reaction score
46
Location
Lone Star State
Brake Master Cylinder Swap: NBS

After a routine brake flush, I was finally tired of my 21yo weak and spongy brakes. I swapped out the OEM master cylinder for an NBS unit. You need a 9/16 to 1/2" adapter for the forward line but the swap was pretty straight forward. There is a good YT video on the entire process. You can use a 2005 yukon search if needed. The part at Autozone was a
Duralast New Master Cylinder (Brake System) NM4073
  • Part # NM4073
  • SKU # 493917

Some final thoughts:

The rear drums have an 8mm bleeder valve. The tubing that I used seemed to fit adequately but there was always some bubbling coming through the tubing no matter how much I pumped the brakes. I reconciled that this was just pass through from the tubing and proceeded with the front wheels that have a 10mm bleeder valve. The tubing was solid on this and no extraneous bubbles. Just keep an eye for it. I didnt see any reverse flow of air back into my rear brakes so I didn't worry about it. Brake check was solid at low speeds so I assume that the bleed was effective after the master cylinder install.

The new master cylinder is a fantastic upgrade. The pedal is much more firm with a much more definite stopping point. A highly recommended upgrade without the headache of the hydroboost and pedal fitment issues. This is an easy swap.

Cost: $95 for the master cylinder, $25.00 for 3 qts of synthetic brake fluid. Done.

View attachment 266410

The part comes with a bleed kit so you don't have to bench bleed. You can just use the brake pedal to clear the air out of the master cylinder before you hook up the lines and do a final bleed at the wheels. Cheers.


Nice upgrade! I'll probably do that myself but until then I just really need to flush my brakes. What size tubing did you use, and would a different size have worked better or not?
 

McDermut

Member
Joined
Mar 22, 2020
Posts
49
Reaction score
46
Location
Lone Star State
Power Steering Fluid Drain and Fill

While chasing down a small drip on the driveway, it seemed like the front seal on the steering gearbox connecting the pittman arm was leaking. It is probably due for a new seal kit but that is for another day.

Here was my process:
  1. I used a fluid exchange hand pump to suck the old, dirty fluid out of the steering pump reservoir,
  2. filled it back to the top with new Lubeguard Synthetic Power Steering Fluid
  3. started the engine and turned the steering wheel lock to lock a few times to circulate the old and new fluid
  4. shut the motor off
  5. sucked the fluid out of the reservoir again
  6. repeat process three times
  7. Added some Lucas Stop Leak
  8. Topped off fluid level
Assuming that 60% of the fluid is in the reservoir, this should get about 97% of the old fluid out of the system. This is a safe method without the risk of running the pump dry or needing to crack the return line. Plan on burning through about 3 quarts with a bit left over for good measure.

Clean fluid, no leaks or drips and nice smooth, quiet power steering system.


Great instructions! Another on the "to do" list!
 

97YukonNZ

Full Access Member
Joined
Feb 12, 2021
Posts
1,385
Reaction score
3,778
A buddy gave me an amp he got a stunning deal on! Time to find a home for it now that I've tested it
5 channel amp. Bridgeable Mosfet amplifier [emoji106] Favorite color [emoji106][emoji106]e74f64024eb78d3327ae1d7ee11a1712.jpg

Sent from my SM-G950F using Tapatalk
 

Sam Harris

Supporting Member
Joined
Sep 26, 2018
Posts
7,427
Reaction score
14,911
Location
Texas
A buddy gave me an amp he got a stunning deal on! Time to find a home for it now that I've tested it
5 channel amp. Bridgeable Mosfet amplifier [emoji106] Favorite color [emoji106][emoji106]e74f64024eb78d3327ae1d7ee11a1712.jpg

Sent from my SM-G950F using Tapatalk
Score!!
 

Forum statistics

Threads
132,381
Posts
1,867,096
Members
97,017
Latest member
97ext
Top