1989 C4 Functional Restoration

Disclaimer: Links on this page pointing to Amazon, eBay and other sites may include affiliate code. If you click them and make a purchase, we may earn a small commission.

OP
OP
SirReal63

SirReal63

Full Access Member
Joined
Sep 29, 2017
Posts
2,430
Reaction score
12,376
Location
Bertram, TX
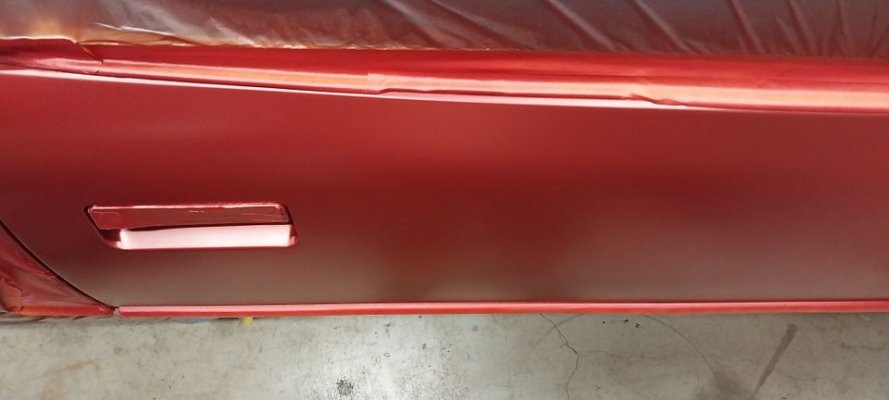
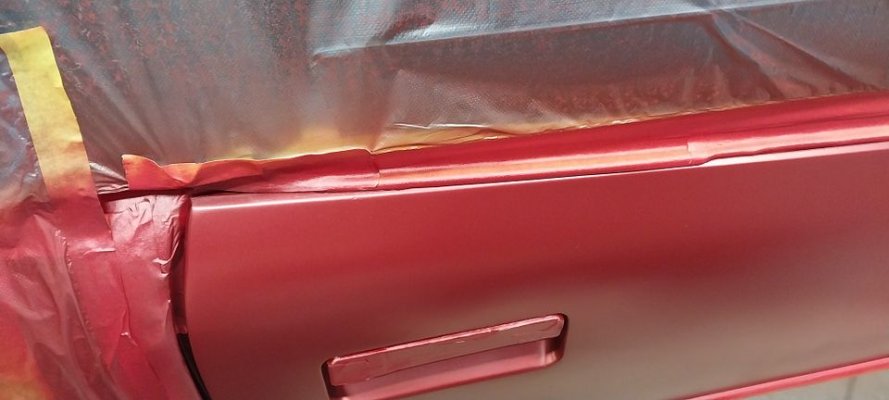
I did most of the work on the passenger door. It has been clayed, cleaned, sanded, cleaned, painted and cleared. The SprayMax is such a great product, minimal orange peel and the nozzle is just about perfect for a spray can.

The passenger door with the first coat of paint and nib found.
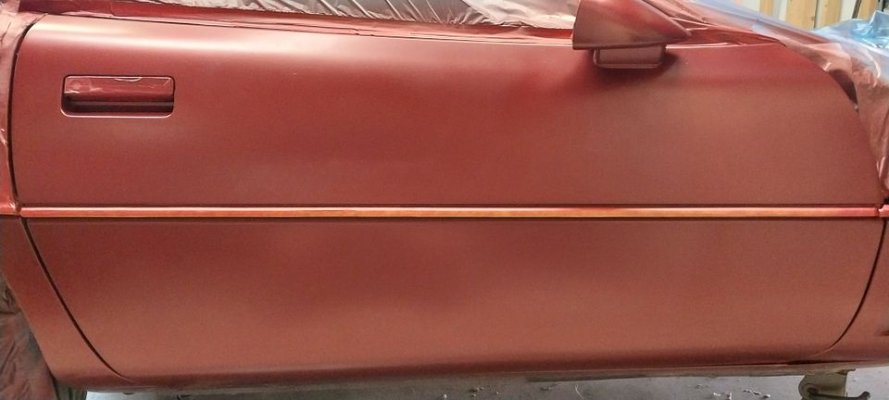
pass3.jpg

I am going to re-sand this mirror, it doesn't show in this pic but it has a lot of spider cracking, the same as the driver side.
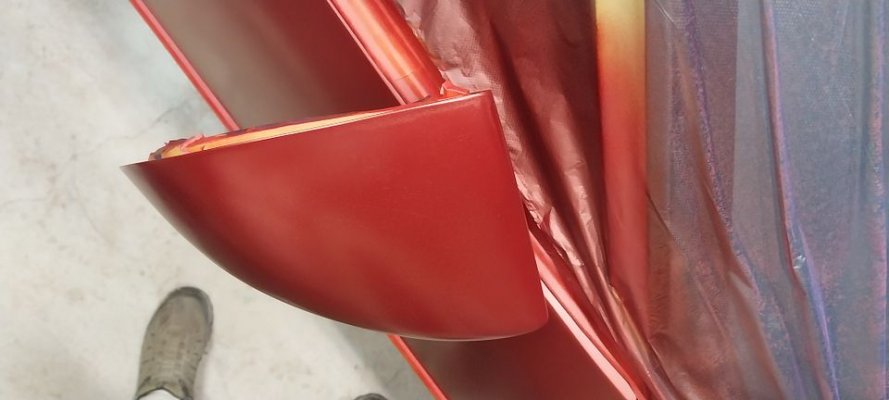
pass4.jpg

Nib gone and second coat of paint.
pass5.jpg

First dusting of clear.
pass2.jpg

First and second coat of clear. I will need to wet sand and buff this to remove the nibs and orange peel.
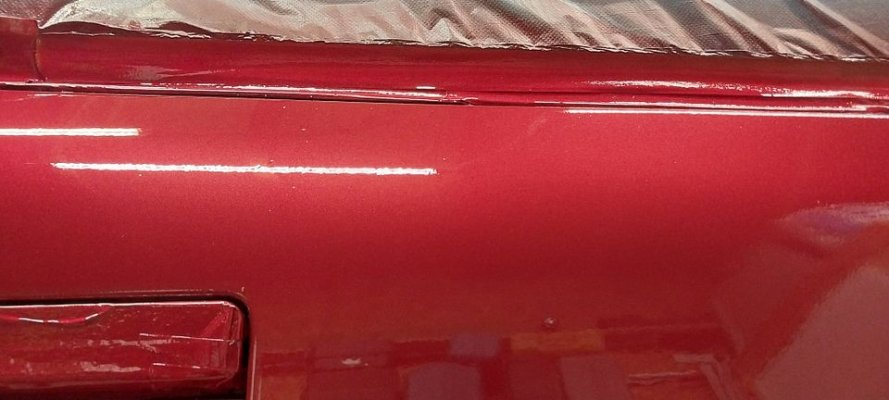
pass10.jpg

I believe this was the final coat of clear. I have a very nice thickness of clear. Not shown was the splatter mess after the first coat. My arthritic trigger finger was hurting so I used one of those spray paint guns and did not realize the can would rotate from the angle on the nozzle and the spray hit the edge of the gun and splattered. I let it dry about 7 hours and sanded it out, then continued with the clear.
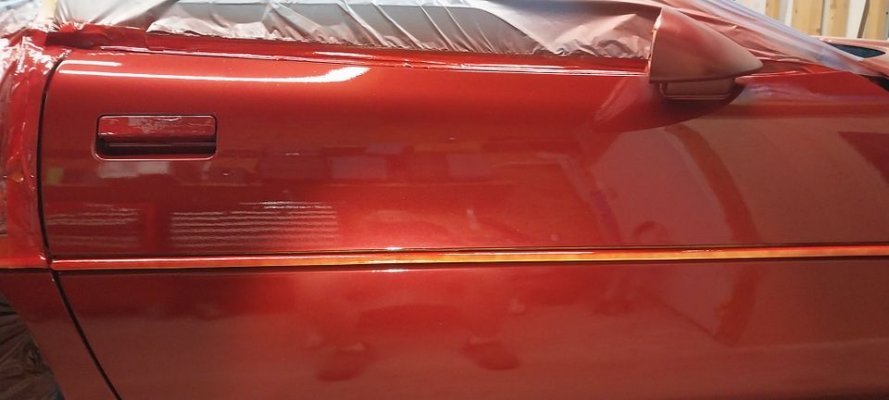
pass8.jpg

I was concerned about the old hood matching the new door as this car has a multitude of shades on it. This morning after the clear had overnight to "cure" I buffed a section of the hood to see if I was going to have to paint the hood as well. I don't believe I will have to, the color is pretty much spot on. The lights and reflections shows a slight variation but with the eye none is seen. (ignore the reflection, I typically do not wear a shirt in the shop and yes, I need to exercise more.)
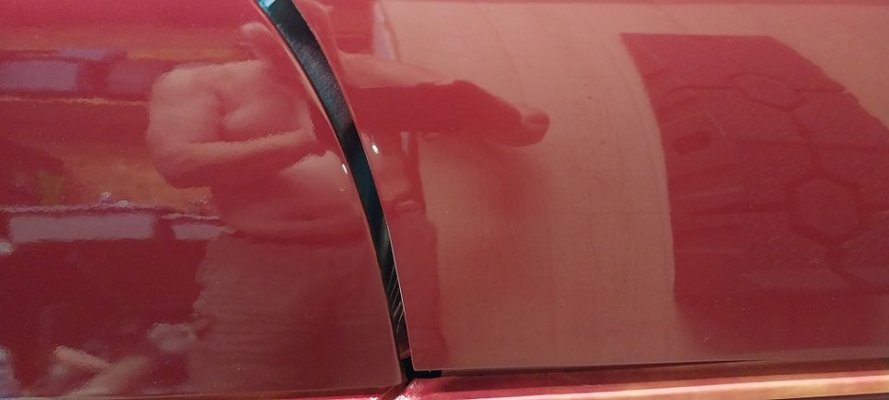
passhood1.jpg

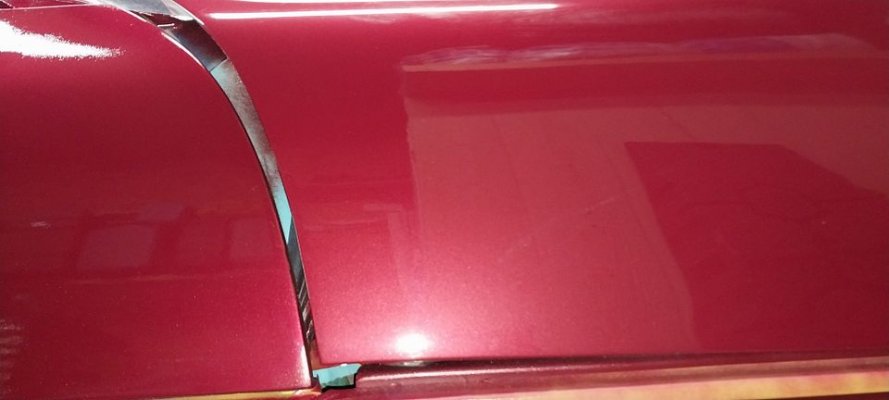
Pretty close, it will help once I am able to polish the door.
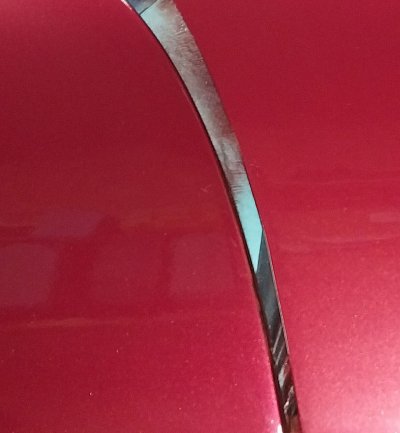
passhood3(a).jpg

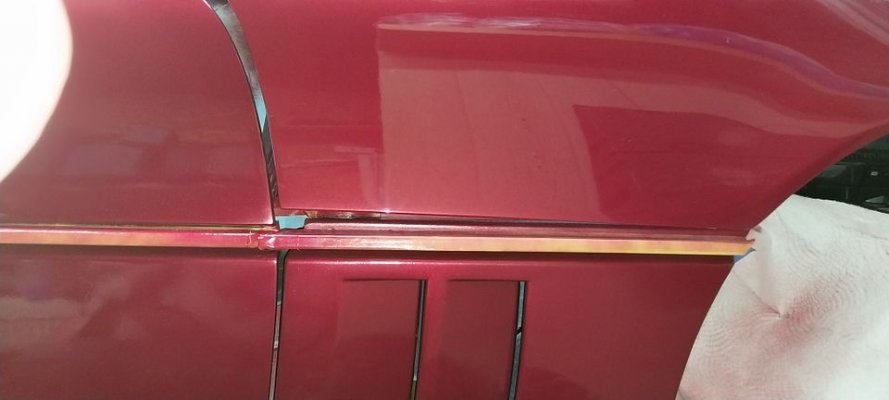
The four corners, the top and bottom of the door, the skirt and the hood. Only the hood wasn't wasn't painted. It looks off but it is a trick of the light and reflection.
passhood5.jpg

You can easily spot the orange peel on the door but not much on the hood. Prior to buffing this small section of hood, the color wasn't very close. After a dose of 105 and 205 and a polishing cream it is going to be just fine. Now I will have to do the rest of the hood.
passhood3.jpg

I got the driver door sanded down most of the way and corrected the rear view mirrors. I am waiting on sanding supplies. I have 2 cans of paint left but am going to have to repaint both bumpers and the entire back of the car so I am going to order more and make sure to have some left over.
 
OP
OP
SirReal63

SirReal63

Full Access Member
Joined
Sep 29, 2017
Posts
2,430
Reaction score
12,376
Location
Bertram, TX
The side mirrors were really sun baked and cracked in the paint. The cracks went all the way to the primer but I stopped just shy of getting into the primer. With a bright LED I can still see remnants of them but the eye cannot without a bright light source. At any rate I won't re-do them, they are more than good enough.

passmirror1.jpg

drvmirror.jpg

I have one can of paint left, not enough to do what remains so I will order more and focus on polishing until it arrives.
 
OP
OP
SirReal63

SirReal63

Full Access Member
Joined
Sep 29, 2017
Posts
2,430
Reaction score
12,376
Location
Bertram, TX
My old arms hurt, lots and lots of sanding this past week and more to go. I have been working on the rear of the car and it has been way more work that the doors were. The doors had almost no defects but the rear lid and back half have a lot of little pock marks that appear to be something like gravel damage, an impact point of some kind. I could see some of them prior to sanding but sanding revealed a lot of them, 13 that needed to be filled, to be exact. I was able to sand out a few of them as they were not deep but others had to be filled prior to painting.

I dissembled everything on the lid, found broken rivets and missing clips but it was overall in good condition. The gas tank lid is not so good, there is some edge rust that needs to be taken care of that I hope isn't too bad underneath, at any rate, it is going to take some work to get right (ish).

The gas tank lid...dirty underneath and rusty. I suppose this could be worse but it is bad enough. This is really the only significant rust I have encountered on the car, a little on the floor pan and the harmonic balancer which doesn't count

.(edited)_Dirty.png

gaslid1.jpg

gaslid2.jpg

gaslid3.jpg

gaslid4.jpg

I found this kind of cool, the date and info cast into the panel under the gas tank lid as well as the paper tags from the deck lid black trim piece. The car had a mfg. date of 07/89

(edited)_casting.png

tag1.jpg

tag2.jpg

Now, the pockmarks that took most of my week. I probably could have left a lot of these and no one would have noticed them, but I would see them every time I got gas and it would bother me.

fish1.jpg

fish3.jpg

fish2.jpg

To fill the ones that did not sand out I sprayed a little high build primer into a cup and used a fine tip artist brush to place a drop of primer into the cavity. Every few hours I would add another drop until the cavity was filled and higher than the surrounding area so I could sand it flat. The high build primer does shrink slightly so it took multiple "drops". I did this to all 13 cavities and filled a few scuffed areas along the edges of every piece on the rear of the car. This took a while as you might guess. Good thing I am retired and have no life. biggrin5.gif

fish4.jpg

fish5.jpg

fish6.jpg

fish8.jpg

fish7.jpg
 
OP
OP
SirReal63

SirReal63

Full Access Member
Joined
Sep 29, 2017
Posts
2,430
Reaction score
12,376
Location
Bertram, TX
I also had some slightly more difficult body work to do. One of the reasons I had to tackle this work, other than the unpainted doors and variety of shades of paint there was this scrape...

paint5.jpg

booboo2.jpg

booboo4.jpg

booboo1.jpg

booboo5.jpg

booboo3.jpg

booboo6.jpg

The area was actually slightly rippled. I checked the backside and it fine, same texture as the rest of the panel but the surface had enough ripple to feel so I knew it could also be seen. I sanded the majority of the ripple out, coated the one burn through on the highest spot with epoxy and used the high build primer to level the surface out and after multiple passes I can no longer feel any ripple. I tried to check it with a straight edge, and the areas that were flat enough to lay a straight edge on showed no ripples.

booboodone1.jpg

booboodone2.jpg

booboodone3.jpg

I am tired, lol. The rest of the paint will arrive later this week and I have a ton of masking to do. I am going to have to rig up a makeshift booth. Painting vertical panels like the doors are pretty easy, painting horizontal panels is a little more challenging as dust/insects and whatever else is in the air can easily settle into the paint before it dries enough to resist it damaging the finish. I can remove them from the clear easy enough but you cannot really sand the actual paint before clearing, it ruins the sparkle.

I haven't touched either of the bumpers yet, it is going to be a large undertaking and I have a lot of research on urethane repair and painting before I begin. Fortunately there do not appear to be any holes, just gobs of filler that did not stick and a couple whiskey bumps.
 
OP
OP
SirReal63

SirReal63

Full Access Member
Joined
Sep 29, 2017
Posts
2,430
Reaction score
12,376
Location
Bertram, TX
This will be a large update, I got a lot done in the past week. I may disappear for a few weeks as I need an impromptu vacation from the car and the farm. We had someone steal chickens out of their coop and lock it back up so I also expanded the CCTV out to the animal areas, something I wasn't really ready to do but I do now have 4-4k cameras covering the area, and each other. (I hate thieves.) The hardest part was the multiple runs of Cat6 direct burial wire and expanding the network in the guest house to accommodate the new cameras. Now on to the part that was actually fun...

The gas filler lid, it was a rusted mess underneath, I sanded the high spots off, rust treated it with Ospho, primed, painted and cleared it.

What it was...

be563cda-d3df-446d-b66c-73537b8cf67d.jpg


8ccde488-73ba-48ae-8982-200d13720a0e.jpg


62dbd153-708f-4617-8843-104bd5f0d567.jpg

To what it is now...

45ece9ce-b92a-4783-8d5e-0c794b91f562.png

The deck lid took quite a long time to remove the damage from them. It too got filled, sanded, painted and cleared. It isn't perfect and like the doors will need a paint correction to remove the orange peel. Fortunately it has 4 good coats of clear on it so I should heve more than enough depth of clear to correct and still have plenty for UV protection.

After a couple coats...

7460b63a-c989-48e1-9470-a9f638d530c4.jpg

Final coat...

70d0f6ee-a790-4c3b-8e0b-5b484f12c0cb.jpg

It took a lot of work on the rear trunk area, lots of dimples, low spots, etc. I had a difficult time spraying the clear, the paint went on beautifully but the angle you need to hold the can makes it easy to build up around the lip of the can then spit a glob of clear out. I had 3 of them to sand out the day after I sprayed the prior evening. By the fourth coat I had a system figured out that worked. I raised the front of the car on stands which gave me just enough angle to make it a little easier. Unfortunately on the fourth coat I had a few gnats land in a very conspicious area so I sanded them out and dropped on a 5th coat. I got one gnat in the fifth coat but it will be easy to remove that one and any other defects and the massive orange peel after it cures completely.

I believe these pics are between the first and second coat of paint...

1df098d9-bfad-4121-a247-efe517b344e6.jpg


7524cec8-7561-4d08-b62f-156402ef8ebc.jpg


4e7ab9ef-d33b-4409-8ab0-c3da480794ac.jpg


752e69a0-1a01-4a01-be57-18948ffdc753.jpg


I have no idea which coats of clear these are but they were prior to the fifth coat...the clear was a long painful process that spanned a few days...

60a7019c-5adb-4800-a75d-1dfd10707246.jpg


936f19a5-7ab1-494e-b56a-cc46d9be2940.jpg

After the last coat of clear...

620e45ce-b1df-4032-820e-d9711e39e5fb.jpg


c5c8383c-2f00-4df5-a3a7-e55270efd218.jpg


8c20c466-d2ce-4167-a6dd-b21fab10a728.jpg


d6f55381-5fa6-4415-8439-04b89ae24bf9.jpg


e6b495a8-0a00-482f-b72f-be7a78aa6911.jpg


0646e1f5-4dff-49e6-81a5-d7e35d228f15.jpg

A few things that make the pics look strange, the ridiculous shine reflects on everything inside, flash on or off made no real difference. To the eye the color match is better than i could have hoped for, to the camera it appears different depending on the angle you take the shot from. I will know better in a few days after I get the car put back together and out in the sun.
 
OP
OP
SirReal63

SirReal63

Full Access Member
Joined
Sep 29, 2017
Posts
2,430
Reaction score
12,376
Location
Bertram, TX
I worked a little more on the hood, I clayed it and hit it with some 105 and a wool pad. It is going to take a 2000 grit sanding to remove the scratches, I had hoped to not sand the hood as I have no idea how thick the clear is. If I burn through I will have to paint and clear the hood. I am not opposed to doing it, but I would rather not as small panels are actually easy and a large panel more of a challenge.

After a cleaning and clay to remove surface contaminants...it is pretty rough...

ac7d3d99-f016-4307-a3db-4244e4f1ff96.jpg


34bc48d9-f0a9-4fc2-85e5-43b150e6c26b.jpg

Before the 105 and wool...

23311913-2e6d-4953-9484-163956676d3d.jpg


8bb97eb5-1a6d-4b09-b891-de1f0c8d25b3.jpg

After...

961cd36c-a6f7-4325-bf76-ad88d3f125d9.jpg


e2f1b485-94d7-4b47-af08-5700cfdbcdd3.jpg

I haven't touched the bumper other than some excavating to see how bad it is going to be. The rear is going to be bad and the front not as bad. I am going to have to pull out the 80 grit and take it most of the way down to remove the filler mess that has accumulated there. You may have noticed the rear bumper was not painted this time at all, not even the sides as I wanted to paint the bumpers as a whole and not try and blend them.

80355b1c-cc5d-4485-9027-f90430bd3b63.jpg


89f0d581-9dc7-4101-a54b-4943713efbd1.jpg


0d9dad27-6beb-42c0-9d5e-0a73ce1f3b12.jpg


8606744b-e484-488a-a993-cdedd97dd6eb.png


53dbc70c-bed6-4362-9cb5-a88aa2ca16ed.jpg


e187ce5c-03fa-4e99-aee3-8c6cf52546cf.jpg

I need a break and further research on urethane refinishing.

I am going to wait a few days for the clear to outgas before I move the car into the sun for pics. It will be tense until then as my anxiety level is high over how well it will match. In the shop it looks great to the eye but the sun will be the true test.
 
OP
OP
SirReal63

SirReal63

Full Access Member
Joined
Sep 29, 2017
Posts
2,430
Reaction score
12,376
Location
Bertram, TX
I went ahead and moved the car out of the shop, SprayMax TDS says 12 hours to cut and buff and it has been well over 35 hours so I moved it into the sun to do any last outgassing.

I took the opportunity to take a few shots of the color. Ignore the orange peel and overspray, those will be gone once I color sand and buff in a few days. Keep in mind the only thing that has been done to the hood is a little cleaning and buffing. Depending on the angle, the color is either clearly different between the rear to the door and the hood. In some shots it is the same color and others the difference is easy to see with the hood being a lighter shade. Kind of maddening. lol I have been working on not being so detail oriented (****) for the past couple of decades, I used to be horrible about it but today it doesn't bother me as much, but deep inside the slight shade difference bothers me.

I am looking for opinions here, criticism, laughter or whatever you got. I don't know if I can leave it like this, my wife says not to worry about it as it will bother me way more than anyone else, if they even notice it.

5c6045fb-abb8-4c04-bfc6-21b562ef5ee9.jpg


45154e4f-e9e9-4f2e-b75e-9b3bd18f4b93.jpg


67ab7cfd-20c4-4ff9-aed4-7af7b39599cf.jpg


e4efb3ad-e2f1-4290-9b9e-d2f494f1c5af.jpg


64d41855-26e0-45d7-8870-0885e92a5712.jpg


09f5df5a-0435-4e0d-bd4a-a2acd5752870.jpg


262f9fbd-d2e1-4824-98a4-70d73e6e9601.jpg


116623d1-0674-47b7-bf49-93b58412c2f7.jpg


e6161e36-a61e-4e1a-b1a7-52522178c878.jpg


8656d88a-ac62-44c1-a81f-4a56a7cce5a4.jpg


ab931798-9fa7-4f2c-b7a7-e7ada9dcd446.jpg

6aba8783-c5b2-4fe3-a857-21323cf9bfdc.jpg

I have also been refurbishing the deck lid hardware as most of it is rusted. I used a 30 minute bath in the ultrasonic cleaner, rust reformer and flat black. Though no one will ever see it, it is nice to stop any rust where I can.

99ee1657-5980-4dcc-8f62-c37d73b992fa.jpg

I should be safe to sand with 2000, 3000, 5000, compound and polish in a few days. I am seriously considering making the black door handles and the cover plate for the top pins body color. I have intentionally left them alone because to me the black distracts from the body lines and black belt molding. I tried to find pics on the interwebs of that and found none.
 
OP
OP
SirReal63

SirReal63

Full Access Member
Joined
Sep 29, 2017
Posts
2,430
Reaction score
12,376
Location
Bertram, TX
As for the handles and pin latches, no matter what color I paint them, I will have to completely strip and sand them as they are hammered. I considered briefly just replacing them, they are all available but that kind of defeats the purpose of this thread and these are the original ones, I suspect the aftermarket are not the same quality.

847ed68e-4be2-400e-a481-75d3e1be23d9.jpg


f6e7bb93-92a1-49e4-ad59-4f02652daace.jpg


5585bcc8-4b57-4156-96cf-84e720f6390e.jpg

I started wet sanding on the hood as well as a few spot checks on the fresh clear coat, I am going to wait a few more days on the clear but can proceed on the hood. This is a spot after 1500, 2000 and 3000. I started with 2000 but it did not work fast enough so the 1500 came out. I thought I had some 4 and 5000 but I do not, at least until this weekend then I will be able to take it beyond 3000 grit.

bef17516-fd85-4f39-bd96-d3363e88fa0d.png
 

Tonyrodz

Resident Resident
Joined
Feb 16, 2012
Posts
31,828
Reaction score
47,739
Location
Central Jersey
Ive never been a fan of Corvettes, but I can appreciate all your hard work and knowledge that went into your restoration--Plus I love a good build thread! Sub'd:worship:
 
OP
OP
SirReal63

SirReal63

Full Access Member
Joined
Sep 29, 2017
Posts
2,430
Reaction score
12,376
Location
Bertram, TX
I made a lot of slow and painful progress this past week. I had concerns about the quality of 2K clear out of a can, those concerns were unfounded. This is the hardest clear I have ever touched. I made a mistake by waiting so long to wet sand, this stuff was so tough in a few places I had to grab the 400 grit to break the granite hard outer later. I have never had to use 400 grit paper on a vehicle's finish. Once the outer shell was taken down the 600-800 worked perfectly to smooth it out. I ran the gamut of paper, from 400 to 600,800,1000,1200,1500,2000,2500,3000,4000 and 5000. The 400-800 were 3M brand and performed beautifully, I also used some Dura-Gold for the 1000 to 2000 and I tied "Serious Grit" in 2500 as well as the Dura-Gold. Both of these papers were adequate, I bought both 6" round for the Porter Cable and 5-1/2"x9 for the hand blocks. The 3000 grit was Dura-Gold and Mirka Abranet 6" foam backed disks (great for hand sanding) which I had both 3 and 4000 grits that were 6" round. The quality difference between the Dura-Gold and the Abranet was substantial. The Mirka was quite a bit finer than the Dura-Gold though both were "3000" grit. I bought the 5000 grit because I didn't want to try and buff larger scratches out of the granite coating of clear. I believe it helped. I started this whole process with a Job Pack of Super Assilex 600,800 and 1200 grit dry sanding paper, 2 half sheets of each. I am still using it and it hasn't really lost much grit at all. If I had to do this all over I would only have used this stuff and the Abranet but would have bought much more.

I got all the way around the car up to 5000 with the exception of the rear tail light area which I only got to 2000, most of it will have to hand sanded though I did try some 3" Uxcel from 600 to 5,000 grit ( I only used the 3000 grit so far) for that area on a 3" foam pad and a slow cordless drill. It worked ok, not great so I will probably finish that area by hand with Super Assilex. I am deeply impressed with that paper. On to some pics, of which I did not take enough, I just wanted to get through this, my old body is officially worn out.

The worst area, the deck (top) lid, I cleared this in very poor light on the other side of the shop and that was a mistake, I had more dusting and orange peel here than anywhere else, mainly because I could not see just how bad of a job I did with the clear. I must have been high when I sprayed the last coat. The flash makes the pics look 1000x worse than they really were and this is the spot that took 400 grit.

31a87ccb-d52b-414b-a15d-80830b08cea8.jpg


e669443d-c78e-47a5-b478-614fd3385e12.jpg

In process, this is during the 400 grit fiasco.

355e71be-c21e-488f-aadf-1b2765535b13.jpg

After the 400 taken to 2000. At one point in the week the entire car looked like this.

b0f72471-f98d-4d09-b099-4a43cdc3eca9.jpg


e76e83df-9e43-47ef-a97c-d406171b2a89.jpg


3bb6da26-9cc5-4ec3-9831-7b72a203b057.jpg

After the 2000 with the random orbit I noticed a few pigtails so I then switched to 2000 and up by hand on various blocks. My arms are ready to fall off after numerous passes with finer and finer grit paper. I am pretty sure I will need to go over the rest of the car closely with a bright led to find any I missed.

d4531019-3b8b-4a16-b59e-ebc28950f8bd.png

Taken to 4000 by hand

b7dd23a4-e49a-46e8-a7ac-740f48b6326d.jpg


After the 4000-5000 I used a heavy cutting pad with some 105, some of these are with and without flash.

90f481ab-1a6d-4c58-a668-9e32a8502832.jpg


0a8c8a26-cd5d-41bd-aa40-154433b91391.jpg


697c271f-32c9-4c81-99ae-e7c851e8927c.jpg


54e616c6-f111-4035-b0ba-e45de9bb8566.jpg

A pretty cool difference between 2000 grit and 4000 grit.

60cbbf93-3ccb-4fe6-8a00-7bb4bab05d3b.jpg
 

Forum statistics

Threads
133,217
Posts
1,881,715
Members
98,252
Latest member
Rambly
Top