About20's FI build (slow build)

Disclaimer: Links on this page pointing to Amazon, eBay and other sites may include affiliate code. If you click them and make a purchase, we may earn a small commission.

OP
OP
about20ninj45

about20ninj45

Full Access Member
Joined
May 13, 2014
Posts
1,120
Reaction score
330
After this I mounted the lid, which wasn't too hard. The EVAP live was in the way so I cut it.. more on that later.

After the lid was bolted on, I had to install the injectors and fuel rail. The factory line will need to be stretched to fit the fuel rail. There's also a bracket you can remove from the rear of the driver's side head, so you can have more line to stretch.
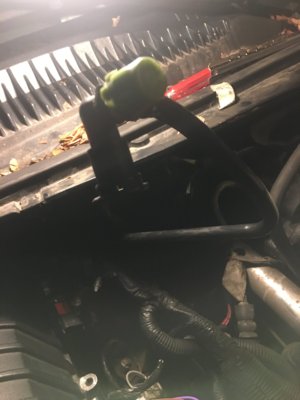
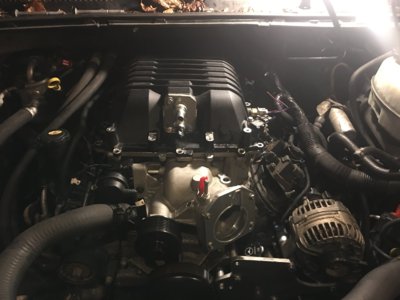
E0F97637-717E-44E8-AC69-4E9CBD2B49A5.jpeg 3AE912D7-C9EC-4B13-8296-84C132CC3258.jpeg

You can see the iat wires on the driver's side. In order for the blower to sit flush, you have to bend down the coolant steam tubes on the front valley cover. These lines usually go through ports on the stock Tb and will need to be rerouted
 
Last edited:
OP
OP
about20ninj45

about20ninj45

Full Access Member
Joined
May 13, 2014
Posts
1,120
Reaction score
330
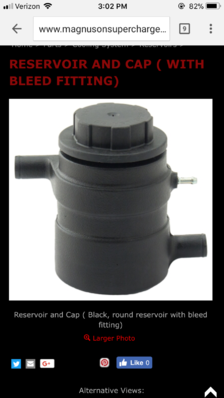
Can't install the heat exchanger until I can find a reservoir for the cooling brick in the lid. I need something like this but seems as though Magnuson stopped selling them.

CC987B21-0E29-4370-AE55-886BC8AE59E1.png

So I will be running without cooling it for the time being.. seeing as how ambient temps are roughly 17*, it shouldn't cause that much of an issue if I'm taking it slow
 
OP
OP
about20ninj45

about20ninj45

Full Access Member
Joined
May 13, 2014
Posts
1,120
Reaction score
330
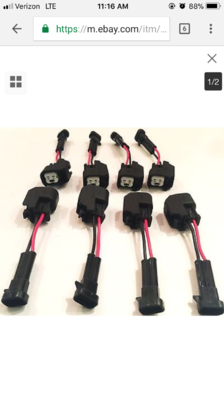
To install the LSA/ls9 injectors, you need wiring adapters that plug into the harness. You need to go from a Delphi plug to an ev6 plug, which most gm vehicles come with as long as you (07+)

Got them on eBay for pretty cheap.
They are plug and play.

FDF6DD36-703F-4AEF-A94A-CC17FE0E8E67.png
 
OP
OP
about20ninj45

about20ninj45

Full Access Member
Joined
May 13, 2014
Posts
1,120
Reaction score
330
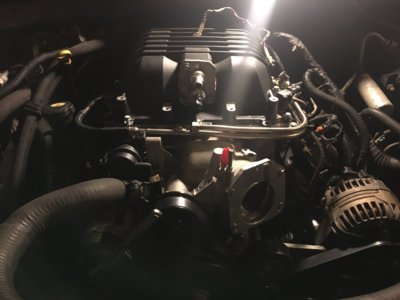
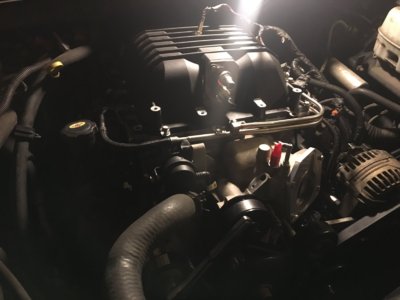
Installed injectors and fuel rail, bolted the lid and rail down and was anxious to fire it up. Installed the correct serpentine belt (after 6 trips to the parts store because they kept giving me the wrong one) I had to extend the EVAP line and solenoid, which plugged right into one of the blower ports without issue. All other vacuum ports need to be plugged if not in use, otherwise , vacuum leaks..= no bueno.

103AFC66-6DB0-4039-8F38-9309027F8A96.jpeg 6700AA23-7BDC-4E0B-A247-47F235EC0836.jpeg

Borrowed this pic with the arrows from LS1 tech to illustrate the ports 8B21A51B-5B31-484B-827B-160C187553D7.jpeg
 
Last edited:
OP
OP
about20ninj45

about20ninj45

Full Access Member
Joined
May 13, 2014
Posts
1,120
Reaction score
330
So I did a once over and said, f it. I'm gonna start it. Anything not hooked up, I'll find out as soon as the engine turns over lol.

Project snowball didn't seem to act right when attempting to fire up.


Inside view.


Afterwards I founds a puddle of gas underneath the vehicle, damn injectors weren't seated all the way and fuel was leaking all over. I corrected that and made sure all the other injectors were seated. I also wanted to make sure that there wasn't any fuel in the cylinders, and risk hydrolock. Decided to just drink a beer and contemplate on my next step.
 
Last edited:
OP
OP
about20ninj45

about20ninj45

Full Access Member
Joined
May 13, 2014
Posts
1,120
Reaction score
330
Shortly afterwards said "YOLO" and fired it up again.. well technically 3 days later but still, you get my drift


Didn't take enough pictures, so I'll have to grab more. Noticed a rattle sound coming from the snout, and it's because the coupler isn't centered on the shaft correctly, so I'll have to pull that and install a different one again. But I may just leave it in there for now untill I get the rest of the details ironed out.
 

Forum statistics

Threads
132,377
Posts
1,867,029
Members
97,014
Latest member
AustinC
Top