I am doing a mod on my '02 Tahoe that will allow me to fully recline my seat. I have a power/manual hybrid seat. The bottom of the seat is powered, but the back part has a ratcheting mechanism. I guess the fully powered seat didn't come out until later. If you're interested pm me and i'll post it up. This isn't the same mod that everyone else has, which requires the removal of the golden ring. I have a whole different setup and is a completely different mod/process.
You are using an out of date browser. It may not display this or other websites correctly.
You should upgrade or use an alternative browser.
You should upgrade or use an alternative browser.
Anyone interested in modifying the seat to fully recline?
- Thread starter cam3439
- Start date
Disclaimer: Links on this page pointing to Amazon, eBay and other sites may include affiliate code. If you click them and make a purchase, we may earn a small commission.
olsonk_89
TYF Newbie
I know you said PM you, but just go ahead and post it. I'm going to do the gold ring method one of these days, but if there's something better I'd like to hear about it.
Cobra
Full Access Member
x2 POST IT!
MDMILL1
Member
- Joined
- Nov 8, 2009
- Posts
- 31
- Reaction score
- 0
Yeah post it for those of us that have the seat that were made during a brain fart.....
Just making sure there were people out there still interested and having some seats like mine....post will come...but the mod will take some time and isn't some golden ring mod. You'll have to take your seats out to do this mod. And the mod is still free...if you have the right tools.
---------- Post added at 12:28 AM ---------- Previous post was at 12:20 AM ----------
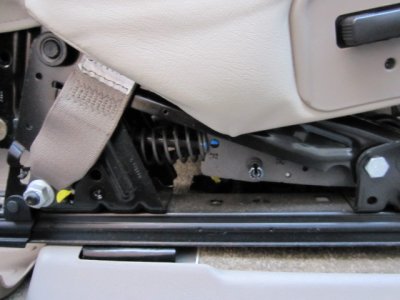
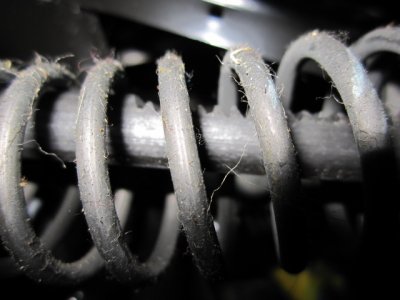
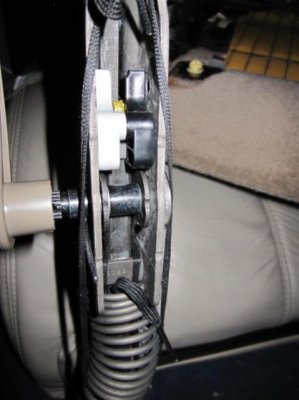
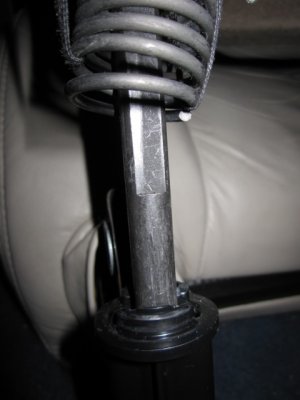
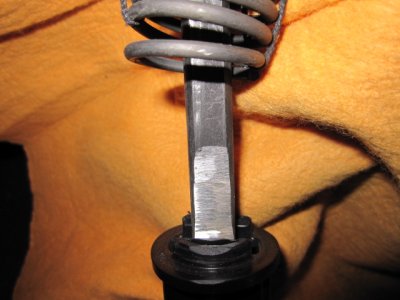
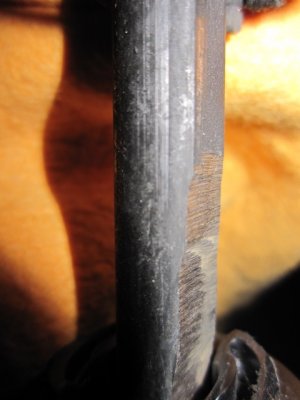
Ok. For those that have a ratcheting seat (to recline) like me there is whole different mechanism that must be looked at. I just worked on my truck to get all 4 lights to stay on when activating the HI beam. I took the cover off of the seat to check out the mechanism for reclining and I found out how to do it, but it'll require a lot of work. If you take off the cover and look at the spring, you'll see a bolt running right through it. The bolt will have some teeth (notches) on the top, which is how the whole ratcheting mechanism works. If you look underneath the bolt, you'll see it's notched all the way back to a certain point. This notch on the bolt acts like a guide for the bolt's ratcheting/reclining, and must either be extended, completely removed, or smoothed. This will allow the extended reclining that we are seeking, but like I said, it'll be a huge pain in the butt since you'll have to remove the seat in order to try to attempt this.
Last edited:
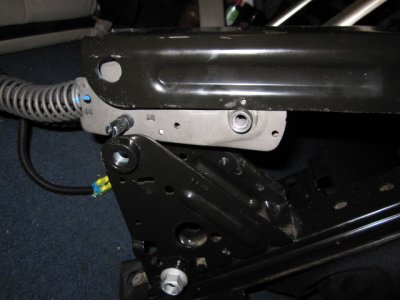
I know that the power seats have a golden ring. I have power seats that powers the forward, reverse, up, and down movement for the bottom of the seat. For reclining, I have a handle that ratchets the seat backward or forward. Below are some pictures of my setup/mechanism.
Attachments
Last edited:
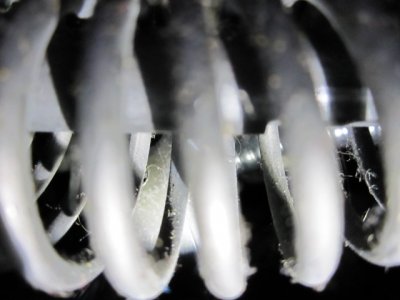
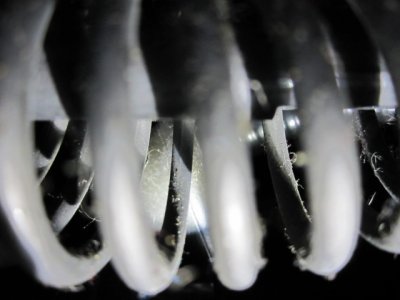
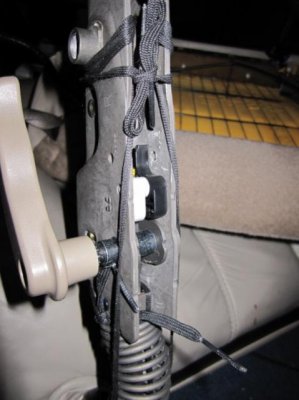
Ok. Well here are some more pictures. I didn't want to compromise the mechanism or various bolts that were riveted/pressed together, and after looking at it for a while, I decided to compress the spring as much as I needed, to make my plan work. I didn't want to remove the plate that acts like a stopper for the notch, since this plate is also used to guide the bolt through the mechanism. I used some braided shoe strings to compress the spring since this is all I had that was both strong and thin enough to fit through the spring and mechanism. I used two strings (about 180 degrees from each other) in order to evenly compress the spring.
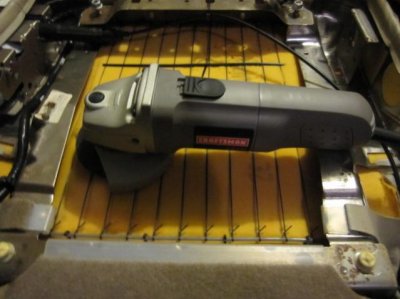
The plan: Since the spring is compressed, I will have room to grind down the notch to a point that I find suitable. I will be extending the notch down the bolt as far as I can. The tool that I will be using is a grinder.
In the pictures below you will see the stopping plates that I'm referring to.
In picture 2 you can see the plate that is used to stop the bolt with the notch. The plate is running horizontal, has two strings tied to it, has some serial number etchings, and is right above the compressed spring. You can see the bolt running vertically right behind it.
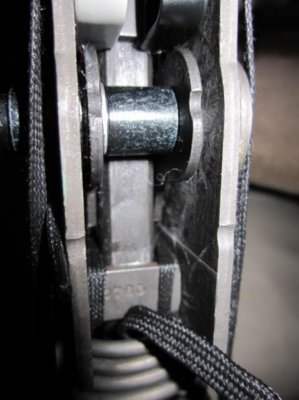
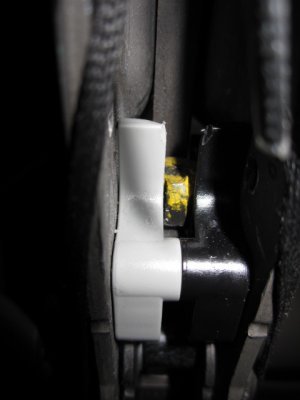
In picture 3, you can see the top of the bolt and is marked with some yellow grease. The top of the bolt also has a notch to prevent it from declining too much. The plate that stops it is right underneath the notch and is barely visible. The black and gray plastic moldings act as guides for the bolt.
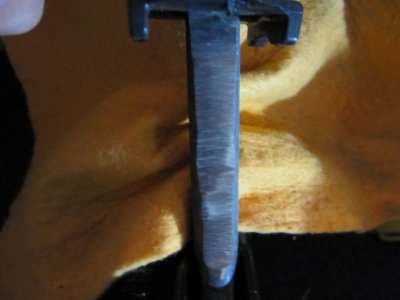
Pictures 1 & 4 are showing the whole mechanism, along with the strings that I used to compress the springs.
Picture 5 is the compressed spring with a good take on the infamous notch.
Attachments
Last edited:
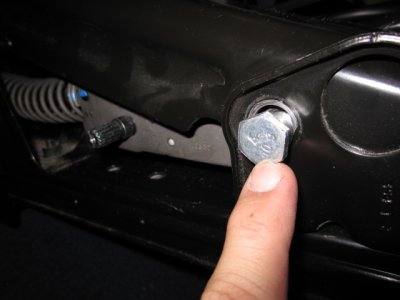
I have posted the pictures that I accumulated. The pictures will show the various bolts that you will need to remove and place back. They will also show the grinding and how it turned out. If you notice, I had to cut some of the spring as well. I decided to cut about 4 "turns" worth of the spring's height. This didn't allow the full reclining of the seat, but it was close enough. I will probably do 4-6 "turns" worth of cutting for the driver's seat or maybe the whole spring. You will also have to remove some wire harnesses that are tied to the various parts of the seat's frame. I tied them back using the existing hardware and some zip ties. All-in-all it turned out pretty good, but wasn't something as easy as cutting a "small golden ring." If anyone has any questions just pm me and I will try to help you out. Good luck on your mod, if you decide to take it on. Almost forgot to tell you that when you do grind down the notch/bolt, remember to cover the seat with something that will be resistant to the flying sparks. This will protect your leather or cloth seat from getting damaged. And DISCONNECT your battery to prevent your airbags from deploying since you'll be removing the harness that controls this (if you have side curtain airbags). Some of the pics won't show this, but I extended the notch all the way down the bolt. Forgot to mention that you will have to remove the bottom frame from the seat in order to work on the mechanism and picture 5 helps show you how to remove the mechanism from the frame. In order to be able to open up the frame in picture 5 you will have to move the seat forward (while still plugged in) so that a part of the frame can pivot forward. If you have questions on what exactly I'm talking about then pm me.
Attachments
Last edited:
Similar threads
- Replies
- 25
- Views
- 3K
- Replies
- 32
- Views
- 5K

