Engine Swap to stroked 6.0 (408) and general vehicle refurbishment

Disclaimer: Links on this page pointing to Amazon, eBay and other sites may include affiliate code. If you click them and make a purchase, we may earn a small commission.

OP
OP
Chooko

Chooko

Full Access Member
Joined
Feb 24, 2013
Posts
102
Reaction score
204
Location
The Great State of Texas
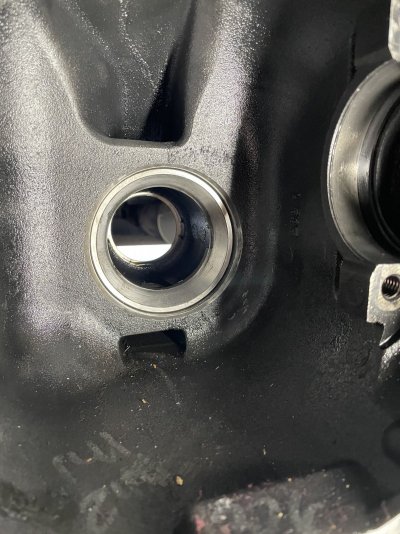
I haven't updated this thread in a while, but I have been making lots of good progress. The race that I last mentioned ended up bring a royal #$%^er to get in. I tried the freezing method, but it coincided with a drop in outside air temperature, and my first try was unsuccessful. I may not have left it in the freezer long enough, and also because of the cold weather I don't think it was THAT MUCH colder than the metal of the rear end. I did get it further in, but still not seated properly. For the second try, I kept the race in the freezer for well over a day, probably 30 hours or so. I had all my tools ready to go so that I was ready to drive it as quickly as possible when I took it out of the freezer. It was also a warmer day. I hammered that thing in, and that time it went in smoothly and squarely, and seated itself as it ought to have.
IMG_4370.jpg
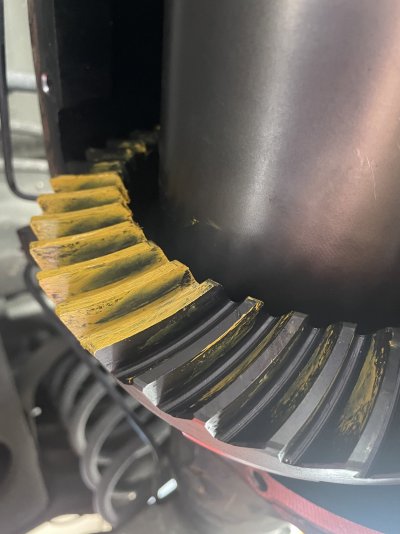
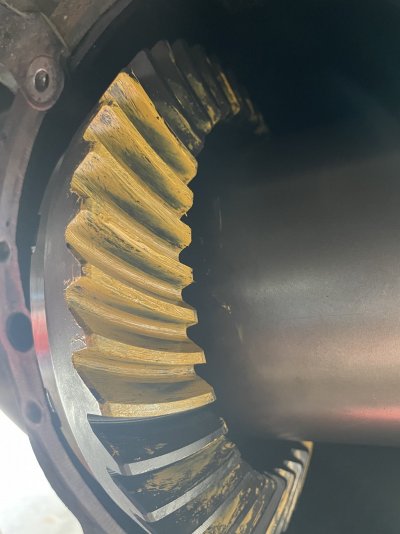
Once that was in, I turned to getting the rear end set up. I switched from 3.08 to 3.42, so I had to replace the pinion as well as the ring gear, and I also installed an Eaton Truetrac. This was the first time I ever did anything like this, so it was certainly a learning experience. I started with pinion depth. Initially I used my caliper to measure the old bearing (same brand, Koyo), and the new one, as well as the old and new pinion gears. Then I used a feeler gauge to measure the shims on the old pinion. With that information I drew out a diagram, and figured out what shims I needed to match the new to the old. That didn't work at all. My pinion was to deep, and I had to make adjustments. Here are some pictures of my first try:
IMG_4373.jpgIMG_4374.jpg
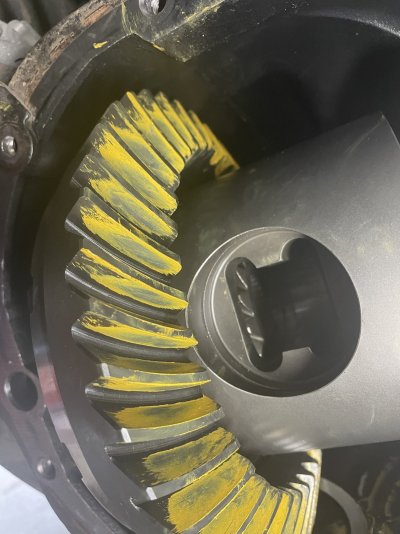
After making a few adjustments, I ended up with this:
IMG_4377.jpg
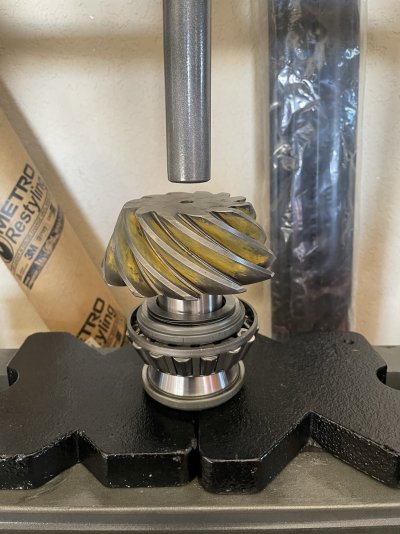
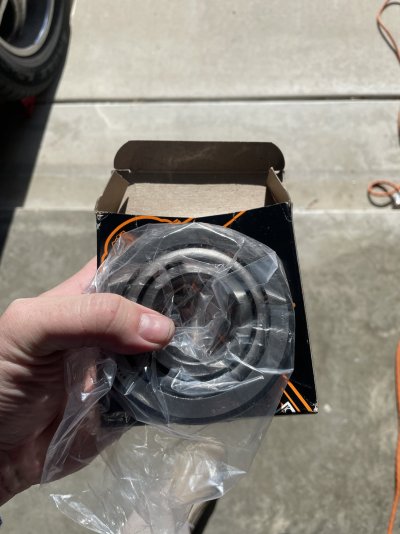
It doesn't look as obvious in the pictures as it did in real life, but this pattern is much better centered depth wise. However I am jumping ahead slightly. When making my final adjustment, I pressed the bearing off, removed one final shim, and then pressed it back on...and the bearing fell apart in the press. That was on Friday so I immediately went inside and ordered a new one, and paid for FEDEX overnight expecting it to show up Saturday. Then I went back out to the garage and snapped the bearing back together. The outer retainer was a little looser than it had been, and when I put it in the race it seemed fine. I was VERY tempted to just use the bearing because I figured that once assembled the the rollers roll between the inner and outer races anyway, and the retainer just keeps them spaced out. But I talked to my Father who was pretty adamant that it would be stupid to but a damaged bearing into the rear end, and ultimately I had to agree. Well, FEDEX hosed me, and the part that was supposed to come Saturday by 1:30 finally showed up Monday morning, so I made no progress at all over the weekend. Finally on Monday morning I got the new bearing.
IMG_4380.jpg
 
OP
OP
Chooko

Chooko

Full Access Member
Joined
Feb 24, 2013
Posts
102
Reaction score
204
Location
The Great State of Texas
Once the new bearing was in hand, I used the inner race from the bearing I ruined with my press to press the new bearing onto the pinion shaft.
IMG_4381.jpg
I did one more depth check just to make sure the shims still provided the correct depth with the new bearing, and it was good to go. I moved on to setting backlash. I had bought a dial indicator for this job, and honestly, with the indicator, it really wasn't very hard. I didn't take any pictures, but it only took me three or four adjustments to get the backlash set to .005. Spec was .003-.006, so I am happy with where I ended up.
IMG_4383.jpg
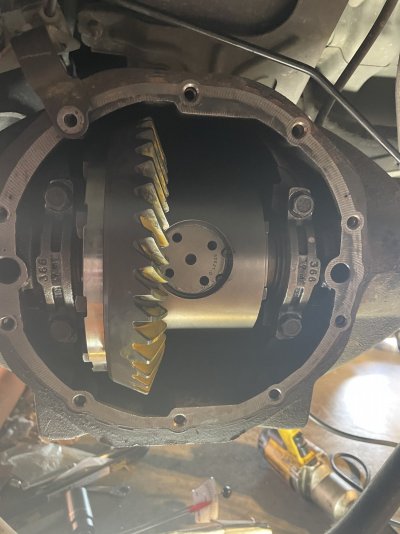
I moved on to setting the preload on the pinion bearings, which was a bit of a hassle. I bought a crush sleeve eliminator kit, which I think was a wise choice overall, but it did take a lot of fiddling with the shims to get the preload set correctly. I did narrowly avoid disaster when I realized way later than I should have that the preload is set in inch-pounds, NOT foot-pounds. Other than that it just took trial and error and measuring the shims with my caliper and recording the results to bracket myself into the correct range for the preload. I ended up with 20-25 inch-pounds, depending on the parallax on the gauge. Once everything was set, I did final assembly, torqued everything to spec, and then installed my new differential cover.
IMG_4384.jpg
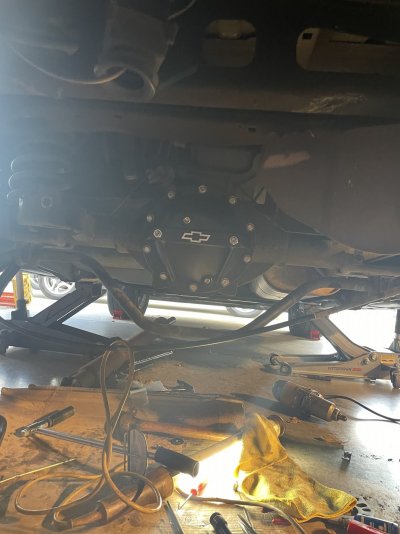
I torqued all the cover bolts down, and then torqued the little feet that ride on the carrier bearing caps and their jamb nuts, after putting RTV in their wells. Hopefully they dont leak. Then I filled the rear end with 2.5 quarts of Royal Purple, reassembled the brakes, sway bar, and other items that I had moved to do the rear end rebuild, put the wheels back on, and lowered the Tahoe down. I did a little more clean up of the garage to prepare for the next phase, and then got the Tahoe backed into the garage fully so that the garage door will close. I had to have the neighbor help push because there is a little lip where my garage door comes down and I couldn't get it by myself. I am finally able to close the garage door, which means I wont have to work in the cold for the rest of this project!
 
Last edited:
OP
OP
Chooko

Chooko

Full Access Member
Joined
Feb 24, 2013
Posts
102
Reaction score
204
Location
The Great State of Texas
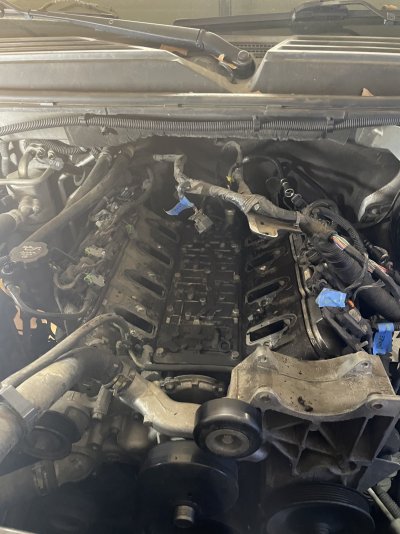
The next phase is the transmission. I am going to have it rebuilt by CircleD. I called and talked to Glen, and he was very helpful and recommended their 2.5 level rebuild, so that is what I am going to do. Taking the advise of a couple of members of this forum (much appreciated) I removed the intake manifold to access the two top transmission bolts. IMG_4389.jpg
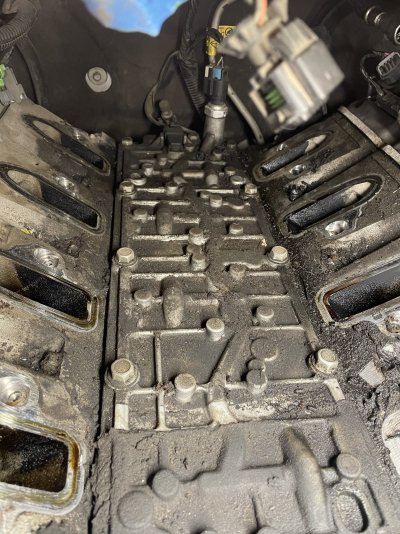
If you read the beginning of this thread, you might remember that I have had issues with the #7 cylinder for quite some time and have suspected a bad head gasket. Based on the grime build up under the manifold, I think that is even more likely as it looks like there was a slight leak in the vicinity of #7.
IMG_4390.jpg
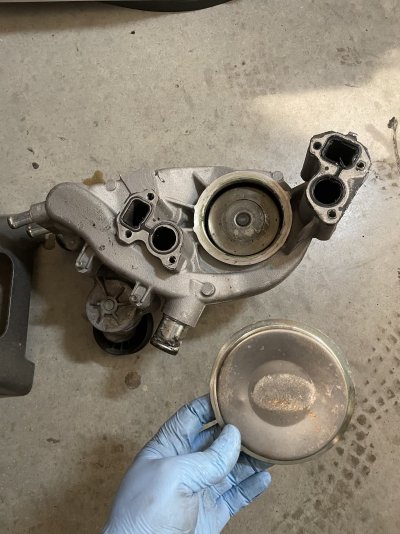
I also pulled off some other accessories to make room in the engine bay. Here is the water pump. Again, if you read the beginning of this thread you may remember that this whole project was finally forced to start when the car overheated and the back of the pump blew off. Here is the first time I have actually seen the carnage:
IMG_4391.jpg
That plate was pressed in to the pump and acted as a seal. With it blown out, water flows right out of the pump as fast as it goes in.

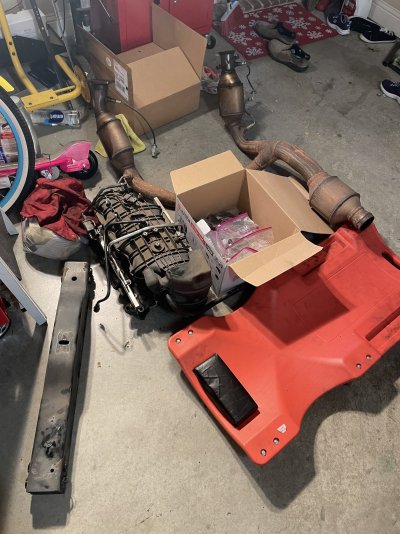
With all that done, I removed the cross member and Y-Pipe, which were kind of a hassle because the cross-member bolts on the driver side were installed the opposite way from the passenger side ones, and I couldn't get them out with the Y-Pipe in. But it was very difficult to get the Y-Pipe out with the cross-member in the way. It was a bit of a Catch-22, but I fainlly got them both out.
IMG_4392.jpg

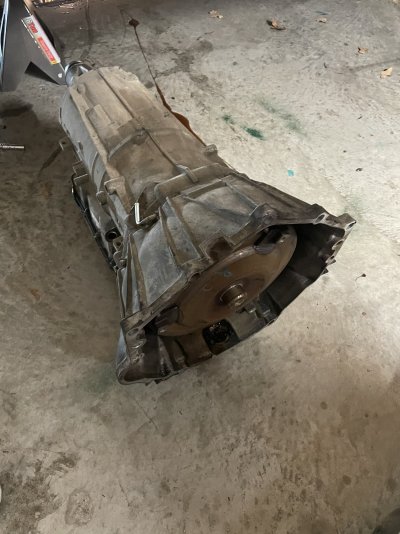
I think I'll turn those bolts around when I put it back together. I also removed the passenger side wheel well liner to get the starter out. It also made it WAY easier to get one of the collector buts off. I pulled the transmission this evening. I am doing this on the garage floor with the car on jack stands. I have four, and borrowed two from my neighbor, and also have two jacks backing them up, so that's 8 points of contact. Even so, it was a fairly miserable job. But it went pretty smoothly. Tomorrow I am driving it down to Houston to CircleD.

IMG_4393.jpg
 
Last edited:
OP
OP
Chooko

Chooko

Full Access Member
Joined
Feb 24, 2013
Posts
102
Reaction score
204
Location
The Great State of Texas
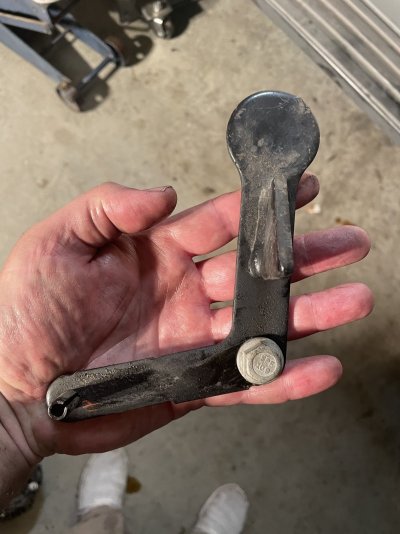
Does anyone know the purpose of this? It was bolted to the back of the driver side head. i can't see any purpose to it, other than to block access to the oil pressure sender. I think I have lost skin on this $%^&er every time I've had to mess with that sender. I am planning on NOT putting it back when I install the new engine, unless someone knows some purpose for it that I am missing?

IMG_4394.jpg
 

Tonyrodz

Resident Resident
Joined
Feb 16, 2012
Posts
31,595
Reaction score
47,075
Location
Central Jersey
Does anyone know the purpose of this? It was bolted to the back of the driver side head. i can't see any purpose to it, other than to block access to the oil pressure sender. I think I have lost skin on this $%^&er every time I've had to mess with that sender. I am planning on NOT putting it back when I install the new engine, unless someone knows some purpose for it that I am missing?

View attachment 360445
This came up in another discussion a few months ago. I think @iamdub came up with the answer. I THINK it prevents the rear of the fuel rail on the DS from getting damaged. Hopefully someone will correct me if I'm wrong.
You made some great progress.
 

iamdub

Full Access Member
Joined
Apr 23, 2016
Posts
20,821
Reaction score
44,943
Location
Li'l Weezyana
Does anyone know the purpose of this? It was bolted to the back of the driver side head. i can't see any purpose to it, other than to block access to the oil pressure sender. I think I have lost skin on this $%^&er every time I've had to mess with that sender. I am planning on NOT putting it back when I install the new engine, unless someone knows some purpose for it that I am missing?

View attachment 360445

It protects the back of the fuel rail on that side as the body is lowered into position at the factory. Some say it helps to protect the back of the fuel rail in a (really bad) wreck where the body crumples around the engine. It's not a problem on the other side since those cylinders are set more forward of the rear of the block.
 
OP
OP
Chooko

Chooko

Full Access Member
Joined
Feb 24, 2013
Posts
102
Reaction score
204
Location
The Great State of Texas
Well, I made the 260ish mile drive down to Houston to Circle D, and dropped off my 6L80E, and after talking to Glen there for a while, I'm glad that I did. The only downside is that he says they are possibly as much as three months out to get it rebuilt, so it looks like I'm going to be waiting for a while. I do have some other small jobs to tackle on the Tahoe while I wait, so I'll continue to post here while I do those, but I think it's going to be a while before I have much of consequence to say. While I was in Houston I also made it into Circle D Specialties (they do torque converters, not to be confused with Circle D transmissions) and ordered a new Pro Series 300mm torque converter with a 2600 stall. I think that will pair well with the cam based on the recommendation of Texas Speed. Glen also recommended a tuner in the Fort Worth area, and when I got home and looked them up, it turns out that they are in the same small town west of Fort Worth that I live in, and only a few miles away from me. So it looks like I have found my tuner.
 

pwtr02ss

Full Access Member
Joined
Apr 1, 2013
Posts
11,756
Reaction score
25,226
Location
Tennessee
Awesome progress. Like the others said, that plate prevents the fuel rail from being crushed in an accident so reinstall it. Glad it's going well and thanks for the in-depth how to on the differential. I think that's something I'm a capable of tackling when the time comes, possibly on my Camaro
 
OP
OP
Chooko

Chooko

Full Access Member
Joined
Feb 24, 2013
Posts
102
Reaction score
204
Location
The Great State of Texas
Awesome progress. Like the others said, that plate prevents the fuel rail from being crushed in an accident so reinstall it. Glad it's going well and thanks for the in-depth how to on the differential. I think that's something I'm a capable of tackling when the time comes, possibly on my Camaro
Well, once I get the Tahoe back on the road I guess I'll find out how I did with my differential rebuild. I think everything was in tolerance and put together correctly, but I'd hate for you or anyone else to give to much of what I have to say about it to much credence until it is tested! I think it is definately a job where there is just no way around the fact that you MUST have the correct tools or it will simply not work.
 

pwtr02ss

Full Access Member
Joined
Apr 1, 2013
Posts
11,756
Reaction score
25,226
Location
Tennessee
Well, once I get the Tahoe back on the road I guess I'll find out how I did with my differential rebuild. I think everything was in tolerance and put together correctly, but I'd hate for you or anyone else to give to much of what I have to say about it to much credence until it is tested! I think it is definately a job where there is just no way around the fact that you MUST have the correct tools or it will simply not work.
I agree on the tools. I'm sure it's fine since you checked everything like you did. That's the key to making things work
 

Forum statistics

Threads
132,301
Posts
1,865,627
Members
96,885
Latest member
BinOdhaib
Top