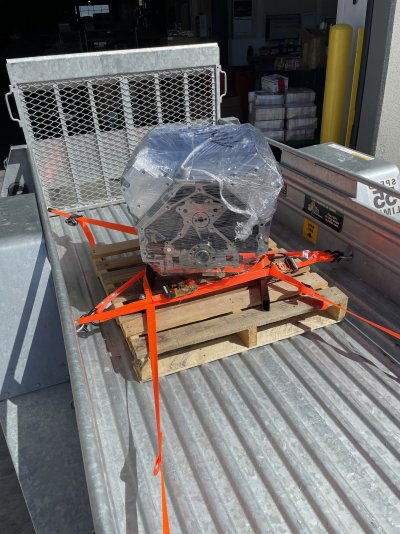
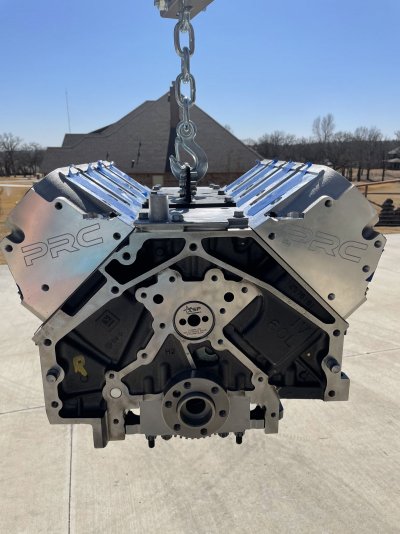
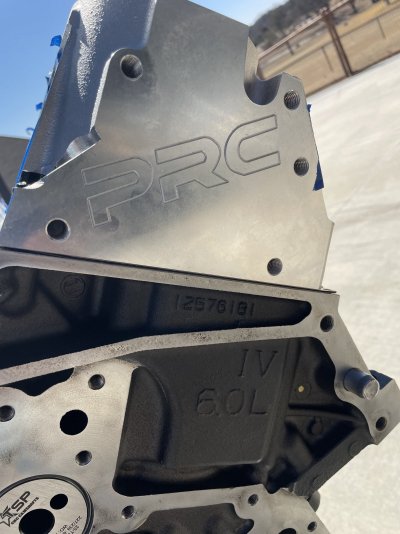
Engine Swap to stroked 6.0 (408) and general vehicle refurbishment

Disclaimer: Links on this page pointing to Amazon, eBay and other sites may include affiliate code. If you click them and make a purchase, we may earn a small commission.

1badjimmy

Member
Joined
Oct 8, 2020
Posts
59
Reaction score
44
Nice work!!

Do you happen to have a picture or willing to describe the specialized zip ties you’re looking for?

Also thanks for listing the sizes you used on the split loom. I want to do that to 5 of my vehicles but didn’t want to order too small or too large of a size.
 
OP
OP
Chooko

Chooko

Full Access Member
Joined
Feb 24, 2013
Posts
102
Reaction score
204
Location
The Great State of Texas
Nice work!!

Do you happen to have a picture or willing to describe the specialized zip ties you’re looking for?

Also thanks for listing the sizes you used on the split loom. I want to do that to 5 of my vehicles but didn’t want to order too small or too large of a size.
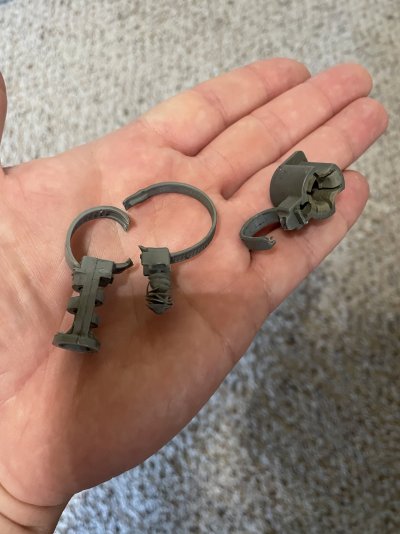
Here is a picture of all three:
IMG_4499.jpg

The one in the middle is relatively easy to find replacements for:


The ones on the right and left...not so easy. I found something similar to the one on the right, but I could only find it in 1000 packs, and the price was something like $200 for that many. Eventually I ordered these:


They are not identical to either, and I haven't received them yet, so I don't know for sure if they will work, but I am hopeful that they can be used to replace both the left and right style from my picture above. I'll let you know once they get here.

As for the looming, for just the engine harness, I used a full 25 foot pack plus a few more feet (maybe 30 feet total) of the 1/4 inch. I only used a few feet each of the other sizes. I ordered WAY more than I needed, although I was considering doing more of the wiring int he Tahoe. I'll probably just keep it around for use on future projects. Thats the best idea I can give you as far as how much of it you might need.
 
OP
OP
Chooko

Chooko

Full Access Member
Joined
Feb 24, 2013
Posts
102
Reaction score
204
Location
The Great State of Texas
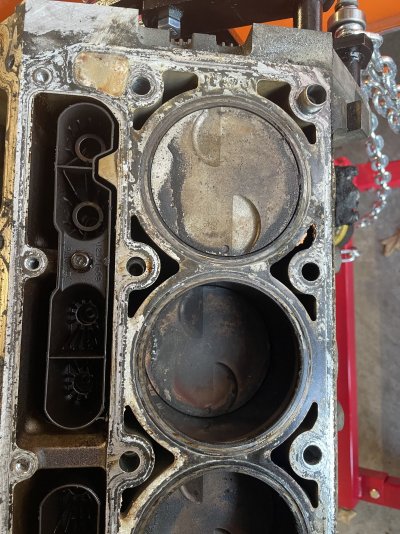
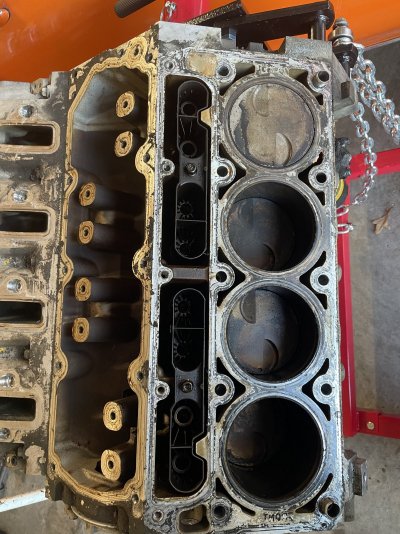
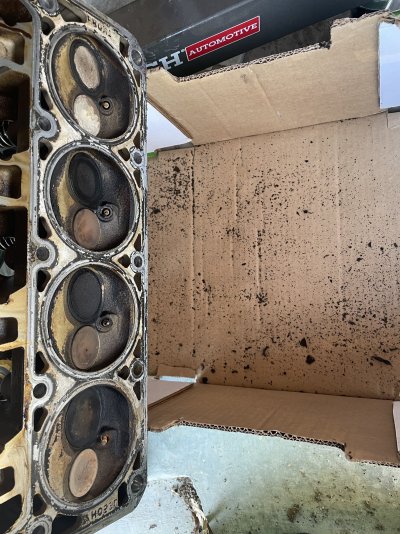
I pulled the driver side head off of the old engine just to see if I could see anything wrong in the vicinity of the #7 cylinder, which was giving me a lot of misfires, and fouling plugs.
IMG_4501.jpgIMG_4502.jpgIMG_4504.jpgIMG_4508.jpg
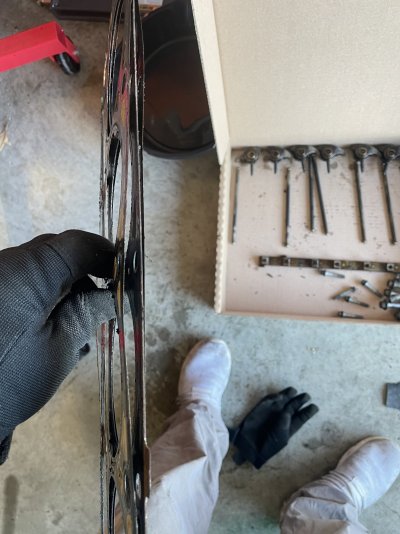
You can see that the build up on the #7 piston is a different color. In addition, the electrode end of the spark plug was slightly rusty, which is just visible in the last picture, so as I pretty much knew, coolant was getting into that cylinder. The third picture is the head gasket from that side. Should it spread apart like that? Or is that indicative of a blown gasket? I am hoping that the block and heads are OK. Didn't notice any obvious cracks, but I need to clean it up more before I can be certain.

In other news, Texas Speed called me, and the new engine should be finished tomorrow, but I am looking at either next week, or the week after before I can make the drive down to get it due to work conflicts. Still, it is exciting that progress is being made!
 

Geotrash

Dave
Supporting Member
Joined
Feb 16, 2018
Posts
6,423
Reaction score
15,916
Location
Richmond, VA
I pulled the driver side head off of the old engine just to see if I could see anything wrong in the vicinity of the #7 cylinder, which was giving me a lot of misfires, and fouling plugs.
View attachment 362771View attachment 362772View attachment 362773View attachment 362774
You can see that the build up on the #7 piston is a different color. In addition, the electrode end of the spark plug was slightly rusty, which is just visible in the last picture, so as I pretty much knew, coolant was getting into that cylinder. The third picture is the head gasket from that side. Should it spread apart like that? Or is that indicative of a blown gasket? I am hoping that the block and heads are OK. Didn't notice any obvious cracks, but I need to clean it up more before I can be certain.

In other news, Texas Speed called me, and the new engine should be finished tomorrow, but I am looking at either next week, or the week after before I can make the drive down to get it due to work conflicts. Still, it is exciting that progress is being made!
Smoking gun. Yes, it's normal for the gasket to separate like that. Are my eyes messing with me or is there some corrosion in the water passage adjacent to the #7 cylinder?
 

skpyle

Full Access Member
Joined
May 15, 2021
Posts
412
Reaction score
1,081
Seth - The stuff I am using is this:


I bought it in several sizes, 1/4, 3/8, 1/2, 3/4, and 1 inch. I think I also got some 1.25 inch. I probably didn't need all of those sizes, but this is the first time I'm doing this and so I'm figuring it out as I go. I'll try to post up which sizes I actually used once I am complete. The tape is this:


For puting it all back together I also bought these:


There are two more styles of specialized zip ties that were on the harness that I am still trying to find. If I do find them I'll let you know where.
I followed your lead and bought all of the above, except for the 1.25". Thanks!!!
 

Foggy

Full Access Member
Joined
Jul 25, 2019
Posts
1,092
Reaction score
1,403
Location
KS
Head gasket is normal.. MLS = Multi Layered Steel... Pretty much a Must on
alum head and/or alum blocks so seal correctly...
I use the cometics on my traditional small block chevys since I use alum heads
and boost/nitrous..
 
OP
OP
Chooko

Chooko

Full Access Member
Joined
Feb 24, 2013
Posts
102
Reaction score
204
Location
The Great State of Texas
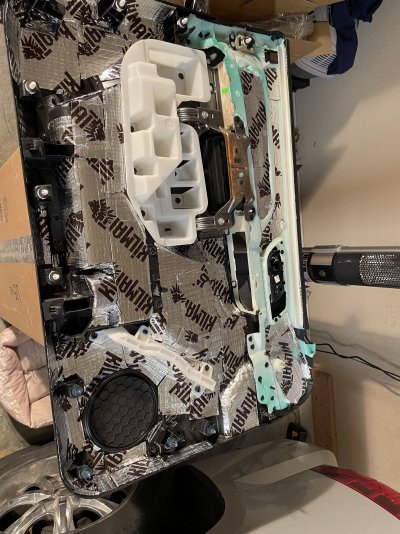
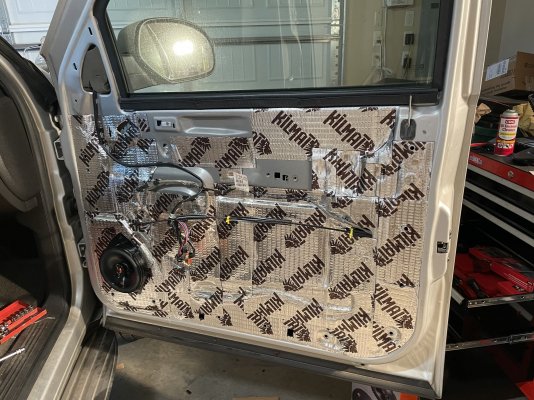
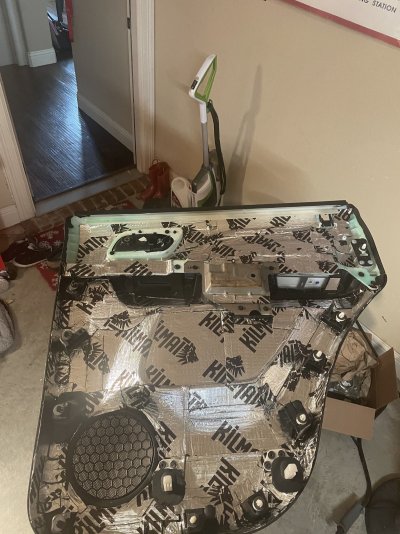
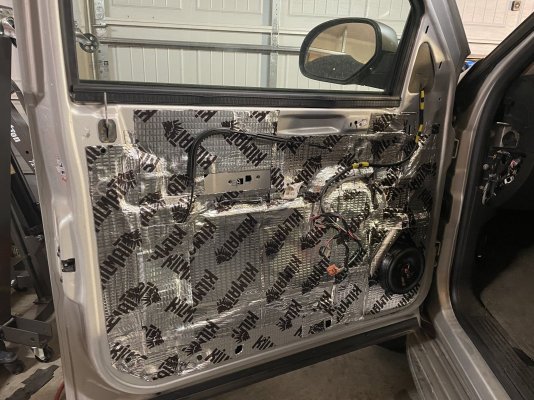
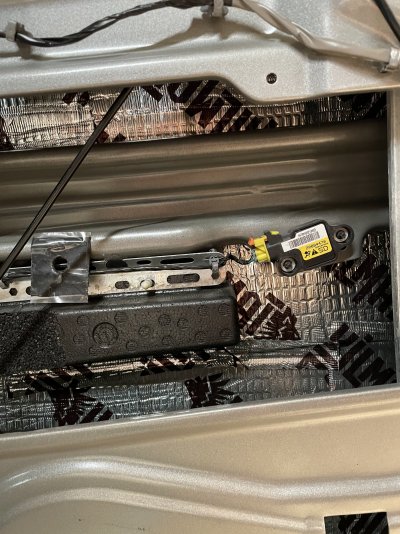
I have not posted in a while because i have been busy between work and working on the Tahoe, but progress has been made. I spent quite a few hours working on sound deadening the doors. I purchased Killmat, which is similar to Dynamat, but significantly more affordable. Eventually I will do the entire interior, including under the carpet, on the metal of the roof, and some stuff in the dash. But for now I just want to get the doors complete and buttoned back up. I also installed my JBL speakers on the doors while I was at it.
IMG_4516.jpgIMG_4517.jpgIMG_4559.jpgIMG_4560.jpg

I got as much coverage on the inside of the outer door skins as I could.
IMG_4513.jpg

I didn't take any pictures of it, but I also ordered a a large quantity of accoustic foam, simialr to what you see on the inside of a recording studio, and cut pieces to fill all the voids inside the door panels. Not inside the door, because I didn't want to interfere with the windows going up and down, but in the back of the plastic door panels. All four doors are compelte, although I need to go back in and trim the Killmat away from a couple of mounting locations to get the door panels to sit flush. Overall, this job was easy, but also very time consuming.
 
OP
OP
Chooko

Chooko

Full Access Member
Joined
Feb 24, 2013
Posts
102
Reaction score
204
Location
The Great State of Texas
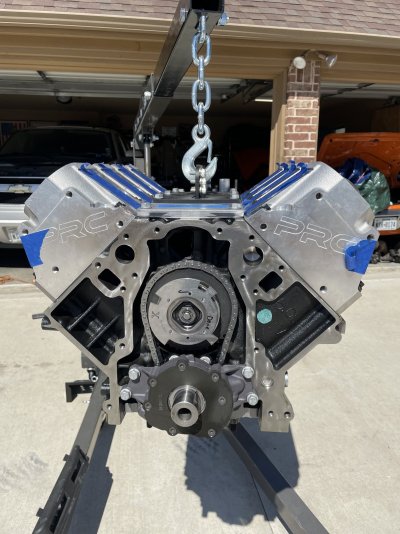
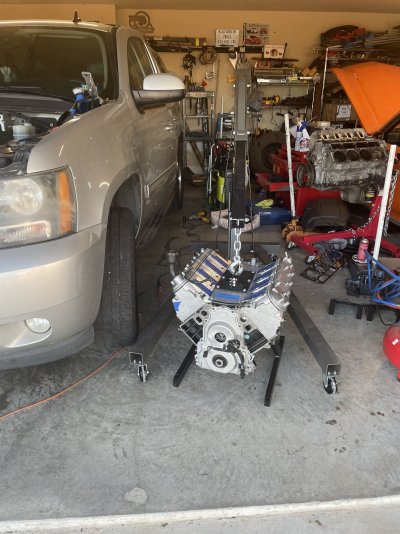
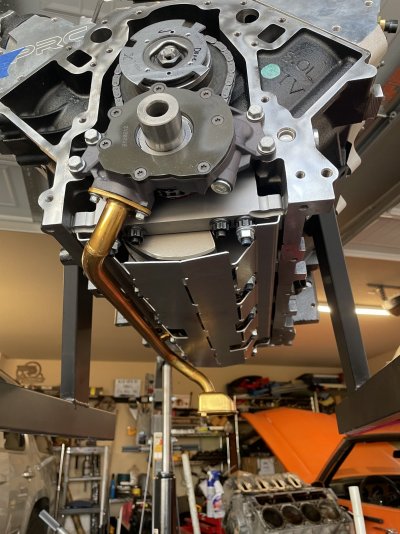
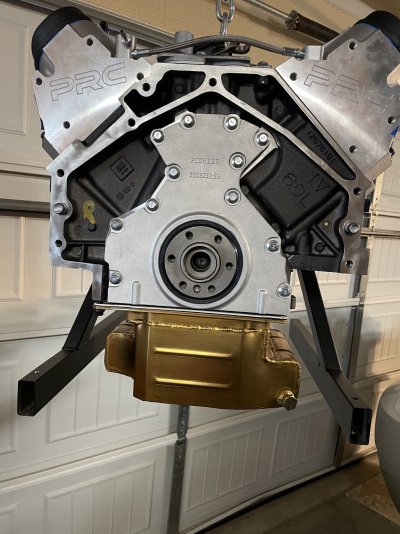
I had a lot of work to get the engine ready to go into the Tahoe. In particular, the front and rear covers and seals, as well as the windage tray, oil pickup, and oil pan needed to be installed. I bought a Milodon 31507 low profile oil pan, which I like because is has kick outs on the sides for extra capacity, and internal trap doors to ensure that the pickup always has oil even in a turn or under hard acceleration or deceleration. What I don't' care for is that the back of the oil pan is very different from stock, and lacks the bolt holes for the lower transmission bellhousing bolts. In addition, the two rear bolts that go into the rear cover need to be much shorter than the stock bolts, but the pan does not come with them. I had an ARP bolt kit, but had to find replacements for those two bolts which I found frustrating. You also have to use a Milodon oil pickup with the oil pan, but I didn't necessarily mind that because the Milodon pickup has two bolt holes where it attaches to the oil pump, and I made sure to put two bolts in it, vice the stock single bolt. Of course I put a new O-ring on the pickup, and lubricated and sealed it with SuperLube silicone O-ring grease. For the windage tray, I purchased a Mast motorsports 401-015 stroker windage tray, which gives plenty of clearance for my stroked engine. Here are the oil pickup and windage tray installed:
IMG_4579.jpg

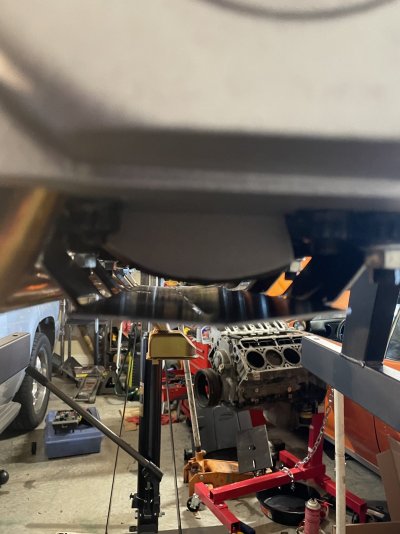
And here is a view of the gap between the windage tray and the crank weights and rod caps and bolts:
IMG_4580.jpg
I turned the engine over by putting a breaker bar on the harmonic dampener bolt just to be sure.

I got a used but cleaned and repainted (I think) GM front cover, and ordered a new rear cover. Of course, new gaskets and seals were included as appropriate. Here is the back of the block with everything installed:
IMG_4582.jpg

In addition, you might notice that the steam crossover in this picture on the back of the heads. The old heads had tapped bolt holes but eh water passages were blocked off. The water passages on the new engien are open. I decided that instead of blocking them off I'd install this flexible crossover, and then plumb it tothe front portion of the system. More to come on that once the engine is installed.
 
OP
OP
Chooko

Chooko

Full Access Member
Joined
Feb 24, 2013
Posts
102
Reaction score
204
Location
The Great State of Texas
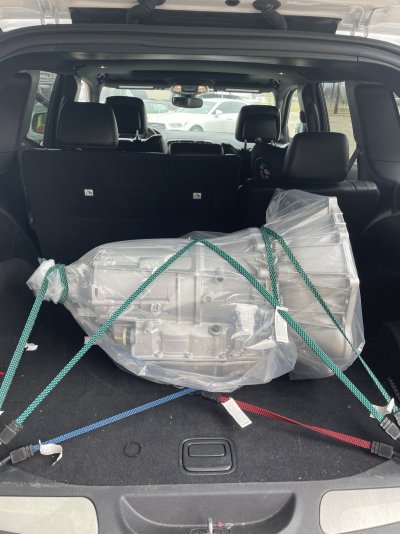
In addition, the transmission rebuild is complete (in about half the time that I was quoted by CircleD no less!), and I drove down to Houston to pick it up.
IMG_4575.jpg

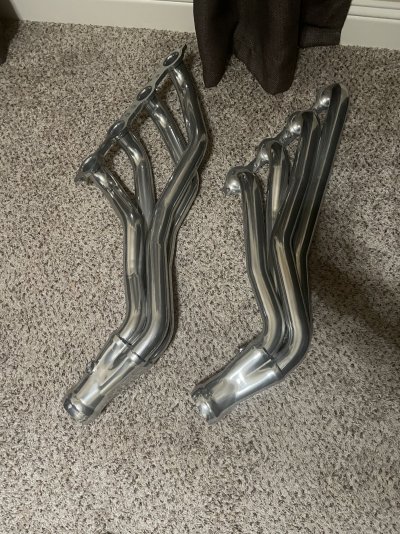
My new torque converter took about a week longer than the transmission, but it was finally finished late last week, and CircleD shipped it to me free, and overnight. I have a friend coming over later this week to help me, and I am hoping to have the engine and transmission bolted back in the car. I also had my headers ceramic coated, and picked them up a coupe of days ago:
IMG_4593.jpg
We'll see how it goes, but right now the plan is to get the engine in the bay, and a few inches up off the mounts, install the headers, and then lower the engine the last few inches. I'm told that having it up a few inches will make installing the headers significantly easier.
 

Forum statistics

Threads
132,296
Posts
1,865,518
Members
96,880
Latest member
jvanwanz
Top