Engine Swap to stroked 6.0 (408) and general vehicle refurbishment

Disclaimer: Links on this page pointing to Amazon, eBay and other sites may include affiliate code. If you click them and make a purchase, we may earn a small commission.

iamdub

Full Access Member
Joined
Apr 23, 2016
Posts
20,821
Reaction score
44,955
Location
Li'l Weezyana
Well, I made the 260ish mile drive down to Houston to Circle D, and dropped off my 6L80E, and after talking to Glen there for a while, I'm glad that I did. The only downside is that he says they are possibly as much as three months out to get it rebuilt, so it looks like I'm going to be waiting for a while. I do have some other small jobs to tackle on the Tahoe while I wait, so I'll continue to post here while I do those, but I think it's going to be a while before I have much of consequence to say. While I was in Houston I also made it into Circle D Specialties (they do torque converters, not to be confused with Circle D transmissions) and ordered a new Pro Series 300mm torque converter with a 2600 stall. I think that will pair well with the cam based on the recommendation of Texas Speed. Glen also recommended a tuner in the Fort Worth area, and when I got home and looked them up, it turns out that they are in the same small town west of Fort Worth that I live in, and only a few miles away from me. So it looks like I have found my tuner.

Awesome turn of events. I'm very much pleased with my Circle D converter. With their reputation, I'd certainly follow their lead on a tuner. It's icing on the cake that it's someone local to you.
 

iamdub

Full Access Member
Joined
Apr 23, 2016
Posts
20,821
Reaction score
44,955
Location
Li'l Weezyana
I think it is definately a job where there is just no way around the fact that you MUST have the correct tools or it will simply not work.

Oh, it'll likely work. It just won't last and it'll audibly let you know just how much it's not lasting. lol
 

THarber

Full Access Member
Joined
Jun 4, 2021
Posts
307
Reaction score
278
That bracket is to protect the fuel line like others have said. I think you might want to up the stall speed a bit. Depending on gear and tire you might not get much out of the 2600.
 
OP
OP
Chooko

Chooko

Full Access Member
Joined
Feb 24, 2013
Posts
102
Reaction score
206
Location
The Great State of Texas
Well folks, big news - the 5.3 is out of the Tahoe!

I've spent quite a bit of time over the last several days pulling connectors, unbolting accessories, labeling things, and cataloging them. I've put every fastener I've removed into labeled zip-lock bags and have a computer spreadsheet of every fastener, bracket, connector, hose, etc that I've touched. My plan is to create a checklist or job-guide to ensure that I put everything back, and try to get everything in the correct order to avoid the two steps forward - one step back issues that usually follow (at least for me) when i try to put something back together from memory.

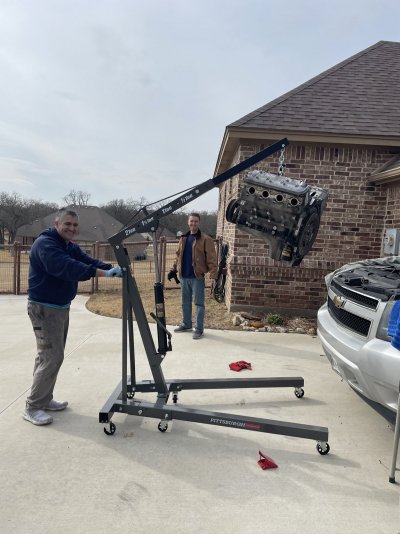
Anyway, today one of my USMC buddies stopped by for a few hours. The only things left to do today were to remove a few miscellaneous hoses and connectors, get the power steering pump and ac compressor and associated brackets clear of the engine, and then unbolt the mounts. We got everything done until there was just one bolt remaining in each mount, and then pushed the Tahoe far enough outside so that the garage ceiling wouldn't interfere with the hoist. She came right out, easy as could be. Amazingly, we did not miss a single wire or hose, and so it was just a matter of my buddy and I holding some harnesses and hoses clear while my wife worked the hoist. The trick of spinning the engine worked like a charm. We rotated the front of the engine to the passenger side, and it went very smoothly. I didn't get pictures until it was out unfortunately, but here it is:
IMG_4417.jpg

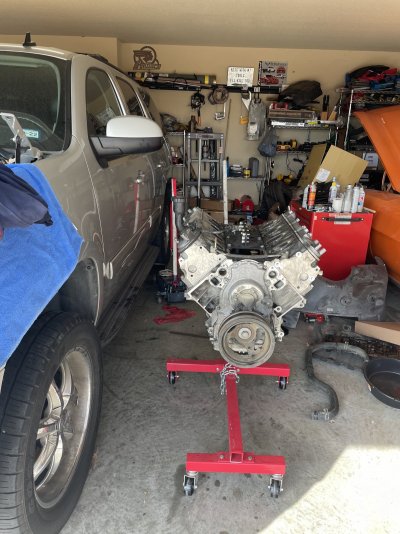
After that we pushed the Tahoe back in, transferred the engine to my engine stand, and got everything back in the garage.
IMG_4421.jpg

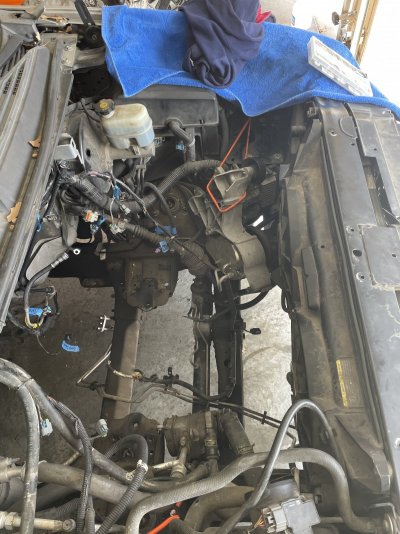
I am going to spend some time while I wait for the new engine and rebuilt transmission, cleaning the engine compartment, and re-looming some or all of the wiring harness. Here is the empty engine bay:

IMG_4422.jpg

Looking forward, I am thinking that if I were to jack the back end of the truck up as high as my ceiling would allow, I MIGHT be able to slide the engine and transmission in as one unit. I could also push the Tahoe fully outdoors for that operation to get the rear end even higher. Has anyone tried doing it that way?
 

iamdub

Full Access Member
Joined
Apr 23, 2016
Posts
20,821
Reaction score
44,955
Location
Li'l Weezyana
Well folks, big news - the 5.3 is out of the Tahoe!

I've spent quite a bit of time over the last several days pulling connectors, unbolting accessories, labeling things, and cataloging them. I've put every fastener I've removed into labeled zip-lock bags and have a computer spreadsheet of every fastener, bracket, connector, hose, etc that I've touched. My plan is to create a checklist or job-guide to ensure that I put everything back, and try to get everything in the correct order to avoid the two steps forward - one step back issues that usually follow (at least for me) when i try to put something back together from memory.

Anyway, today one of my USMC buddies stopped by for a few hours. The only things left to do today were to remove a few miscellaneous hoses and connectors, get the power steering pump and ac compressor and associated brackets clear of the engine, and then unbolt the mounts. We got everything done until there was just one bolt remaining in each mount, and then pushed the Tahoe far enough outside so that the garage ceiling wouldn't interfere with the hoist. She came right out, easy as could be. Amazingly, we did not miss a single wire or hose, and so it was just a matter of my buddy and I holding some harnesses and hoses clear while my wife worked the hoist. The trick of spinning the engine worked like a charm. We rotated the front of the engine to the passenger side, and it went very smoothly. I didn't get pictures until it was out unfortunately, but here it is:
View attachment 361720

After that we pushed the Tahoe back in, transferred the engine to my engine stand, and got everything back in the garage.
View attachment 361721

I am going to spend some time while I wait for the new engine and rebuilt transmission, cleaning the engine compartment, and re-looming some or all of the wiring harness. Here is the empty engine bay:

View attachment 361722

Looking forward, I am thinking that if I were to jack the back end of the truck up as high as my ceiling would allow, I MIGHT be able to slide the engine and transmission in as one unit. I could also push the Tahoe fully outdoors for that operation to get the rear end even higher. Has anyone tried doing it that way?

Good job! Your engine bay, with the accessories bungee'd to the sides and blue tape everywhere, looks very familiar. ;) But you squeezed it out with the fans in place. I didn't know that was possible.

I've never R/R'ed a trans in one of these, but I'm almost inclined to say that it would be more work to install them together rather than the trans separately from underneath. I mean, you have to rotate the engine sideways to barely get it out by itself. This won't be an option with a trans bolted to it.
 
OP
OP
Chooko

Chooko

Full Access Member
Joined
Feb 24, 2013
Posts
102
Reaction score
206
Location
The Great State of Texas
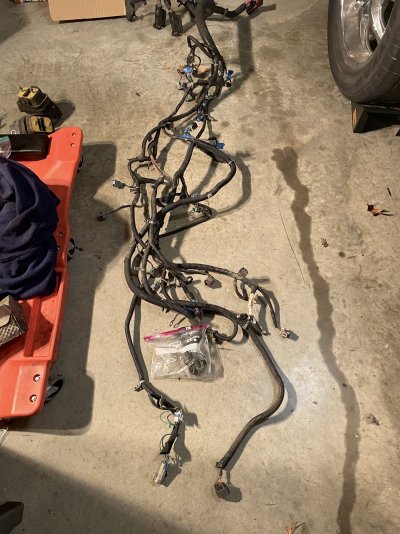
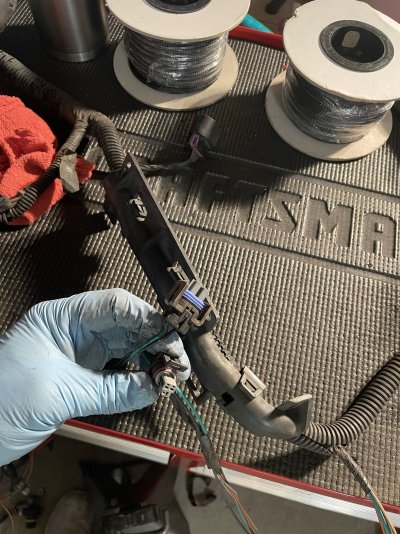
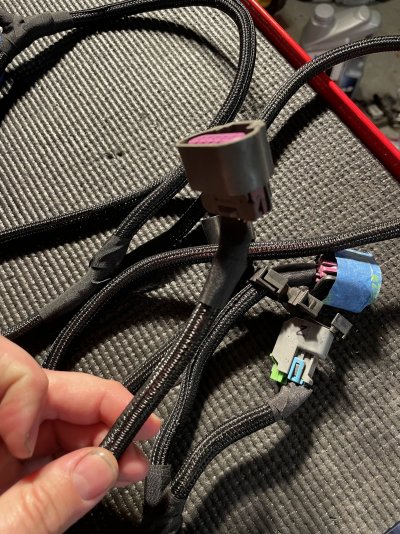
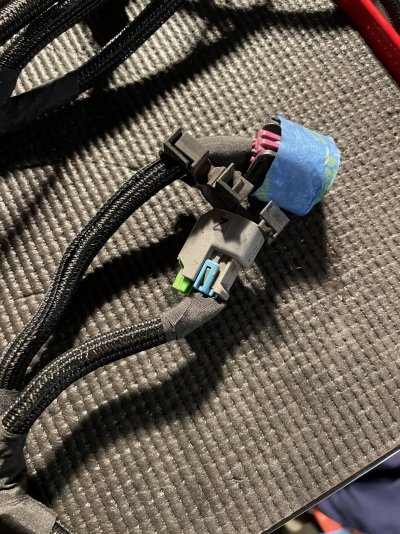
I've been looking for little projects to keep myself busy while I wait on my engine and transmission. One thing that I noticed is that the factory looming on my engine wiring harness was looking pretty rough. It was brittle in places, and sections were completely missing in other places. In fact I had a couple of spots where the plastic was completely missing for several inches. I decided to pull the harness out of the vehicle (which I hope that I don't come to regret when I put it back together) and redo the loom on the entire harness. I am using Tessa cloth tape, and split PET loom. I ordered several different sizes of the loom material to try to keep things as clean as possible as the harness thickness changes as it branches out. My pictures are not great, but here are a couple of before shots:
IMG_4456.jpgIMG_4457.jpg
And here are a couple of after shots:
IMG_4467.jpgIMG_4466.jpg

This has been pretty smooth, and kind of enjoyable to do, so now I am considering doing other harnesses in the vehicle, such as the wiring to the headlights, etc.
I also just bought a significant amount of Kilmat, Boom Mat spray, and associated items for sound deadening, and I guess once the looming is complete I am going to move on to pulling out the interior to install my new stereo and backup camera, and sound treat the full interior.
 

skpyle

Full Access Member
Joined
May 15, 2021
Posts
417
Reaction score
1,098
That loom work is beautiful! Is the woven loom the 'split PET loom' you referred to? The engine bay of my Escalade is lousy with brittle and degraded cable looms. I like your idea! Please elaborate on the materials you are using.

Thanks!
 
OP
OP
Chooko

Chooko

Full Access Member
Joined
Feb 24, 2013
Posts
102
Reaction score
206
Location
The Great State of Texas
That loom work is beautiful! Is the woven loom the 'split PET loom' you referred to? The engine bay of my Escalade is lousy with brittle and degraded cable looms. I like your idea! Please elaborate on the materials you are using.

Thanks!
Seth - The stuff I am using is this:


I bought it in several sizes, 1/4, 3/8, 1/2, 3/4, and 1 inch. I think I also got some 1.25 inch. I probably didn't need all of those sizes, but this is the first time I'm doing this and so I'm figuring it out as I go. I'll try to post up which sizes I actually used once I am complete. The tape is this:


For puting it all back together I also bought these:


There are two more styles of specialized zip ties that were on the harness that I am still trying to find. If I do find them I'll let you know where.
 

Forum statistics

Threads
133,190
Posts
1,881,275
Members
98,213
Latest member
mcguire7

Latest posts

Top