LordWayback
Full Access Member
- Joined
- Jun 23, 2022
- Posts
- 556
- Reaction score
- 436
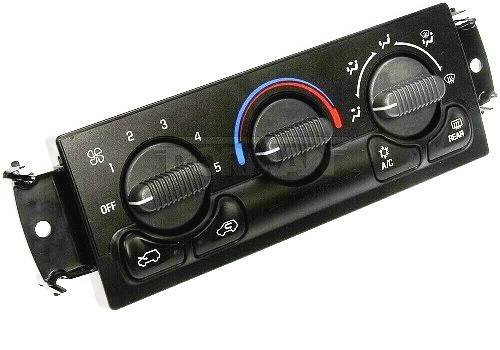
Foreword: precision repair if not done correctly it’ll be broken but if the panel is already broken it doesn’t hurt when you were going to replace it.
I figured out how to fix one of the biggest problems at least temporarily if not permanently! Required tools and Materials
1. Precision needle nose pliers
2. 8mm?
3. Very very tiny flat head
4. Q tips name brand or not doesn’t matter
5. High percentage rubbing alcohol
Step 1: Remove from vehicle
Step 2: remove all screws from the back and the blower motor potentiometer that goes all the way through the back
Step 3:remove all of the potentiometer caps (the plastic switch things that go on the outside)
Step 4: lift the black cover gently and set like this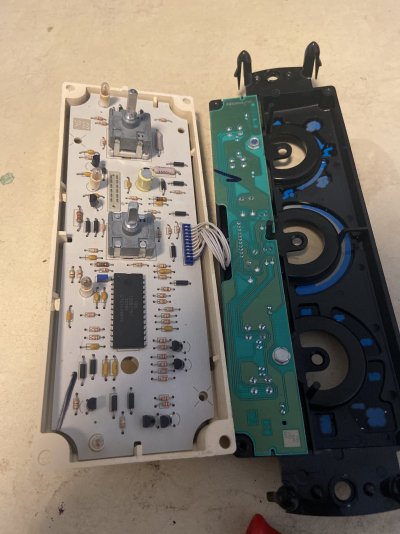
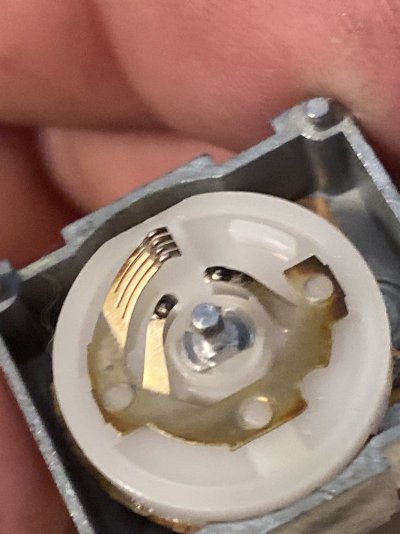
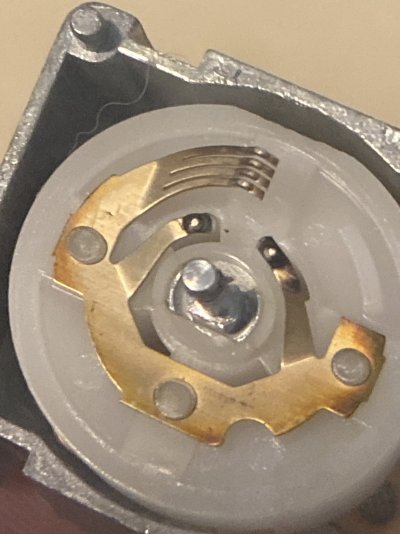
Step 5: pry the metal tabs up on the broken potentiometer and PULL ON THE METAL NOT THE PLASTIC
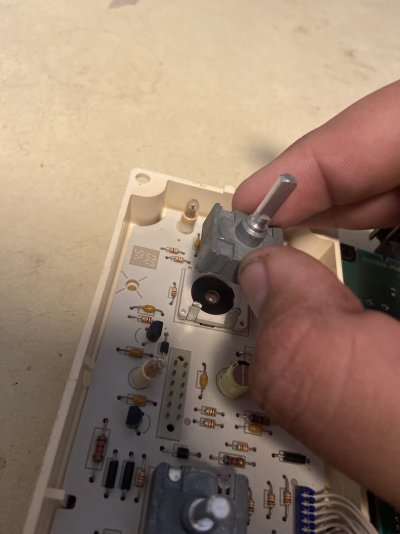
Clean the black pad and the golden points on the bottom of the switch with rubbing alcohol and q tips and then repeat the steps in reverse until it’s connected and test it if that doesn’t work you most likely need to junk the HVAC panel because it’s a issue with a diode that needs special attention that’s not worth your time without the skill to do so.
I figured out how to fix one of the biggest problems at least temporarily if not permanently! Required tools and Materials
1. Precision needle nose pliers
2. 8mm?
3. Very very tiny flat head
4. Q tips name brand or not doesn’t matter
5. High percentage rubbing alcohol
Step 1: Remove from vehicle
Step 2: remove all screws from the back and the blower motor potentiometer that goes all the way through the back
Step 3:remove all of the potentiometer caps (the plastic switch things that go on the outside)
Step 4: lift the black cover gently and set like this

Step 5: pry the metal tabs up on the broken potentiometer and PULL ON THE METAL NOT THE PLASTIC

Clean the black pad and the golden points on the bottom of the switch with rubbing alcohol and q tips and then repeat the steps in reverse until it’s connected and test it if that doesn’t work you most likely need to junk the HVAC panel because it’s a issue with a diode that needs special attention that’s not worth your time without the skill to do so.

