My LED Lighting Project (2009 Yukon XL)

Disclaimer: Links on this page pointing to Amazon, eBay and other sites may include affiliate code. If you click them and make a purchase, we may earn a small commission.

OP
OP
agupta3224

agupta3224

Member
Joined
Sep 4, 2016
Posts
34
Reaction score
10
Nice write up!! Your doing the same exact project I'm doing as well. So far I've just added puddle lights and footwell lights. The Opt 7 footwell led kit I highly suggest looking into. For my puddle lights I just tapped into the dome lights down under the dash so the lights gradually dim out same as the dome lights and keeps the install simple.
puddle.jpg


Thank you.

Your SUV looks really nice. I am actually trying to keep it more functional (wife likes it better with just simple white LEDs and I am trying not to sleep on the couch :) ).

How did you run the wire from the inside to outside?
 
OP
OP
agupta3224

agupta3224

Member
Joined
Sep 4, 2016
Posts
34
Reaction score
10
Alright. I have finally finished the project. Pictures are attached. Let me know what you guys think. I am not going to upload any of the LED Interior Lighting unless someone requests.

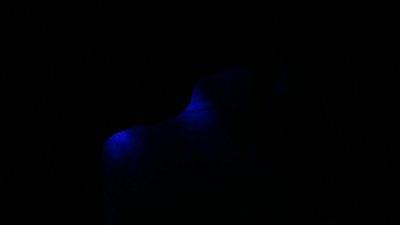
This is the footwell accent lighting. In this pic the light is about 75% brightness. But I keep it reduced to about 10.
Accent Foot.jpg

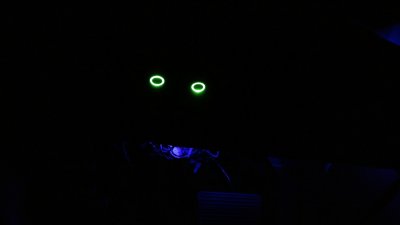
These are the mirror switches. I opted to go for two momentary switches rather than one for two reasons. 1. I am more comfortable drilling round holes and 2. I wanted them top be lighted.
Mirror Switch.jpg

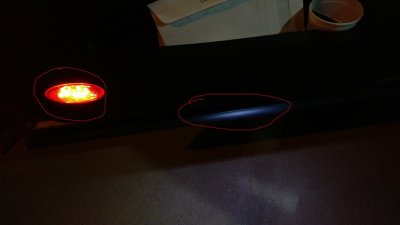
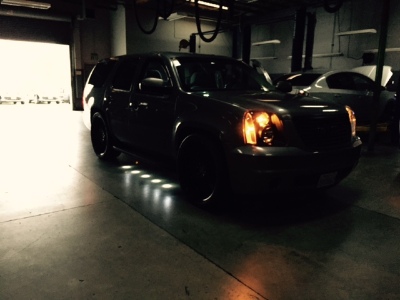
Here are the additions to the door. I added Lights under all four doors and just for fun also added lights in the red marker in the front door.
Door and Marker.jpg

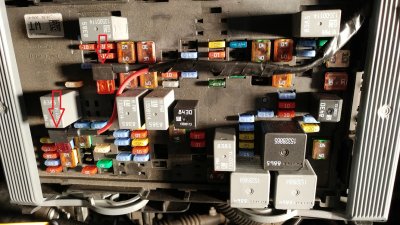
Here is the major departure from my original plan. Originally the outside lighting was to be tied to the dome circuit. Since the dome circuit builds power slowly and dims out, I was getting noises from the relays. So rather than tying it to dome lighting I tied it to the Exit and Approach lighting. Simple fact, parking lamps are powered for 20 to 30 seconds on unlocking. So I tied the under board lighting to that (Left Arrow, Fuse 26 Right Parking). To keep the under lighting from coming in during normal operations, I tapped in to Fuse 43 (Right Arrow) to keep the relay open when the Ignition is on. All wires run from the front to underneath thru the outside. No need to tap or drill thru the body.
Outer Fuse Box.jpg

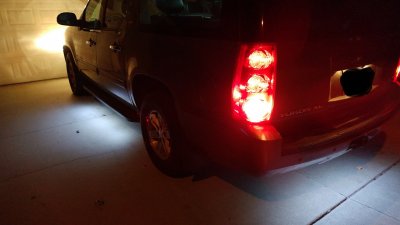
Here you can see the result of the lighting Left and Rear. A side not is this. The rear bumper lighting is an independent run all the way to the engine compartment at is attached to 5 amp fuse. We do go to the lake some times and the truck does get submerged. Hopefully it will only that 5 amp fuse if it shorts. But these lights are packed with silicone and I am not expecting any shorts. (Fingers Crossed)
Side Left and Rear.jpg

So that is the end of the project for now.

Once I put everything together and was taking pictures, I realized that the Glove Compartment has no light. Seriously, no light on a 50K truck. Anyways, I will see if I can add one easily.

I really would like some input of what your ideas are. I do thrive on criticism.
 

yugrus

Member
Joined
Aug 8, 2014
Posts
62
Reaction score
16
Great job, nice project, thank you for the write-up!
There are some drawbacks with this wiring solution. You don't get puddle lights on approach with remote start and while exiting with engine running. However, the idea of keeping all the wiring on the outside is tempting.
I calculated some time ago that if you change all interior lights to LEDs, the spare capacity should be enough for BCM's dimmer to handle outside LEDs as well. At least I remember I did. Will check again soon...
 
OP
OP
agupta3224

agupta3224

Member
Joined
Sep 4, 2016
Posts
34
Reaction score
10
Great job, nice project, thank you for the write-up!
There are some drawbacks with this wiring solution. You don't get puddle lights on approach with remote start and while exiting with engine running. However, the idea of keeping all the wiring on the outside is tempting.
I calculated some time ago that if you change all interior lights to LEDs, the spare capacity should be enough for BCM's dimmer to handle outside LEDs as well. At least I remember I did. Will check again soon...

Thanks for the complement. The DL3 mirrors I bought were from A GMC Sierra. They had no puddle light connection. I racked my brain looking for the Orange/White Striped wire on Pin 3 on the white connector and there was none. So the approach is with remote start is a problem but since the door has lights underneath the exit is not a problem.

I am sure with the LED on the inside there is enough Amps left to power the outside.

You have given me something to think about. Perhaps I can add a wire to pin three and add puddles on the mirror for that purpose. Or may be I can figure out the Remote Start System and see if there is a way to wire thru there.

THanks again.
 
OP
OP
agupta3224

agupta3224

Member
Joined
Sep 4, 2016
Posts
34
Reaction score
10
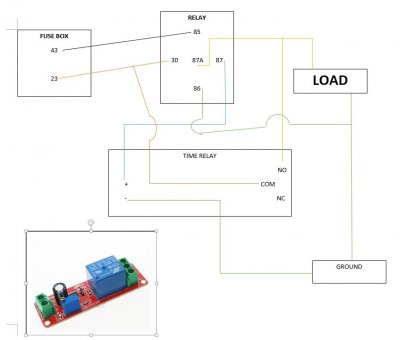
Hello again. I think I have now resolved the issue that @yugrus mentioned. With remote start there is no puddle lighting. Take a look at the circuit I installed. This is giving me about 7 seconds of Running Board Lighting with Remote Start. I am going to order a better Timer Relay so I can adjust the time to about 20 seconds or so.

Drawbacks:
1. Still no Running Board Lighting with the Engine On and Door Opne. (Already resolved with the installed door lights.
2. The Running Board Lights will come on for about 7 seconds (or maybe 20 or 30 seconds) once the key is moved to II position. (I am ok with that since the car is on, and also will be courteous to passengers).

Once again your criticism is welcome.

I tried my best to make the picture explainatory, but if you have questions just ask. Also it shows the timer relay I am using. Had it sitting in the house, cost around $5. The new one I am looking at is around $10 or so.

Remote Start Circuit Diagram.JPG
 

yugrus

Member
Joined
Aug 8, 2014
Posts
62
Reaction score
16
Then again, you can use the same timer instead of the relay that was connected to the dimmer in your original desingn. To delay the relay activation till after the dome lights are fully lit. This way no relay buzzing and full replication of the interior lighting functionality at running boards, but involves interior-to-exterior wiring...
 
OP
OP
agupta3224

agupta3224

Member
Joined
Sep 4, 2016
Posts
34
Reaction score
10
Then again, you can use the same timer instead of the relay that was connected to the dimmer in your original desingn. To delay the relay activation till after the dome lights are fully lit. This way no relay buzzing and full replication of the interior lighting functionality at running boards, but involves interior-to-exterior wiring...

Nice thought. I did not try that, first I did not think of it and it would still require inside outside wiring. May be one day I will give it a try. Right now I am just glad it is done. I do really appreciate your insights.
 

Ob1hybrid

Full Access Member
Joined
Nov 26, 2016
Posts
121
Reaction score
17
Alright. I have finally finished the project. Pictures are attached. Let me know what you guys think. I am not going to upload any of the LED Interior Lighting unless someone requests.

This is the footwell accent lighting. In this pic the light is about 75% brightness. But I keep it reduced to about 10.
View attachment 71575

These are the mirror switches. I opted to go for two momentary switches rather than one for two reasons. 1. I am more comfortable drilling round holes and 2. I wanted them top be lighted.
View attachment 71577

Here are the additions to the door. I added Lights under all four doors and just for fun also added lights in the red marker in the front door.
View attachment 71579

Here is the major departure from my original plan. Originally the outside lighting was to be tied to the dome circuit. Since the dome circuit builds power slowly and dims out, I was getting noises from the relays. So rather than tying it to dome lighting I tied it to the Exit and Approach lighting. Simple fact, parking lamps are powered for 20 to 30 seconds on unlocking. So I tied the under board lighting to that (Left Arrow, Fuse 26 Right Parking). To keep the under lighting from coming in during normal operations, I tapped in to Fuse 43 (Right Arrow) to keep the relay open when the Ignition is on. All wires run from the front to underneath thru the outside. No need to tap or drill thru the body.
View attachment 71580

Here you can see the result of the lighting Left and Rear. A side not is this. The rear bumper lighting is an independent run all the way to the engine compartment at is attached to 5 amp fuse. We do go to the lake some times and the truck does get submerged. Hopefully it will only that 5 amp fuse if it shorts. But these lights are packed with silicone and I am not expecting any shorts. (Fingers Crossed)
View attachment 71581

So that is the end of the project for now.

Once I put everything together and was taking pictures, I realized that the Glove Compartment has no light. Seriously, no light on a 50K truck. Anyways, I will see if I can add one easily.

I really would like some input of what your ideas are. I do thrive on criticism.


This looks really cool. I was searching for info on changing out ALL interior and exterior bulbs to led white. Then I saw this. Love it. Love the look. Why GMC won't make it standard is beyond me. Anyhow , keep up the good work and please post as much info as possible on your build, including what you would have done different. It always happen that way lol.
 
OP
OP
agupta3224

agupta3224

Member
Joined
Sep 4, 2016
Posts
34
Reaction score
10
How did you install the lighting underneath your running boards, etc?

That was supposed to be my secret. :).
I just came back from a long drive. Took the family out. To me the effects looked amazing. I will post the pictures soon, within a day or two, just to make sure it shows how I put it together.
Besides I am really tired right now :)
 

Forum statistics

Threads
132,381
Posts
1,867,096
Members
97,017
Latest member
97ext
Top