Idiots put tint on (and it was a terrible job) even though it’s already privacy glass. You can see what’s happening to the defroster grid as I started pulling the tint off. I mean, it had one broken and missing defroster tab which to me doesn’t give it an A grade to start with but when you combine that with a shit tint job that destroys the entire grid as it’s removed...reminds me of the console fiasco for my Silverado which after 2 consoles they just gave the last one to me and refunded all my money.Hard to tell from the pics--Was it scratched up?
You are using an out of date browser. It may not display this or other websites correctly.
You should upgrade or use an alternative browser.
You should upgrade or use an alternative browser.
Rocket Man's 02 Denali Build Thread AKA "THE BEAST"
- Thread starter Rocket Man
- Start date
Disclaimer: Links on this page pointing to Amazon, eBay and other sites may include affiliate code. If you click them and make a purchase, we may earn a small commission.
Dantheman1540
Full Access Member
Idiots put tint on (and it was a terrible job) even though it’s already privacy glass. You can see what’s happening to the defroster grid as I started pulling the tint off. I mean, it had one broken and missing defroster tab which to me doesn’t give it an A grade to start with but when you combine that with a shit tint job that destroys the entire grid as it’s removed...reminds me of the console fiasco for my Silverado which after 2 consoles they just gave the last one to me and refunded all my money.
Sounds like that same experience I had with HD grill and bumper caps. I still have a brand new HD bumper cap in the box they sent me an extra for my trouble.
Their profit margin must be ridiculous for them to be able to make money with that type of service.
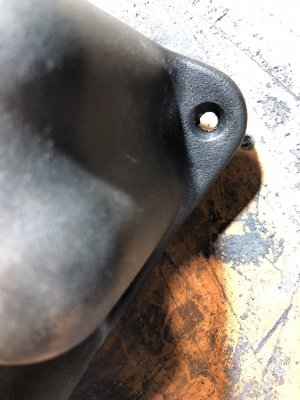
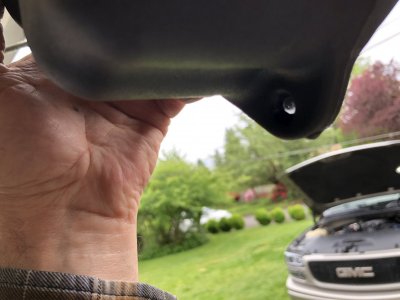
I found the leak in the intercooler reservoir just by adding some denatured to the tank and holding it up. It’s dripping from the seam at a mounting hole. I thought that’s where I saw it coming from when it was in the truck. Bummer. It’s in a bad spot. I can’t see in there, can’t shine a light in there even. My only shot is to try the Fusor using a new mixing tip that almost reaches that place from the fill hole and hope it flows enough that gravity will let it fill in that bottom area if the tank. I’m not feeling too confident though. I don’t think it can be fixed from outside. I’ll give it a shot and if the Fusor doesn’t work I’ll order the kit from Whipple.


Ok, I used the last of my Fusor. I swished the interior with denatured and drained it twice, then used a heat gun to dry the hell out of it on the inside and outside, then shot the Fusor down into that area while that corner of the tank was pointed down. Then quickly I heated the interior and exterior in that area hoping to make it flow better then swung the tank like a crazy man hoping centrifugal force would help, then put the cap on and plugged one hole and blew in the other as hard as I could... all in the course of a minute and a half or so which is the working time of the Fusor. I feel like a nut. I can’t even see if the stuff went down into the right place to fix it. I’ll let it sit for the rest if the day even though it hardens enough to sand in 10 minutes.
05Single
afraid of the dark
- Joined
- Feb 26, 2015
- Posts
- 8,186
- Reaction score
- 11,456
Why did you add Flex Tape? Fusor doesn’t need that. I used their 142 Plastic Repair on my custom cluster bezel for structural and their 114LG Finishing for feathering. And I have bent and twisted that with no cracking or separation. The stuff is awesome.
View attachment 247102 View attachment 247103 View attachment 247104
Honestly it’s my first time using it so I wasn’t sure. A lot of stress/ bouncing/ vibrations in that spot all while holding the fog light horizontally on the valance. The tape gave a cushion to make it snug in the hole. Anyway I usually over engineer things , it’s in my nature lol. No harm in that

Looks like the Fusor hit the right spot. It doesn’t leak using the nonpressurized test. I cleaned the tank out and mounted it so tomorrow I’ll fill it up and pressurize the system. Fingers crossed.
05Single
afraid of the dark
- Joined
- Feb 26, 2015
- Posts
- 8,186
- Reaction score
- 11,456
That’s how it’s done. Cheap and easy fixLooks like the Fusor hit the right spot. It doesn’t leak using the nonpressurized test. I cleaned the tank out and mounted it so tomorrow I’ll fill it up and pressurize the system. Fingers crossed.

PG01
Supporting Member
Except for reds torn rotator cuff now...That’s how it’s done. Cheap and easy fix
adventurenali92
Full Access Member
Curious to know why the switch to the 2005 hatch? Hinges spreading from the glass on yours? Sucks that you gotta send it back. Lame that it was screwed up.

I think it’s a cleaner look with no surround at the sides and bottom. Mines fine except I can’t seem to find the break in the defroster grid that’s keeping the top 1/3 from working. I don’t care for the Esky one with the huge 3rd brake light and this one you don’t see very much. It’s the one with the wide appliqué at the top that was on only some of the 05-06’s. It’s this one, pic is @JollyRoger01Curious to know why the switch to the 2005 hatch? Hinges spreading from the glass on yours? Sucks that you gotta send it back. Lame that it was screwed up.
Last edited:
Similar threads
- Replies
- 38
- Views
- 2K
