What did you do to your NBS GMT800 Tahoe/Yukon Today?

Disclaimer: Links on this page pointing to Amazon, eBay and other sites may include affiliate code. If you click them and make a purchase, we may earn a small commission.

BigDaddy13440

Full Access Member
Joined
Aug 20, 2009
Posts
942
Reaction score
558
Location
Rome, NY
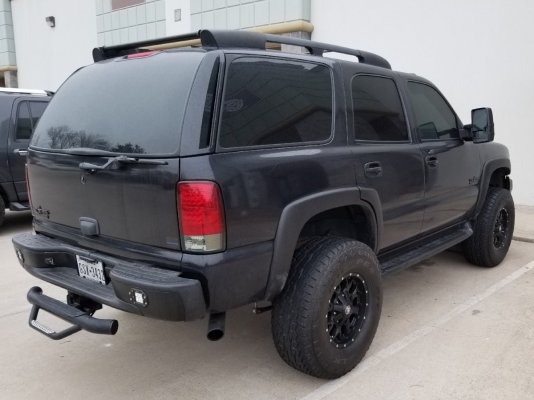
Time for a change... I like the bare guts style. It’s a stage one weight reduction lmao. It’s time to change out all the tan interior for black!!! But it’s a 14 yr old tahoe. Yeah but it’s a 14 yr old tahoe with 11inches of lift on 37’s that has never left me stranded or let me down. I love this damn thing! **** yeah she deserves it! Black carpet, black leather seats, might two tone and go tan from the bottom of the windows up. But none the less my hoe deserves it! Thoughts, ideas and suggestions are, of course, more than welcome brothers!

View attachment 191425 View attachment 191426 View attachment 191427

If you're into tunes (and who isn't??), I had an epiphany last night, woke up out of a sound sleep!

Since your spare tire obviously doesn't fit under the truck any more (if you even have one), why not remove the mechanism for it, and all the other useless bracketry, and fabricate a sub box UNDER the floor?

Lay underneath it, and remove anything that isn't structural, or absolutely necessary. Then, drill a couple holes through the floor at the interior perimeter points, and play connect-the-dots from inside the truck. Cut out the center section of the floor. Then, since I know you are good at fab work, make a steel box that you can drop down inside that hole, preferably out of some heavier steel plate, maybe 1/8" thick. Since a typical spare tire is about 10-11" wide and doesn't hang down below the body, you could easily make the box that deep, or even a little more - just depends on if you want it to hang down a bit more.

Now, make some "passageways", if you want to call them that, to go from that enclosure forward, and protrude into the vertical section of floor underneath your second row of seats. Basically, you want a way for the output of the subs to enter the vehicle, without having to have them fire up in the cargo area. These "passageways" could be anything from multiple 4" round pipe, to a couple 6"x16" rectangular configuration. Whatever you wanted to fab, it's up to you.
Weld it up, make it water tight, and coat it with bedliner on the inside and out. Don't want it to rust!

Figure out how much airspace you have, and you can put whatever subs you'd like that would fit that requirement. Build a box out of MDF or plywood that will fit inside the steel box, and make some way for it to be securely fastened. If your box is tall enough, you could fit 10's (maybe even 12's) facing forward, with the output firing out underneath the rear seats. If you have enough room, you could even do 15's (or an 18!) firing upward - just make sure you have enough room for the full excursion of the sub(s). You could do a sealed enclosure, or ported - just make sure the ports have sufficient clearance. Me, I'd have the ports facing forward, towards the passageways - why not get the full output available?

Once you get everything all dialed in, cut the full back floor out of a donor vehicle, and lay it over the hole your enclosure is in. After you use some sound deadener everywhere you can, secure the floor panel with a couple dozen zip screws, and you can lay your carpet over your 100% stealth sub enclosure!

If I hadn't already built an enclosure into the rear corner of my Yukon XL, I'd be doing this in a heartbeat!

Maybe we can get one of our artistic brothers to do a quick sketch of what I'm suggesting?
 

05Single

afraid of the dark
Joined
Feb 26, 2015
Posts
8,186
Reaction score
11,456
Those rgb bulbs are cool. Except only 1 works and the other don't :( china made and only $4 lol:shrug: whatev, I'll get $2 refund lol20180125_020759.jpg 20180125_020802.jpg 20180125_020805.jpg 20180125_020812.jpg 20180125_020823.jpg

Also yes I bought a sliding glass door, won't fit the tahoe so I guess I'll put it in the house:hmm:
 
Last edited:

M1Gunner

Full Access Member
Joined
Feb 7, 2015
Posts
1,078
Reaction score
1,236
Location
Gainesville, Fl
If you're into tunes (and who isn't??), I had an epiphany last night, woke up out of a sound sleep!

Since your spare tire obviously doesn't fit under the truck any more (if you even have one), why not remove the mechanism for it, and all the other useless bracketry, and fabricate a sub box UNDER the floor?

Lay underneath it, and remove anything that isn't structural, or absolutely necessary. Then, drill a couple holes through the floor at the interior perimeter points, and play connect-the-dots from inside the truck. Cut out the center section of the floor. Then, since I know you are good at fab work, make a steel box that you can drop down inside that hole, preferably out of some heavier steel plate, maybe 1/8" thick. Since a typical spare tire is about 10-11" wide and doesn't hang down below the body, you could easily make the box that deep, or even a little more - just depends on if you want it to hang down a bit more.

Now, make some "passageways", if you want to call them that, to go from that enclosure forward, and protrude into the vertical section of floor underneath your second row of seats. Basically, you want a way for the output of the subs to enter the vehicle, without having to have them fire up in the cargo area. These "passageways" could be anything from multiple 4" round pipe, to a couple 6"x16" rectangular configuration. Whatever you wanted to fab, it's up to you.
Weld it up, make it water tight, and coat it with bedliner on the inside and out. Don't want it to rust!

Figure out how much airspace you have, and you can put whatever subs you'd like that would fit that requirement. Build a box out of MDF or plywood that will fit inside the steel box, and make some way for it to be securely fastened. If your box is tall enough, you could fit 10's (maybe even 12's) facing forward, with the output firing out underneath the rear seats. If you have enough room, you could even do 15's (or an 18!) firing upward - just make sure you have enough room for the full excursion of the sub(s). You could do a sealed enclosure, or ported - just make sure the ports have sufficient clearance. Me, I'd have the ports facing forward, towards the passageways - why not get the full output available?

Once you get everything all dialed in, cut the full back floor out of a donor vehicle, and lay it over the hole your enclosure is in. After you use some sound deadener everywhere you can, secure the floor panel with a couple dozen zip screws, and you can lay your carpet over your 100% stealth sub enclosure!

If I hadn't already built an enclosure into the rear corner of my Yukon XL, I'd be doing this in a heartbeat!

Maybe we can get one of our artistic brothers to do a quick sketch of what I'm suggesting?
That is quite the idea and project. This just came to you while you were sleeping?! lol doe it help that I also have a 3in body lift already installed as well. So any obstacles underneath the body are already 3inches out of the way!
 

Austinite

Full Access Member
Joined
Dec 31, 2015
Posts
300
Reaction score
655
Location
Austin, Tx
I did a few things this week to the old girl:

Rebuilt Front End - ie all new upper & lower control arms, ball joints, inner & outer tie rods, etc...(still have to replace pitman & idler arms when I get time)
3" Lift Spindles up front
3" Lift Spacers and 2" Hub Centric Wheel Spacers in rear
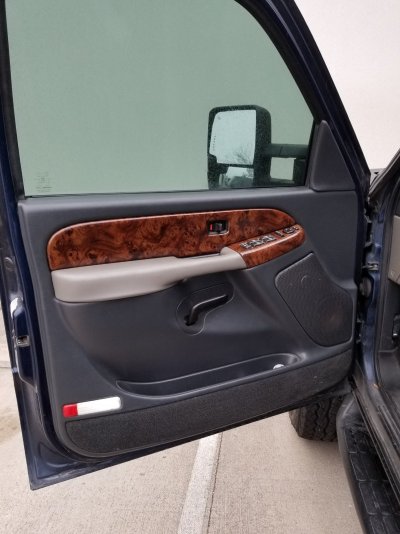
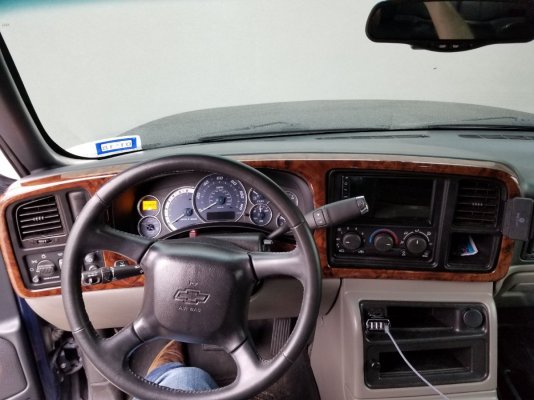
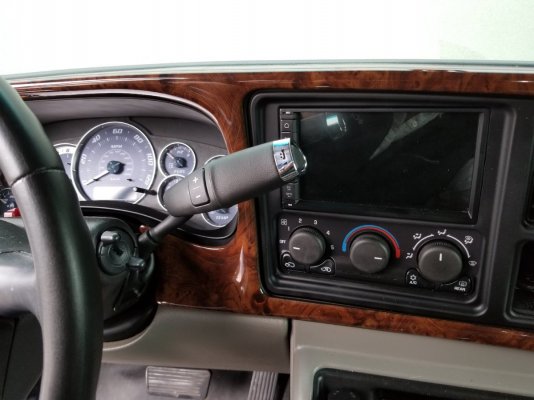
3D Molded Wood Dash Kit
02 Escalade Knobs
08-14 shifter swap
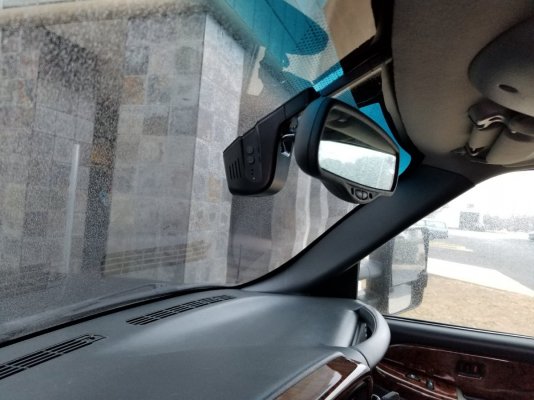
Dash Cam
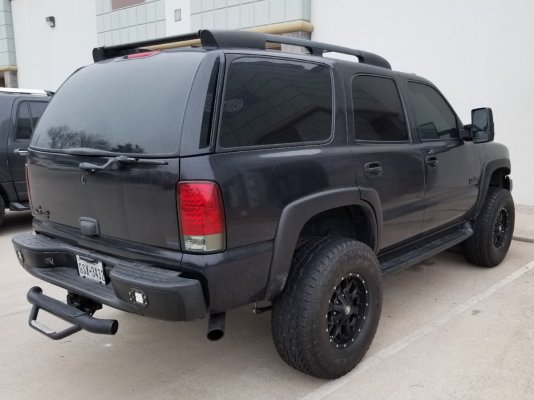
3d_woodgrain_molded_dash.jpg
03_escalade_ac_knobs_08_gm_shifter_swap.jpg
driver_side_front_door_3d_woodgrain_kit.jpg
dash_cam.jpg
tric_rear_wheel_spacers_3_inch_front_lift_spindles.jpg
 

Tonyrodz

Resident Resident
Joined
Feb 16, 2012
Posts
31,604
Reaction score
47,097
Location
Central Jersey
I did a few things this week to the old girl:

Rebuilt Front End - ie all new upper & lower control arms, ball joints, inner & outer tie rods, etc...(still have to replace pitman & idler arms when I get time)
3" Lift Spindles up front
3" Lift Spacers and 2" Hub Centric Wheel Spacers in rear
3D Molded Wood Dash Kit
02 Escalade Knobs
08-14 shifter swap
Dash Cam
3d_woodgrain_molded_dash.jpg
03_escalade_ac_knobs_08_gm_shifter_swap.jpg
driver_side_front_door_3d_woodgrain_kit.jpg
dash_cam.jpg
tric_rear_wheel_spacers_3_inch_front_lift_spindles.jpg
I gotta get me one of those shifters.
 

HiHoeSilver

Away!
Joined
Feb 28, 2017
Posts
10,918
Reaction score
14,571
Location
Chicago
I did a few things this week to the old girl:

Rebuilt Front End - ie all new upper & lower control arms, ball joints, inner & outer tie rods, etc...(still have to replace pitman & idler arms when I get time)
3" Lift Spindles up front
3" Lift Spacers and 2" Hub Centric Wheel Spacers in rear
3D Molded Wood Dash Kit
02 Escalade Knobs
08-14 shifter swap
Dash Cam

3d_woodgrain_molded_dash.jpg
03_escalade_ac_knobs_08_gm_shifter_swap.jpg
driver_side_front_door_3d_woodgrain_kit.jpg
dash_cam.jpg
tric_rear_wheel_spacers_3_inch_front_lift_spindles.jpg

Lookin big, buddy. Sweet.
 

Forum statistics

Threads
132,321
Posts
1,865,944
Members
96,912
Latest member
Papaskip
Top