Rocket Man's 2008 Bagged CC Silverado Build AKA "THE MACHINE"

Disclaimer: Links on this page pointing to Amazon, eBay and other sites may include affiliate code. If you click them and make a purchase, we may earn a small commission.

OP
OP
Rocket Man

Rocket Man

Mark
Supporting Member
Joined
Dec 25, 2014
Posts
26,006
Reaction score
50,869
Location
Oregon
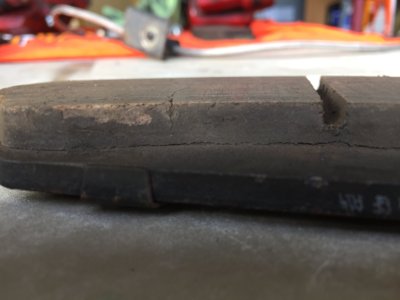
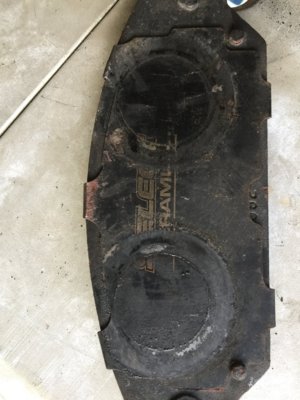
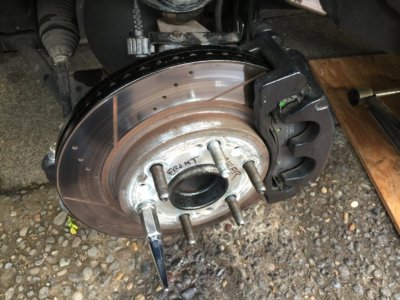
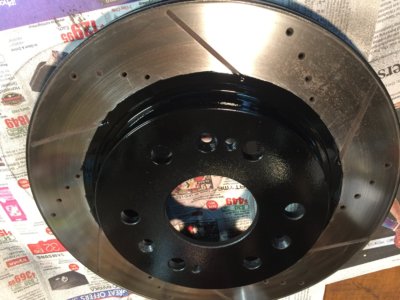
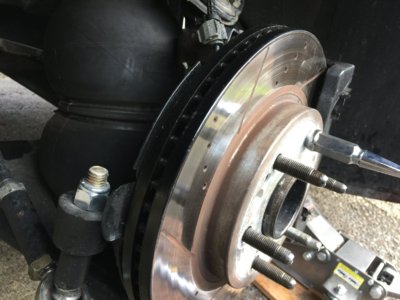
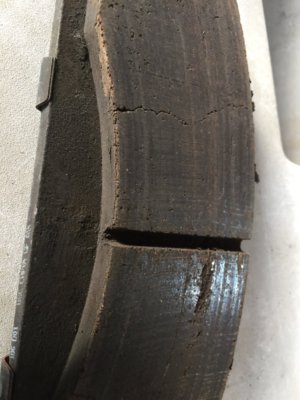
I started on the front brakes today. I was planning on replacing the rotors, calipers, pads and stainless hoses that were originally on The Beast for only a few months when I did my NNBS upgrade. But then I decided to leave the calipers on because they were already black and I have decided I want my brakes to not stand out on this truck, mainly because it has drums on the rear at this point. The ones off The Beast were red. Also, these were in great shape. I do plan on converting to discs in the rear but that will be later. So then I started to replace the stainless hoses but they were different than the Silverado's so that was out. That left me with the rotors and EBC pads. I painted the outer edges of the rotors and thought the hats were covered by the wheels so I didn't paint them. I was wrong but as it was, I only got the left side done today anyway so I'll take it apart and paint that tomorrow. But I was glad I decided to swap the pads and rotors out. The pads he had on it must have been the cheapest made; they had probably 70% left but they had some serious cracks and I have no doubt they would have fallen apart. Plus the rotors are slotted so they might dissipate heat better.
IMG_7900.JPG IMG_7902.JPG IMG_7903.JPG IMG_7906.JPG IMG_7907.JPG
 
OP
OP
Rocket Man

Rocket Man

Mark
Supporting Member
Joined
Dec 25, 2014
Posts
26,006
Reaction score
50,869
Location
Oregon
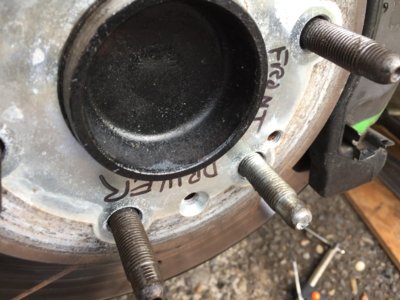
Also, I replaced 2 studs while I was at it. One was broken off halfway and one was pretty much stripped. I tried to get the first one in with my 1/2" impact but it wouldn't quite seat so I threw a few of them in the freezer for a couple hours. That did it; I was barely able to get them fully seated. It feels good to take care of that though; there was the one lug that was barely grabbing any threads so I didn't torque it much and the other felt like it was going to strip so I didn't fully torque it either. Now I can R&R that wheel without a worry and I feel safer too. Good thing too since I'll be pulling it off tomorrow.

IMG_7901.JPG
 

Tonyrodz

Resident Resident
Joined
Feb 16, 2012
Posts
31,709
Reaction score
47,439
Location
Central Jersey
Also, I replaced 2 studs while I was at it. One was broken off halfway and one was pretty much stripped. I tried to get the first one in with my 1/2" impact but it wouldn't quite seat so I threw a few of them in the freezer for a couple hours. That did it; I was barely able to get them fully seated. It feels good to take care of that though; there was the one lug that was barely grabbing any threads so I didn't torque it much and the other felt like it was going to strip so I didn't fully torque it either. Now I can R&R that wheel without a worry and I feel safer too. Good thing too since I'll be pulling it off tomorrow.

View attachment 194177
Does that make the metal contract? So it's easier?
 
OP
OP
Rocket Man

Rocket Man

Mark
Supporting Member
Joined
Dec 25, 2014
Posts
26,006
Reaction score
50,869
Location
Oregon
Does that make the metal contract? So it's easier?
Yep. I learned that trick when installing bearings on my Harleys. Either heat up the wheel or freeze the bearing and I could just tap them in with a hammer and block of wood, no bearing press needed. I found out it was easier to freeze the bearing. Same with the lugs; the tolerance was so tight that all it took was a couple of thousandths and freezing provided that. If I'd thought of it the night before and left them in overnight it would have been easier. I now have a box of wheel studs in my freezer in case I need any more today.
 

Tonyrodz

Resident Resident
Joined
Feb 16, 2012
Posts
31,709
Reaction score
47,439
Location
Central Jersey
Yep. I learned that trick when installing bearings on my Harleys. Either heat up the wheel or freeze the bearing and I could just tap them in with a hammer and block of wood, no bearing press needed. I found out it was easier to freeze the bearing. Same with the lugs; the tolerance was so tight that all it took was a couple of thousandths and freezing provided that. If I'd thought of it the night before and left them in overnight it would have been easier. I now have a box of wheel studs in my freezer in case I need any more today.
Nice.
 
OP
OP
Rocket Man

Rocket Man

Mark
Supporting Member
Joined
Dec 25, 2014
Posts
26,006
Reaction score
50,869
Location
Oregon
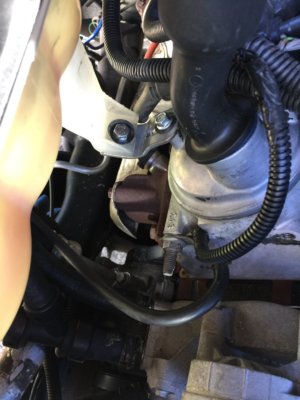
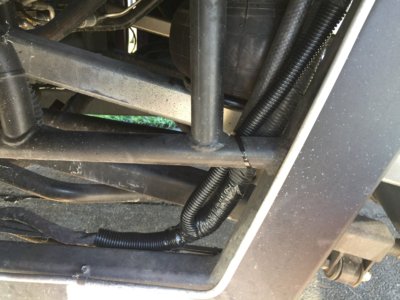
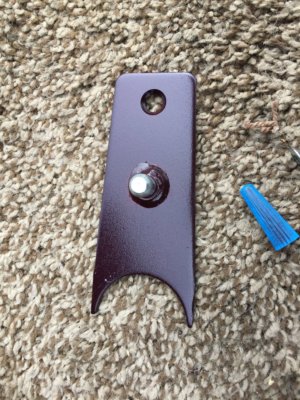
I got a couple things done today. I installed the passenger front rotor and pads and this time I painted the hat on the rotor beforehand. Next I fixed the mount for the overflow tank that someone had screwed up when they relocated the tank. There was a broken off bolt in the valve cover where they had it attached at one point. It came zip-tied in place, sort of anyway. The bracket also needed to be modified to work right and I drilled out the bolt and tapped the hole in the valve cover. It came out pretty good, nice and solid. Then the rear wheel speed sensor showed up so I installed that and painted the brake drum with black caliper paint since I'm going with black brakes. And I added some split loom where it was missing too @Galante . Then I hooked up the Tech 2 and went for a drive to see if the sensor was reading right. No such luck. Still only reads about 5 mph at 35. I came home and looked up troubleshooting on alldatadiy and decided to call it a day. I'll pull the wheel again tomorrow and get into it. And now I need to pull the driver front and passenger rear wheels to finish painting like I did on the other 2. These damn billets are wearing me out lol. Tomorrow the tailgate helper and the Depo's will be delivered also. Friday the retrofits from TRS will be delivered.

IMG_7908.JPG IMG_7909.JPG IMG_7910.JPG
 

Tonyrodz

Resident Resident
Joined
Feb 16, 2012
Posts
31,709
Reaction score
47,439
Location
Central Jersey
I got a couple things done today. I installed the passenger front rotor and pads and this time I painted the hat on the rotor beforehand. Next I fixed the mount for the overflow tank that someone had screwed up when they relocated the tank. There was a broken off bolt in the valve cover where they had it attached at one point. It came zip-tied in place, sort of anyway. The bracket also needed to be modified to work right and I drilled out the bolt and tapped the hole in the valve cover. It came out pretty good, nice and solid. Then the rear wheel speed sensor showed up so I installed that and painted the brake drum with black caliper paint since I'm going with black brakes. And I added some split loom where it was missing too @Galante . Then I hooked up the Tech 2 and went for a drive to see if the sensor was reading right. No such luck. Still only reads about 5 mph at 35. I came home and looked up troubleshooting on alldatadiy and decided to call it a day. I'll pull the wheel again tomorrow and get into it. And now I need to pull the driver front and passenger rear wheels to finish painting like I did on the other 2. These damn billets are wearing me out lol. Tomorrow the tailgate helper and the Depo's will be delivered also. Friday the retrofits from TRS will be delivered.

View attachment 194236 View attachment 194237 View attachment 194238
Watch that shoulder Red.
 
OP
OP
Rocket Man

Rocket Man

Mark
Supporting Member
Joined
Dec 25, 2014
Posts
26,006
Reaction score
50,869
Location
Oregon
I have a way to pull the wheels using my knee to lift at the center caps. Works pretty good when the tire barely clears the ground.
 
OP
OP
Rocket Man

Rocket Man

Mark
Supporting Member
Joined
Dec 25, 2014
Posts
26,006
Reaction score
50,869
Location
Oregon
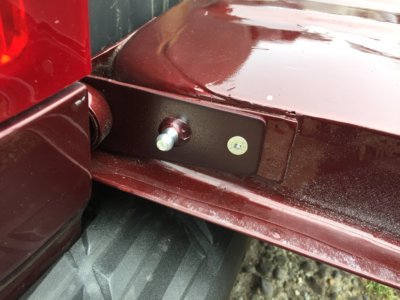
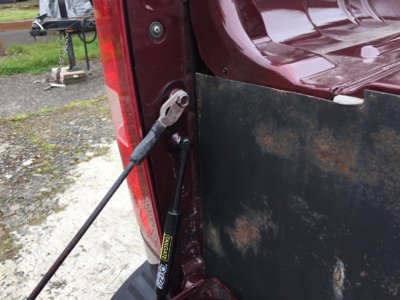
I pulled the RR and LF wheels and finished up the painting today, then pulled the LR to troubleshoot the speed sensor issue. I was trying to spin the wheel with a DVM hooked up to the sensor leads to see whether it was generating an ac signal which is pretty damn hard with the driveline connected. I decided to look up into the hole where the sensor mounts to see if I could watch the reluctor spin. I noticed it looked like it was slipping so I stuck a tool up there and could spin it without the axle moving. I tried the side that's working and couldn't do that. So it's the "electronic brake control ring" that's the problem. I looked up the replacement procedure and , just like I thought, the axle has to come out. Then USPS showed up and there was my tailgate assist so I CM'd the brackets and installed it. That little thing works great; thanks @kwOH for the heads up on that. It looks like the paint might be a touch dark but it's pretty close. It might actually be the clear I used, I'll get some other and see. It should be close enough for the headlights, which just showed up as I was typing this. They are Depo this time.

IMG_7915.JPG IMG_7916.JPG IMG_7917.JPG
 

Forum statistics

Threads
132,751
Posts
1,873,562
Members
97,577
Latest member
Jbobo15
Top