Rocket Man's 2008 Bagged CC Silverado Build AKA "THE MACHINE"

Disclaimer: Links on this page pointing to Amazon, eBay and other sites may include affiliate code. If you click them and make a purchase, we may earn a small commission.

OP
OP
Rocket Man

Rocket Man

Mark
Supporting Member
Joined
Dec 25, 2014
Posts
26,003
Reaction score
50,857
Location
Oregon
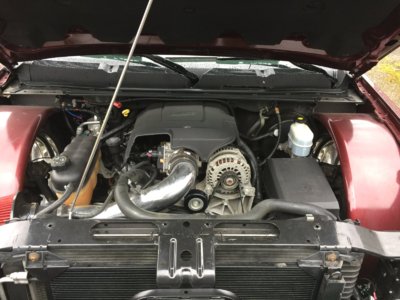
In case anyone was following another thread where some new dude was asking about his bagged POS and trying to educate me about the fact that I can install a York engine-driven air compressor for my system and I mentioned that most guys have to sacrifice their A/C compressor and that dude thought he was smart and shit and tried saying I didn't need to lose my A/C...let me set that subject straight. If you have a half-ass bag system ,you might have room but if you're tubbed for 28's like I am you won't have room. I barely have room for my relocated fusebox and overflow tank, as you can see. I have no room for any such compressor here. IMG_8116.JPG
 

PG01

Supporting Member
Joined
Nov 6, 2016
Posts
14,862
Reaction score
18,205
Location
Up here to the right
Maybe hit them with a DA sander?
I couldn't get the rotors surfaced because they're drilled and slotted. They said the lathe would catch on all that. But I decided they will be ok for now. I was running them on The Beast without an issue for months. So I painted them at least with some caliper paint.

View attachment 195625
Pads will wear into the grooves right quick.... ive used worse....lol
 

kbuskill

***CAUTION*** I do my own stunts!
Joined
Mar 11, 2017
Posts
5,306
Reaction score
8,313
Location
NE. FL.
Well, I bought 2 sets of stickers so I might try that. The instructions said to use a sharpie to color them in if they're too worn off which I didn't do but I never thought about doing that. Any pics of yours?


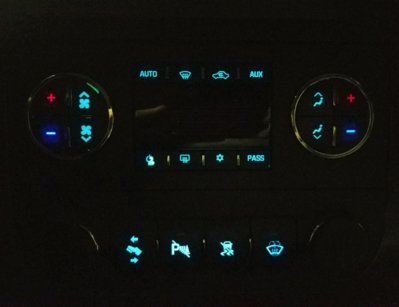
So here is a night time pic.

I wish I could remember what I did with the spare stickers I didn't use... looks like I need at least one for the power button.

rps20180327_211827_733.jpg
I can't remember all the buttons I covered with stickers but I know for sure the drivers side temp and fan buttons are stickers.
 
OP
OP
Rocket Man

Rocket Man

Mark
Supporting Member
Joined
Dec 25, 2014
Posts
26,003
Reaction score
50,857
Location
Oregon
So here is a night time pic.

I wish I could remember what I did with the spare stickers I didn't use... looks like I need at least one for the power button.

View attachment 195644
I can't remember all the buttons I covered with stickers but I know for sure the drivers side temp and fan buttons are stickers.
Damn near perfect except that power button. My sets came with 4 or 5 extra power buttons. Anyway, no bleed through at all. Did you scrape everything off the buttons or just the centers?
 

kbuskill

***CAUTION*** I do my own stunts!
Joined
Mar 11, 2017
Posts
5,306
Reaction score
8,313
Location
NE. FL.
Damn near perfect except that power button. My sets came with 4 or 5 extra power buttons. Anyway, no bleed through at all. Did you scrape everything off the buttons or just the centers?

Actually, full disclosure, I had my wife clean, scrape, and apply the stickers while I installed the head unit.

I told her to just scrape the centers but she kinda buggered up the drivers side blower up button.... you can see a little green peaking through around the edge if you look closely.
 
Last edited:
OP
OP
Rocket Man

Rocket Man

Mark
Supporting Member
Joined
Dec 25, 2014
Posts
26,003
Reaction score
50,857
Location
Oregon
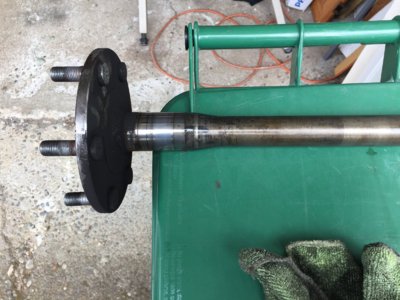
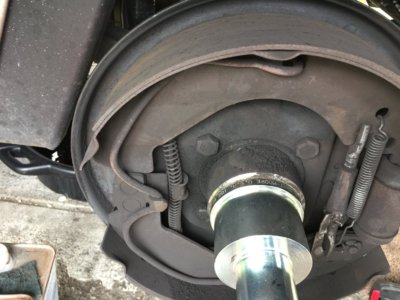
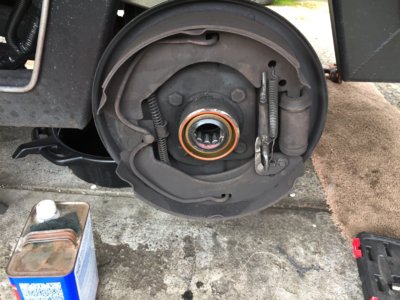
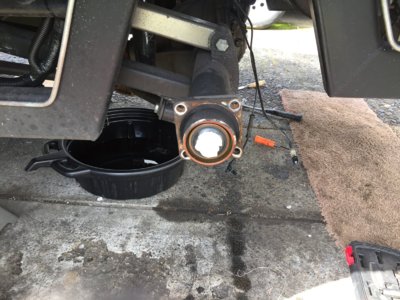
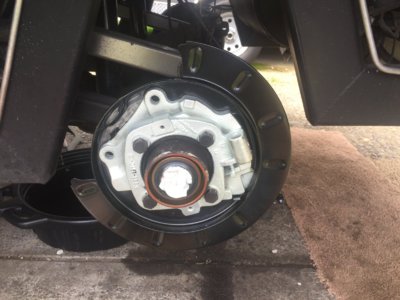
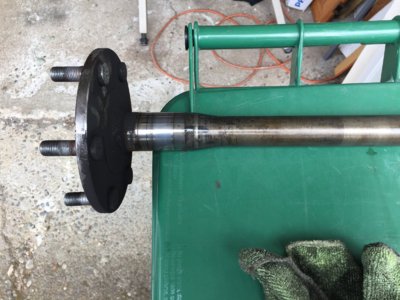
I got a whole bunch of loan-a-tools at O'reilly this morning and drained the diff and pulled the driver side axle. It looked pretty good and I slipped the ABS ring on it to see how it holds onto the axle and it's kind of weird. It isn't exactly super tight but it has a kind of black goo inside and when I slipped it on the axle when it was out of the rear end it left this stuff on the axle. I tried the old one first and it spun pretty easy and had what looked like silicone oozing out of the holes inside. Anyway, I replaced the ABS ring (and it's a good thing I bought the special tool or I would have had no way to set the depth correctly), then the bearing, then the seal. Then I removed the drum assembly and installed the disc brake backing plate and dust shield and went to reinstall the axle but I hadn't read the part about temporarily reinstalling the pin inside the diff that holds the axles in and didn't realize that pin also locates the spider gears so the 2 small ones fell out. I found the thrust washers and got them back in and reinstalled the pin temporarily. I was nervous because somebody tried to tell me I'd need spacers for the brakes but everything fits perfect. And even the brake lines will be easy; I won't have to cut the old ones and do a double flare because the connections are right at the center top of the diff and I'm just gonna get new shorter hard lines and bend them so they fit to the stainless hoses.

IMG_8117.JPG IMG_8119.JPG IMG_8120.JPG IMG_8121.JPG
 
OP
OP
Rocket Man

Rocket Man

Mark
Supporting Member
Joined
Dec 25, 2014
Posts
26,003
Reaction score
50,857
Location
Oregon
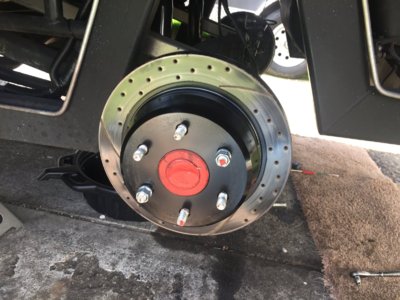
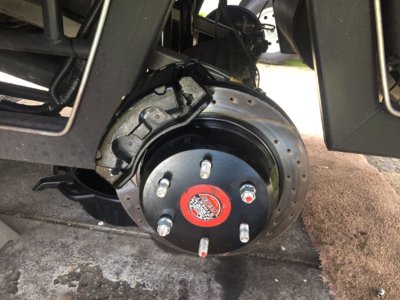
It's been so long since I've done drum brakes that I even forgot how so by the time I was done removing them I was thinking the disc brakes better work or I might never get the shit back together. Anyway I got the driver side done except the brake line and the passenger side should be easier since I'm just replacing the seal and doing the conversion. I think I'll wait until tomorrow to finish it.

IMG_8122.JPG IMG_8123.JPG IMG_8124.JPG
 

Tonyrodz

Resident Resident
Joined
Feb 16, 2012
Posts
31,572
Reaction score
46,993
Location
Central Jersey
It's been so long since I've done drum brakes that I even forgot how so by the time I was done removing them I was thinking the disc brakes better work or I might never get the shit back together. Anyway I got the driver side done except the brake line and the passenger side should be easier since I'm just replacing the seal and doing the conversion. I think I'll wait until tomorrow to finish it.

View attachment 195713 View attachment 195714 View attachment 195715
Def lucked out with the lines. Looks so much cleaner.
 
OP
OP
Rocket Man

Rocket Man

Mark
Supporting Member
Joined
Dec 25, 2014
Posts
26,003
Reaction score
50,857
Location
Oregon
Well I did not luck out with the ABS ring. I forgot I hadn't checked to see if it's still spinning freely and it is. I think there's something wrong with the axle, as in the machining where they turned it down to a smaller diameter starts too close to the outboard end. I've reached out to Mosier axles to see if there's a measurement from the end that I can check. The ABS ring is actually so loose that I can move it up and down a little and I used the correct tool to set the depth when I installed it so I'm pretty damn sure it's not the ABS ring. In fact the original was probably Ok too. I am kicking myself for not taking measurements on both axles while they were out but I'll take them both out tomorrow and compare. If one's different I'm gonna get them to ship me a new axle. This is upsetting to say the least. AAARRRGGGHHH!!!

IMG_8117.JPG
 

Onebad1983

Resident Country Dumbass
Joined
Mar 5, 2018
Posts
1,262
Reaction score
1,128
I couldn't get the rotors surfaced because they're drilled and slotted. They said the lathe would catch on all that. But I decided they will be ok for now. I was running them on The Beast without an issue for months. So I painted them at least with some caliper paint.

View attachment 195625
Looks good dude! keep up with the updates!
 

Forum statistics

Threads
132,210
Posts
1,864,065
Members
96,741
Latest member
Dgrigg05
Top