Some videos of the headlights/ grill lights. first one is the unlock/ lock colors. I don't even know how the strip behind the grill colormatches the switchback turns since I didn't program them to do that. The other 2 videos are just a couple colors and some good shots of the etching on the inside of the projectors. I wanted to leave the video recording while I changed the colors through the complete spectrum but the ap and the camera are on the same phone.
You are using an out of date browser. It may not display this or other websites correctly.
You should upgrade or use an alternative browser.
You should upgrade or use an alternative browser.
Rocket Man's 2008 Bagged CC Silverado Build AKA "THE MACHINE"
- Thread starter Rocket Man
- Start date
Disclaimer: Links on this page pointing to Amazon, eBay and other sites may include affiliate code. If you click them and make a purchase, we may earn a small commission.
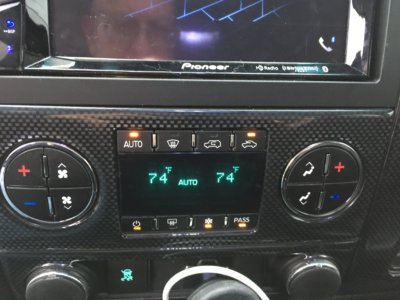
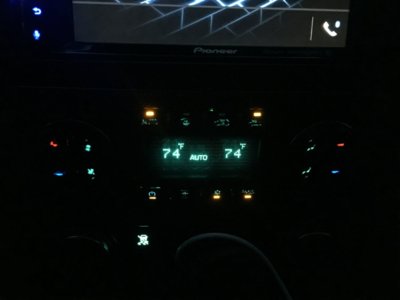
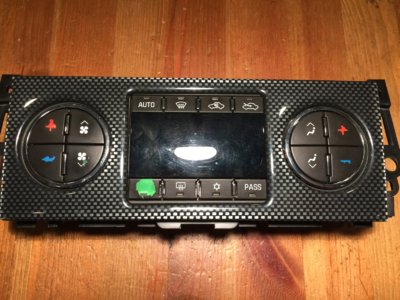
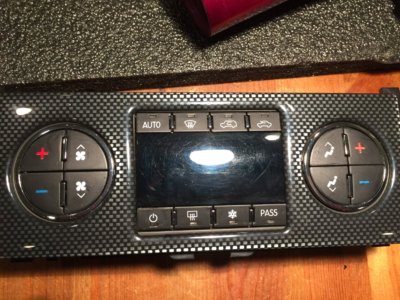
I also got the stickers for the HVAC controls and installed them. It looks pretty damn good during the day but at night it's not perfect. The backlighting for the symbols is not perfect like original, maybe because there's no way to line up the graphics perfectly. But it will do for now. If I find another control on Amazon warehouse deals for $85 I'll probably buy it and hopefully it will be the right one.


05Single
afraid of the dark
- Joined
- Feb 26, 2015
- Posts
- 8,186
- Reaction score
- 11,456
kbuskill
***CAUTION*** I do my own stunts!
I also got the stickers for the HVAC controls and installed them. It looks pretty damn good during the day but at night it's not perfect. The backlighting for the symbols is not perfect like original, maybe because there's no way to line up the graphics perfectly. But it will do for now. If I find another control on Amazon warehouse deals for $85 I'll probably buy it and hopefully it will be the right one.
View attachment 195562 View attachment 195563 View attachment 195566 View attachment 195567
I scrapped the original symbols off the buttons, with a razor blade, before applying the stickers to avoid interference with light transmission.
Well, I bought 2 sets of stickers so I might try that. The instructions said to use a sharpie to color them in if they're too worn off which I didn't do but I never thought about doing that. Any pics of yours?I scrapped the original symbols off the buttons, with a razor blade, before applying the stickers to avoid interference with light transmission.
Tonyrodz
Resident Resident
The light would still shine through. Even with a Sharpie.Well, I bought 2 sets of stickers so I might try that. The instructions said to use a sharpie to color them in if they're too worn off which I didn't do but I never thought about doing that. Any pics of yours?
kbuskill
***CAUTION*** I do my own stunts!
Well, I bought 2 sets of stickers so I might try that. The instructions said to use a sharpie to color them in if they're too worn off which I didn't do but I never thought about doing that. Any pics of yours?
I would have to wait till it's dark to get any night pics.
Tonyrodz
Resident Resident
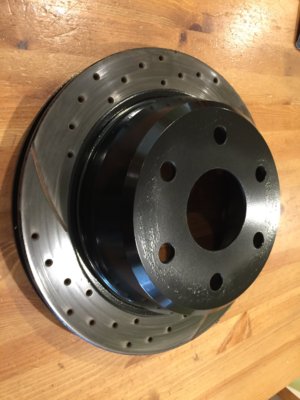
Maybe hit them with a DA sander?I couldn't get the rotors surfaced because they're drilled and slotted. They said the lathe would catch on all that. But I decided they will be ok for now. I was running them on The Beast without an issue for months. So I painted them at least with some caliper paint.
View attachment 195625
They're fine. If they have issues I can replace them later pretty easy. It's not like I have to pull the axles lol. I just want to get the ABS ring replaced and the brake conversion done; we have a few days of nice weather before the rain returns.Maybe hit them with a DA sander?
Similar threads
- Replies
- 38
- Views
- 2K
- Replies
- 2
- Views
- 110


