2003 Yukon SLT flex fuel 5.3L whats brand would you use? cam, oil pump, lifters, timing chain

Disclaimer: Links on this page pointing to Amazon, eBay and other sites may include affiliate code. If you click them and make a purchase, we may earn a small commission.

iamdub

Full Access Member
Joined
Apr 23, 2016
Posts
20,821
Reaction score
44,949
Location
Li'l Weezyana
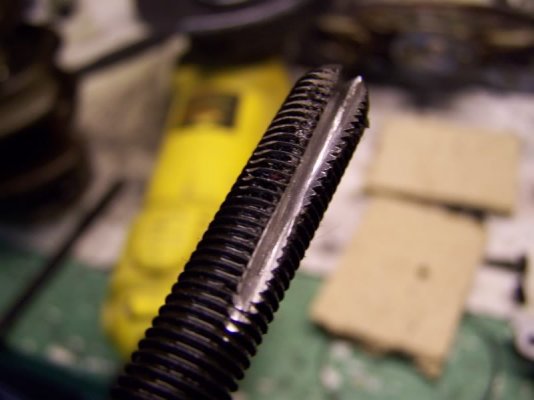
Have a grinder and cut-off disc? You can make more thread chasers than you'll ever need using the old bolts.

Use the cut-off disc to make a slot or two:
629427d1501400968-what-broke-picture-100_2827.jpg


Or, if you have a flap disc, you could just grind some simple flats into it:

F4RCPBYGB0JQOSI.LARGE.jpg


Or, if you don't have a grinder, use a hacksaw to make a couple thin slots (I'd invest even in a HF grinder before doing it this way):

Tip2.jpg


Have an air compressor? I like to use a blow gun with a 12" needle tip to blow out the threads starting from the bottom. Squirt a little brake cleaner in the hole, brush it with a thin nylon bottle brush, then blow it out. Wear side-shielded safety glasses!
 
OP
OP
S

Summajet

Full Access Member
Joined
Feb 7, 2019
Posts
176
Reaction score
68
I was able to get threads cleaned out. I got blocked cleaned. I set the main bearings in the crank underside and top caps on. Will check clearances this week on crank bearings. Then ring gaps and connecting rod bearings. It feels to be making progress. I am not rushing and taking my time to get it back together
 
OP
OP
S

Summajet

Full Access Member
Joined
Feb 7, 2019
Posts
176
Reaction score
68
Progress update,

note I was going to use a torque angle gauge dial. I was reading through the steps and my Wife asked what tools would make the rebuild easier. A friend of mine is a mechanic by trade. He hooked me up with a deal on two snap-on tech digital angle torque wrenches, 3/8" and a 1/2".

Crank bearing clearances within spec
rod bearing clearances within spec
piston Ring gaps within spec

installed camshaft FIRST
installed crank, main bearing caps
installed piston rings and ring gaps set apart
installed pistons,
installed connecting rod bearings/caps
installed camshaft thrust plate/cover
installed timing chain and camshaft sprocket
installed gm oil bypass galley tube

I used assembly lube for all the bearings, behind the thrust cover/plate and behind the camshaft sprocket face.
The ring pistons gap was easier to check using the feeler gauge. I kept my work area organized and cleaned. I also laid out all the top and 2nd rings onto a table with a drawn paper sketch of the block looking forward. I then assembled the oil ring, then top oil ring and bottom oil ring. Next the 2nd compression ring and then the top compression ring.

This weekend I am moving onto installing the
crankshaft position sensor.
oil pump (new gm orange o-ring) and prime oil pump
oil deflector tray
oil pickup tube
rear cover of block level (within spec per book)
front cover of block (level within spec per book)
install oil pan.

It can be overwhelming but taking your time and staying organized.

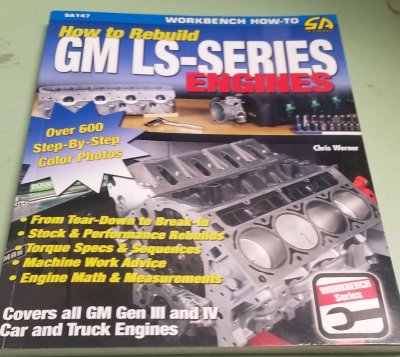
I am using the Haynes Manual and the how to rebuild GM LS-Engines by Chris Werner. The rebuild book has the steps, pictures and torque yields/angles required.

20191018_091016.jpg
 

iamdub

Full Access Member
Joined
Apr 23, 2016
Posts
20,821
Reaction score
44,949
Location
Li'l Weezyana
I'm thrifty, so I drew lines and dots on the TTY bolts. For the crank pulley, I torqued the bolt, then used a protractor to put a mark on the bolt head and at the proper degrees of additional rotation. I marked each bolt hole of the cylinder heads as well. Torqued the bolts to the initial lb-ft (or is it lb-ft?), marked the bolt heads where they lined up with the first mark on the edge of the bolt holes, then turned them until they lined up with the second mark.
 

HiHoeSilver

Away!
Joined
Feb 28, 2017
Posts
10,918
Reaction score
14,572
Location
Chicago
I'm thrifty, so I drew lines and dots on the TTY bolts. For the crank pulley, I torqued the bolt, then used a protractor to put a mark on the bolt head and at the proper degrees of additional rotation. I marked each bolt hole of the cylinder heads as well. Torqued the bolts to the initial lb-ft (or is it lb-ft?), marked the bolt heads where they lined up with the first mark on the edge of the bolt holes, then turned them until they lined up with the second mark.

"Thrifty" Lol.

1. Guy who clocks in, chows some eggs and bacon, figures out what to do all day, does it, clocks out, gets paid (I am NOT jealous :disgust:).

2. And the "Perfect Tagline" award goes to.....

3. Why don't you just clock in, throw some Nutria on the grill, Amazon a bit, clock out, buy an angle gauge, and save yourself all that thinking [and stealing your daughter's protractor (and having to remember to put it back)]?
 

iamdub

Full Access Member
Joined
Apr 23, 2016
Posts
20,821
Reaction score
44,949
Location
Li'l Weezyana
"Thrifty" Lol.

1. Guy who clocks in, chows some eggs and bacon, figures out what to do all day, does it, clocks out, gets paid (I am NOT jealous :disgust:).

2. And the "Perfect Tagline" award goes to.....

3. Why don't you just clock in, throw some Nutria on the grill, Amazon a bit, clock out, buy an angle gauge, and save yourself all that thinking [and stealing your daughter's protractor (and having to remember to put it back)]?

Hey, it's MY protractor! It's flexible and clear with some physical therapy clinic's logo on it, intended to measure a joint's range of motion. Pretty sure it was left here by my ex. (PTA) Anyway, it's very ideal for this purpose.

The angle gauge gets in the way cuz I put the heads on after I bolt the block in the bay. This way, I can easily get to the top four bellhousing bolts. Sometimes, there is a method to my madness.
 
OP
OP
S

Summajet

Full Access Member
Joined
Feb 7, 2019
Posts
176
Reaction score
68
Some headway made this weekend,
crankshaft position sensor
oil pump
oil deflector
oil pickup tube
front timing cover

I Hope to have time to work on it this week and get the rear cover, oil pan installed so at least the bottom end will be done.
 

iamdub

Full Access Member
Joined
Apr 23, 2016
Posts
20,821
Reaction score
44,949
Location
Li'l Weezyana

Lol
I meant that to ask "why". But I just looked it up and I think I see what you were referring to. It looks like the official GM name for that which is commonly known as a "windage tray" is "deflector". I thought you got the deflector for the AFM pressure release solenoid, which, of course, your Gen3 doesn't have.
 
Last edited:

Forum statistics

Threads
132,655
Posts
1,872,213
Members
97,457
Latest member
Ezzat
Top