You are using an out of date browser. It may not display this or other websites correctly.
You should upgrade or use an alternative browser.
You should upgrade or use an alternative browser.
2003 Yukon SLT flex fuel 5.3L whats brand would you use? cam, oil pump, lifters, timing chain
- Thread starter Summajet
- Start date
Disclaimer: Links on this page pointing to Amazon, eBay and other sites may include affiliate code. If you click them and make a purchase, we may earn a small commission.
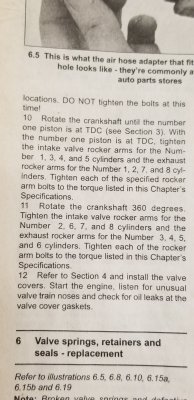
The image was from a Haynes Manual.
Today I found this on another forum. Post says per gm factory book,
22 ft. lbs
6. Rotate the crankshaft until the number one piston is at top dead center (TDC) of the compression stroke.In this position, cylinder number one rocker arms will be off lobe lift, and the crankshaft sprocket key will be at the 1:30 position.The engine firing order is 1, 8, 7, 2, 6, 5, 4, 3.Cylinders 1, 3, 5 and 7 are the left bank.Cylinder 2, 4, 6 and 8 are the right bank. Notice: Refer to Fastener Notice in Service Precautions.
7. With the engine in the number one firing position, tighten the following valve rocker arm bolts:
o Tighten the cylinders 1, 2, 7 and 8 exhaust valve rocker arm bolts to 30 Nm (22 ft. lbs.) .
o Tighten the cylinders 1, 3, 4 and 5 intake valve rocker arm bolts to 30 Nm (22 ft. lbs.) .
8. Rotate the crankshaft 360 degrees.
9. Tighten the following valve rocker arm bolts:
o Tighten the cylinders 3, 4, 5 and 6 exhaust valve rocker arm bolts to 30 Nm (22 ft. lbs.) .
o Tighten the cylinders 2, 6, 7 and 8 intake valve rocker arm bolts to 30 Nm (22 ft. lbs.) .
iamdub
Full Access Member
^^^ Pretty simple process. It's Zen-like.
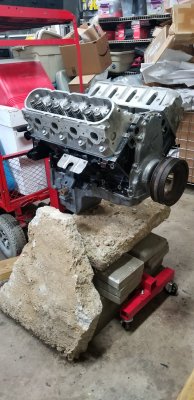
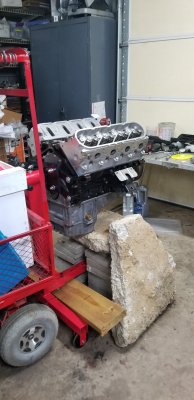
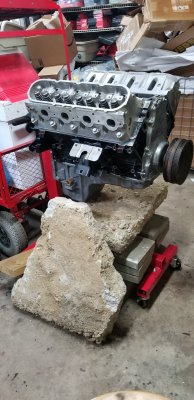
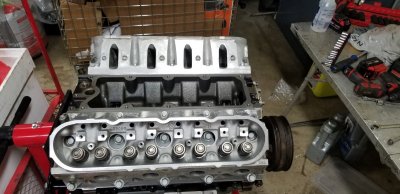
Was able to get the rocker arms and push rods installed. Valve covers on also.
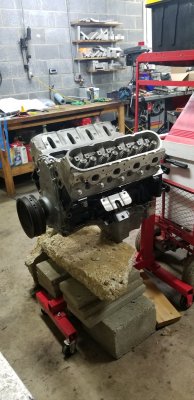
Has anyone put their water pump on motor and then install into the truck? I was thinking it is easier on the stand. I know I would have to raise motor and then turn sideways and lower down with a helper working the lift.
Has anyone put their water pump on motor and then install into the truck? I was thinking it is easier on the stand. I know I would have to raise motor and then turn sideways and lower down with a helper working the lift.
iamdub
Full Access Member
It's only 4 bolts and there's plenty of room in front of it once it's installed. You'll appreciate the extra space when dropping the motor into place with the water pump not installed.
iamdub
Full Access Member
That is what I was thinking. It will make it easier to get on top of the the motor and bolt up the transmission.
I don't know why I typed "4". It's six bolts. Anyway, same applies.
Speaking of bolting up the trans, I put the heads on after the block is in the bay so I can easily reach the top four bell housing bolts.
I hope the heads wont get in my way as their are installed on the engine stand. I am putting the intake on last after it is all bolted up. While the motor is on the stand I have removed/replaced the front drive axle seals as before now they leaked and slung grease everywhere. Got the front axle diff filled with grease. I am now in process of replacing the ac compressor, orifice tube, drier, and all the ac like seals i can get to. I did flush the lines with ac power flush in the can. I dod not notice any metal or discolored oil coming from outside the lines. Yes orifice tube was stuck in the line. Trick i found was use a left handed/stripped bit to remove the orifice tube. Prior to dissasembling the ac system it cooled fine. The ac compressor has noise in it and the shop said it was ok but it is easiest as it will get to replace it now. Mechanic said to use long extensions bars from about the exhaust near rear to access the bolts up front.
I know on my ford mountaineer ac seals were o-rings. The gm seals look like a cloth paper flat washer. I assume no oil or lubricant is used between the two hoses??
Thanks,
I know on my ford mountaineer ac seals were o-rings. The gm seals look like a cloth paper flat washer. I assume no oil or lubricant is used between the two hoses??
Thanks,
I got sometime to work on it yesterday. I drilled a used oil galley plug and attached a 1/4" connector to prime the motor through the oil galley.
I am trying to wrap/prep the motor bay for the motor. I'm going to prime motor on the engine stand. How long once it is primed on the motor stand should I have it installed and crank over in the truck?
I am trying to wrap/prep the motor bay for the motor. I'm going to prime motor on the engine stand. How long once it is primed on the motor stand should I have it installed and crank over in the truck?
Similar threads
- Replies
- 17
- Views
- 3K
- Replies
- 24
- Views
- 5K

