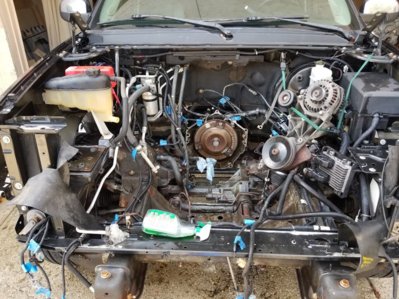
Nadthomas 2007 Yukon Denali 200k Mile Re-build

Disclaimer: Links on this page pointing to Amazon, eBay and other sites may include affiliate code. If you click them and make a purchase, we may earn a small commission.

OP
OP
nadthomas

nadthomas

Full Access Member
Joined
Dec 1, 2017
Posts
158
Reaction score
177
Slowly picking away at this thing. I still need to order all the parts to actually freshen up this motor, and get it put back together. I'm not sure if I have been legitimately too busy to get the order in, or if I just don't want to spend the $1600.

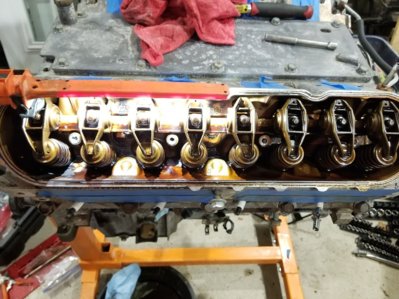
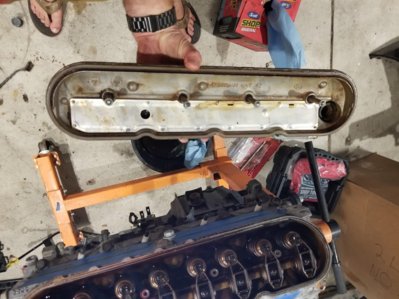
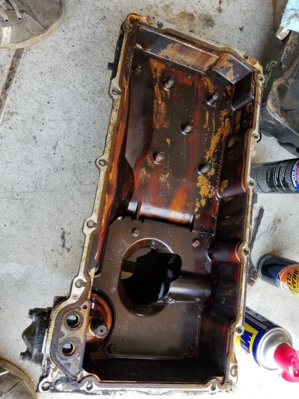
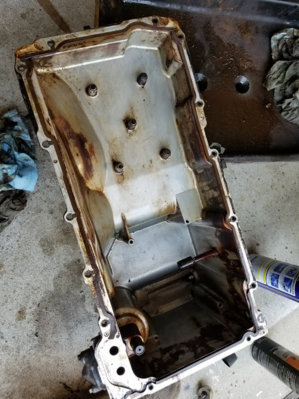
I did pull the valve covers, front cover, and oil pan this past weekend. The rocker arms and springs look good, tight, no sludge, or random needle bearings floating around. Just some staining from the previous owner using a synthetic blend. The timing chain and tensioner looked great. Zero slack in the chain, and the tensioners had no signs of wear. So, I'm going to leave all of that along with the camshaft alone, and just replace the oil pump, VVT Oil Control Valve(bolt looking thing), Magnetic Actuator, and Camshaft Position Sensor. The oil pan was a bit of a different store. There was a good 1/4" of dirt/sludge in the very bottom of it. I'm really surprised that not more it comes out when you drain the oil. I cleaned everything up with a wire brush and carb cleaner, and new gaskets will go on everything before I button it back up. I wasn't going for perfection, just cleaner.
20180725_220402.jpg
20180725_220416.jpg
20180805_155619.jpg
20180805_161502.jpg

I also rolled the front half out of the garage so I could clean all of the grease out of engine bay. I wiped down all of the wiring harness, and sprayed the frame rails and cross bracing with oven cleaner. I'm not sure if this was a great idea. The finish on these parts appears to be different. The oven cleaner made it very soft, to the point that I took it back to bare metal. So, now I'm working on taking it all back to bare metal, and spaying it with Eastwood textured black rust encapsulation paint. At least its clean now.

20180728_164824.jpg
 

kbuskill

***CAUTION*** I do my own stunts!
Joined
Mar 11, 2017
Posts
5,313
Reaction score
8,335
Location
NE. FL.
Slowly picking away at this thing. I still need to order all the parts to actually freshen up this motor, and get it put back together. I'm not sure if I have been legitimately too busy to get the order in, or if I just don't want to spend the $1600.

I did pull the valve covers, front cover, and oil pan this past weekend. The rocker arms and springs look good, tight, no sludge, or random needle bearings floating around. Just some staining from the previous owner using a synthetic blend. The timing chain and tensioner looked great. Zero slack in the chain, and the tensioners had no signs of wear. So, I'm going to leave all of that along with the camshaft alone, and just replace the oil pump, VVT Oil Control Valve(bolt looking thing), Magnetic Actuator, and Camshaft Position Sensor. The oil pan was a bit of a different store. There was a good 1/4" of dirt/sludge in the very bottom of it. I'm really surprised that not more it comes out when you drain the oil. I cleaned everything up with a wire brush and carb cleaner, and new gaskets will go on everything before I button it back up. I wasn't going for perfection, just cleaner.
View attachment 205003
View attachment 205004
View attachment 205005
View attachment 205006

I also rolled the front half out of the garage so I could clean all of the grease out of engine bay. I wiped down all of the wiring harness, and sprayed the frame rails and cross bracing with oven cleaner. I'm not sure if this was a great idea. The finish on these parts appears to be different. The oven cleaner made it very soft, to the point that I took it back to bare metal. So, now I'm working on taking it all back to bare metal, and spaying it with Eastwood textured black rust encapsulation paint. At least its clean now.

View attachment 205007

I would replace the oil pressure relief valve in the oil pan while it's off...

https://www.gmpartsdirect.com/oem-parts/gm-relief-valve-12608835

https://www.amazon.com/12608835-VALVE-OIL-PRESS-RLF/dp/B015NE7VWW

Also install the shield if it doesn't already have one on it.

Cheap insurance so you don't have to possibly drop the pan later.
 
OP
OP
nadthomas

nadthomas

Full Access Member
Joined
Dec 1, 2017
Posts
158
Reaction score
177
Almost forgot. I also started tackling the broken exhaust manifold bolts. The one that didn't break flush with the head spun right out using some vise grips. So, I moved on to one of the bolts that broke flush. I have seen a couple of Youtube videos with people successfully stacking welds to make a stub, and then spinning them out. So I broke out my cheap Harbor Freight flux core welder. I attempted 5 times with no success. I'm not getting a good/large enough weld to bond to the remaining stud. Not sure if using flux core is the problem, lack of power from my welder, or total lack of experience are to blame.

Also, a tank top, nylon running shorts, and flip flops are not proper safety gear when welding. :rofl:
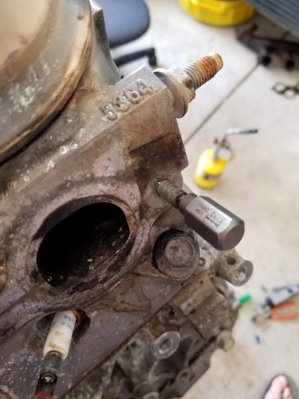
I'm going to give it a couple of more attempts, but I also have a set of bolt extractors on the way form Amazon. Since these bolts are not ceased in there, and spin out pretty easy I expect the extractor should work well. Since I already had a welder I wanted to try that first.
 
OP
OP
nadthomas

nadthomas

Full Access Member
Joined
Dec 1, 2017
Posts
158
Reaction score
177
I would replace the oil pressure relief valve in the oil pan while it's off...

https://www.gmpartsdirect.com/oem-parts/gm-relief-valve-12608835

https://www.amazon.com/12608835-VALVE-OIL-PRESS-RLF/dp/B015NE7VWW

Also install the shield if it doesn't already have one on it.

Cheap insurance so you don't have to possibly drop the pan later.

Thanks. That is cheap enough, I will add it to my parts list.

I also stumbled across the Sac City Corvette oil bypass valve "barbell" that is behind the rear cover, that I plan to purchase as well.
 

iamdub

Full Access Member
Joined
Apr 23, 2016
Posts
20,821
Reaction score
44,950
Location
Li'l Weezyana
...flip flops are not proper safety gear when welding. :rofl:
Da hell you say?! You can see my fabrication/welding attire in this pic. Safety third!

f3d78b71-40a1-4a10-bb22-45ba17cf3951_zpsa9ecfopu-jpg.177392
 
OP
OP
nadthomas

nadthomas

Full Access Member
Joined
Dec 1, 2017
Posts
158
Reaction score
177
I got the exhaust manifold bolts out today. Important note, if you attempt to do the stacked weld method first, it will slightly harden the stud making it much harder drill out later. So, unless you are confident that you can get a solid weld, I would jump straight to an extractor.

I have always hated drilling metal, as I had always burnt up and broken drill bits. I tend to try to solve problems with MOAR POWER. This simply does not work when drilling metal. After wasting 2 hours and several drill bits on the stud that I attempted to weld first, I did more research of drilling metal, and I moved onto another stud. This time forcing myself to keep the drill bit slow. I also regularly stopped to drip my drill bit in clean motor oil to keep it cool and lubricated. To my sheepish surprise it actually works. Its a little slow going, but within 10ish minutes I had a stepped up through a couple of drill bits to get a 5/32" hole deep enough for the the bolt extractor. I'm pretty sure the bolt extractor was starting to slip on the first one, so I stopped and lightly heated the area with a MAPP torch and then spun the stud out without problems. The remaining two did not require heating to spin them out with the extractor.

Now back to the one that I originally attempted to weld, and then drill. At first, I applied about the same amount of moderate-light pressure and drill bit speed as I did the others. After a couple of minutes still no progress, so I applied more pressure and slowed the drill way down. Looking at a speck of paint on my drills chuck, I would say it was a little less then one revolution per second. FINALLY the drill bit started to cut! So, when the say drill slow in metal they mean it! Also, at no time did my drill bit get hot, several times through all of this I touched the drill bit to see how warm it was, and I would say it was just barely warmer then ambient temp. If its uncomfortably hot to the touch, you are going too fast and not using enough oil.

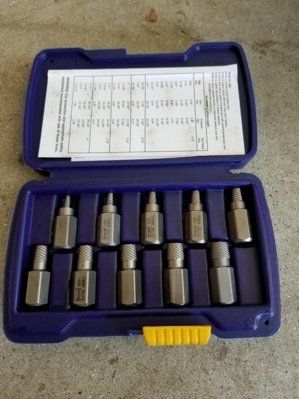
I used the 5/32 extractor in my set, as it was a step up from the 1/8" in my set and therefore stronger, but also gave me decent wiggle room if I was a little off center when I started drilling. If needed I think I could have went the next size up, but I would have needed my hole to be pretty dead nuts on to not damage the threads. The extractor set I used was the Irwin 53226 which was $27 of Amazon. The drill bits I believe were Milwaukee 7/64", 1/8", 5/32", they ran about $3 each and were the kind that said "Last 10x longer", forget what the actual metal content they were. BTW once I slowed the drill down, I was able to use the same drill bit(s) to do all 3 studs.

20180812_125611.jpg 20180812_125722.jpg
 
Last edited:

Rocket Man

Mark
Supporting Member
Joined
Dec 25, 2014
Posts
26,006
Reaction score
50,869
Location
Oregon
The ARP studs for the exhaust manifold bolts aren't too expensive (like their studs are) and work just as well. I never want to have a bolt break off in there again so for me it was worth it. You will never break an ARP bolt. Nice progress!
 
Top